
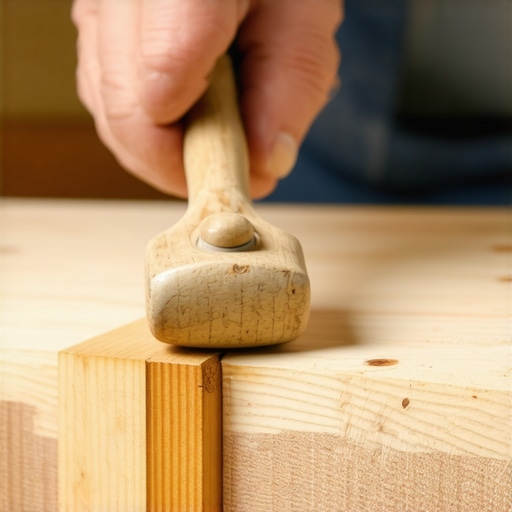
Have you ever spent hours installing or repairing hardwood floors, only to realize later that those tiny gaps and uneven seams have ruined the entire look? I certainly have. There was a frustrating moment during my early flooring projects when I used a standard hammer—loud, heavy, and unforgiving—and as a result, I ended up with chipped edges and misaligned planks. It was only after some research and a few ruined boards that I discovered the true importance of using a soft mallet on tongue-and-groove flooring.
The Hidden Power of a Soft Mallet in Flooring Work
Today, I want to share with you why this simple tool became my secret weapon—and why I believe it should become yours too. Using a soft mallet not only protects your precious materials but also ensures a seamless fit and professional finish. In this post, we’ll explore the vital reasons for making this small change in your toolkit, and I’ll guide you through the benefits and best practices. If you’ve ever worried about damaging your flooring or struggled with uneven seams, you’re in the right place. Together, we’ll troubleshoot common pitfalls and elevate your craftsmanship.
Is It Really Worth the Extra Step to Use a Soft Mallet?
Early in my projects, I fell into the trap of thinking that any hammer would do—after all, it’s quicker, right? Wrong. I learned the hard way that a standard hammer’s brutality can cause chips, cracks, and even loosened boards. According to flooring experts, inadequate tools lead to costly mistakes and compromised durability. A soft mallet, with its gentle impact, minimizes the risk of damage while allowing for precise adjustments. Trust me, the peace of mind alone is worth it. If you’re curious about selecting the right tools for your flooring projects, check out tile and flooring selection tips for expert advice.
So, are you ready to ditch the heavy hammers and embrace a smarter, safer way to install tongue-and-groove flooring? Let’s dive into the practical reasons why the soft mallet is a game-changer.
Preparing Your Workspace for Success
Before you start laying down your hardwood or tile, clear the area of furniture, debris, and any obstructions. Use a broom or vacuum to eliminate dust and small particles that could interfere with leveling or adhesion. It’s vital to have a clean environment to achieve perfect seams and avoid uneven surfaces. Incorporate a moisture meter to check subfloor conditions; any excess moisture can cause warping or gaps later. Remember, a dry, clean space sets the foundation for smooth installation. Consider protective coverings for nearby walls and surfaces to shield against accidental scratches or spills.
Achieving a Level Surface with Precision
Start with thorough subfloor assessment
Use a long straightedge or a laser level to identify dips or high spots. Pay close attention to corners and transition areas. For instance, I once found a subtle 1/8-inch dip in a hallway that, if unaddressed, would distort the entire flooring line. Fill these low spots with a quality leveling compound, mixing it to peanut butter consistency—thick enough not to run but fluid enough to self-level. Apply with a trowel, using a rake to spread evenly, and work from the highest to the lowest points for consistency. For better results, follow this detailed guide to floor leveling.
Use a raking tool for smooth application
Spread the leveling compound in the direction of your future floor run to mimic the natural grain or pattern flow. After application, use a long trowel or a self-leveling spike roller to eliminate air pockets and ensure an even surface. I recall one project where I applied a slightly uneven pour; using a rake and roller together corrected the low spots, resulting in a perfectly flat surface that saved hours of troubleshooting later. Let the compound cure as per manufacturer instructions before proceeding to the next step.
Guiding Your Materials into Perfect Alignment
When installing tongue-and-groove flooring, use a soft mallet to gently tap the boards into place—never a standard hammer, which risks damaging edges. Think of it like aligning puzzle pieces; a light tap ensures snug fit without chips or cracks. Place a wood block or tapping block against the board edge, and tap softly to close gaps. I once mistakenly used a metal hammer, resulting in small chips that required patching. Over time, I learned that using a soft mallet preserves material integrity and results in seamless seams. For optimal results, check the fit frequently and adjust accordingly, ensuring each row is perfectly aligned before proceeding.
Securing and Finishing the Floor
Once the boards are aligned, secure them with nails or adhesive, depending on your project type. Use a pneumatic nailer with correct gauge nails to prevent splitting. For glued-down floors, apply the adhesive with a notched trowel, following the manufacturer’s guidelines for coverage. After installing each section, walk the surface carefully to press the material into adhesion, preventing voids or bubbles. When grouting or sealing, use a damp sponge to wipe excess material, and consider masking tape along edges to achieve clean lines. For detail-oriented tips on grout finishing, review this handy masking tape technique.
troubleshooting Common Challenges
Uneven seams and gaps often stem from improper subfloor prep or misaligned boards. Use a level to spot deviations early, and don’t hesitate to re-level areas before proceeding. For tricky transitions or odd angles, adjusting your tools—like switching to a softer mallet or adjusting the tap force—can make a difference. If boards start to loosen or gaps appear, revisit the installation process, ensuring your materials and working conditions are optimal. Consistent checking and patience during each step turn a complex task into a manageable one, leading to a professional finish that lasts.Many DIY enthusiasts and even seasoned contractors often believe they understand the essentials of tile, hardwood floors, and leveling, but there are several prevalent misconceptions that can undermine the quality of a project. One widespread myth is that evenly spaced grout lines or perfectly aligned planks alone guarantee a professional look. In reality, the hidden nuances involve meticulous preparation, understanding material interactions, and mastering advanced techniques like precise subfloor assessment. For example, relying solely on surface-level leveling without checking for moisture content could result in future buckling or gaps, as detailed in expert guides on installation pitfalls.
Another misconception is that using the most expensive materials or fastest-curing compounds compensates for poor technique. Even top-tier products can’t hide structural issues or miscalculations during subfloor prep. A common mistake is neglecting the subtle effects of ambient humidity and temperature changes, which can cause hardwood to expand or contract beyond expectations. Industry specialists emphasize that understanding the environmental interplay is crucial—see design adaptations for more insights.
Further, many assume that a quick fix, like applying an extra layer of leveling compound, will solve underlying slope issues. However, this masks deeper problems such as poor subfloor framing or inconsistent slab thickness. These issues become especially problematic when installing large-format tiles or complex hardwood patterns, where precision is paramount. Advanced practitioners often use laser-guided assessment tools to detect these imperfections before installation—check out comprehensive leveling strategies.
So, what about those craft choices that seem minor but have major consequences? For instance, many overlook the importance of acclimating materials to their environment, which can lead to unpredictable movement post-installation. Experts advise that proper acclimation extends beyond a few days—often, it requires weeks and specific conditions tailored to the material type, as discussed in mastering acclimation techniques.
Furthermore, advanced installers pay attention to the subtle interactions between adhesives, subfloor types, and climate zones. An oversight here might cause adhesive failure or warping, especially in basements or humid climates. For a deeper dive into environmental considerations, see environmentally aware installation.
Remember, surpassing beginner expectations isn’t just about tools or materials; it’s about mastering these nuanced aspects through continuous learning and adaptation. Have you ever fallen into this trap? Let me know in the comments.
Maintaining Your Flooring Tools for Long-Term Results
Investing in quality tools is just the first step; maintaining them over time is crucial to ensure they perform reliably on every project. Regular cleaning of your concrete trowel and self-leveling tools prevents buildup that can compromise leveling accuracy. I recommend wiping tools with a damp cloth immediately after use, especially when working with epoxy or cement-based compounds, to avoid hardened residue that hampers future application. Additionally, inspecting for signs of wear, like dull blades or cracked handles, allows you to replace parts before failure occurs, saving both time and money.
Essential Equipment That Keeps Projects Running Smoothly
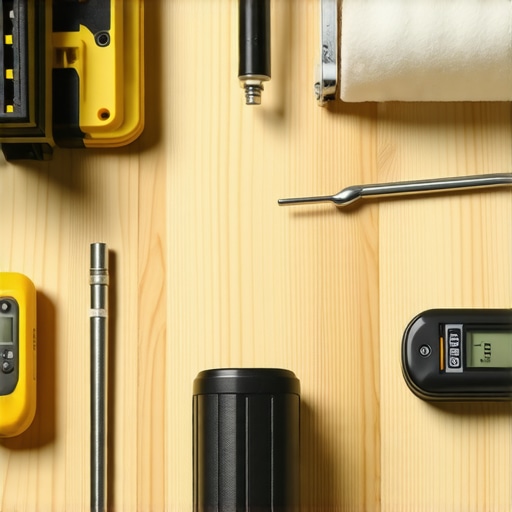
Among my must-have tools is a laser level—precise and easy to set up, it’s indispensable for evaluating floor unevenness. When it comes to floor leveling, a quality spike roller can significantly enhance self-leveling compound adhesion by eliminating air pockets. I also swear by a professional-grade tapping block and mallet for installing tongue-and-groove flooring, as they minimize damage to the delicate edges. For measuring moisture content in substrates, a digital moisture meter helps predict potential future issues like warping or gaps, ensuring your work stands the test of time.
What’s the Future of Flooring Technology? Predictions as We Improve
Looking ahead, I believe flooring installation will integrate more digital tools and smart assessment devices. The rise of IoT sensors embedded in subfloors could offer real-time feedback on moisture levels and stability, alerting you to issues before they escalate. Augmented reality apps may help visualize leveling adjustments or tile patterns, reducing errors and rework. Staying current with these innovations, like advanced moisture analysis techniques outlined here, can give you a competitive edge and ensure your installations are both flawless and durable.
How Do I Maintain Flooring Tools Over Time?
Proper maintenance involves cleaning, inspecting, and calibrated storage. After each project, wash tools thoroughly to remove debris and dry them to prevent rust, especially if you work with metal components. Store tools in a dedicated space, ideally in a toolbox with compartments that prevent damage. Regularly check for wear—replace worn pads on your self-leveling pour or worn edges on your trowels—to keep them performing accurately. Consider lubricating moving parts like handles or hinges with a light oil periodically to keep everything operating smoothly. Adopting these habits will extend the lifespan of your equipment, ensuring consistent results on every job.
To improve your installation skills, try incorporating a high-quality spike roller into your next project—this simple upgrade can make a significant difference in leveling precision and ultimately the longevity of your flooring. For more tips on perfecting your flooring process, visit this guide on floor transformations.
The Most Surprising Thing I Learned About Floor Leveling
Early in my flooring journey, I believed that a quick pour of leveling compound was all I needed—until I faced uneven seams and waviness that ruined the final look. The lightbulb moment came when I realized that meticulous subfloor assessment and environmental prep are as crucial as the leveling itself. Now, I routinely invest extra time measuring moisture content and repairing low spots, which saves me from headaches and costly fixes later.
Tools That Elevated My Flooring Game
Over the years, I’ve discovered that investing in quality tools, like a high-precision laser level and a sturdy spike roller, makes all the difference. These tools help me achieve a professional finish with less frustration. I trust this comprehensive guide to floor leveling for expert tips that complement my toolkit. Proper maintenance of these tools ensures consistent results, turning challenging projects into straightforward tasks.
The Emotional Power of Sharing My Flooring Story
Looking back, I realize that my most valuable lessons came from mistakes—like using a metal hammer on delicate tongue-and-groove boards or rushing subfloor prep. These experiences taught me patience, attention to detail, and the importance of continuous learning. If you’re feeling overwhelmed, remember that every project is an opportunity to improve. Embrace the learning process, and soon you’ll be upgrading your space with confidence and skill.
My Secret Weapon for Perfect Floors
One piece of advice I wish I had earlier is to never underestimate the power of a spike roller combined with proper environmental controls. This combo ensures your self-leveling compound flows flawlessly, creating a foundation that stands the test of time. For further insights, explore this step-by-step guide to leveling success. Remember, the key to flawless floors is patience, preparation, and quality tools—plus a willingness to learn from every step along the way. What’s been your biggest flooring challenge so far? Drop your story below—I’d love to hear it.