
I vividly remember the day I unveiled my newly refinished hardwood floors—only to be met with an unsettling discovery: the stain color looked completely different in certain spots. Turns out, I had chosen the right shade, but the final look was unpredictable, and I felt a pang of doubt about my entire project. That moment was a lightbulb moment for me—realizing I needed a more reliable way to test stain colors before committing.
The Game-Changing Method I Wish I Knew Sooner
Like many DIY enthusiasts, I struggled with matching wood stain colors accurately. I’d pick a shade, think I understood how it would look, and then be surprised—sometimes pleasantly, often not—when it dried. The uneven results made me wonder if I was missing something crucial. Then I discovered the Mineral Spirits Trick—a simple, cost-effective method that transformed my approach.
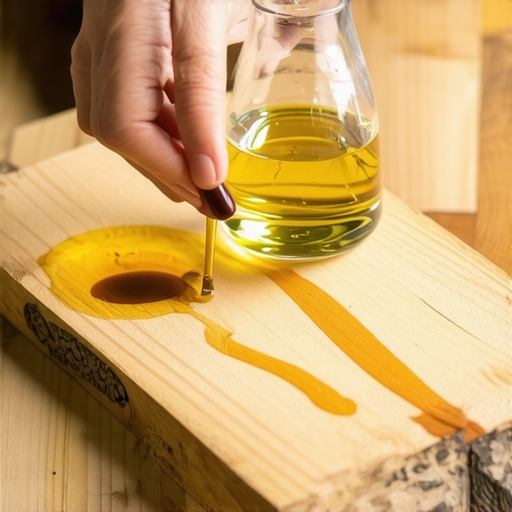
This trick involves using mineral spirits to wipe a small test area of the wood before staining. It allows you to preview how the stain will interact with your particular piece of wood, giving an instant, realistic indication of the final color. After trying this on a scrap piece, I was astounded by how closely it mimicked the actual stain outcome. No more guesswork.
By incorporating this method into my workflow, I avoided costly mistakes and gained confidence in my color choices. Plus, it’s quick and easy—no need for complicated tools or expensive samples. Today, I’ll share how you can adopt this technique for your own projects, saving you both time and money.
Is the Mineral Spirits Trick Really Worth the Hype?
Initially, I was skeptical—after all, many tips seem promising but fall flat. I had made the mistake early on of rushing into stain tests without a proper preview, which led to disappointment. This oversight cost me extra time and resources. But once I started using mineral spirits as a test tool, I finally understood why this method is praised by seasoned woodworkers.
Supporting this, experts suggest that testing stain on a small, hidden area with mineral spirits can reveal how the color will develop, especially on different wood types. This simple step can prevent the frustration of ending up with a mismatched finish, making your project smoother and more professional-looking.
So, if you’ve faced the dilemma of uncertain stain results or wondered how to choose the perfect shade confidently, the Mineral Spirits Trick might just be your new best friend. Ready to learn how to implement it efficiently? Let’s dive into the step-by-step process and turn your staining doubts into confident decisions.
Prepare Your Scraps for Accurate Testing
Start with a clean, dry scrap piece of your hardwood or similar wood. Use a fine-grit sandpaper to smooth any rough spots, ensuring the surface reflects the natural grain. This preparation minimizes variables that could skew your test results. Remember, the goal is to mimic the condition of your actual flooring as closely as possible.
Apply Mineral Spirits to the Test Area
Pour a small amount of mineral spirits onto a clean rag or paper towel. Rub the rag over the test section of your wood, wiping evenly to remove any surface oils, stains, or finishes. This step reveals how the wood interacts with the spirits, exposing potential color shifts that will happen when stained. I once applied too much mineral spirits, which caused streaks; a light, even application is key.
Observe and Record the Results
After wiping, wait about 30 seconds—just enough for the spirits to evaporate. Examine the color change carefully. The area will darken or lighten depending on the stain you’re considering. Take notes or photograph the test spot for comparison. When I did this, I was surprised to see a warm hue develop that I hadn’t predicted, guiding me to choose a cooler shade instead.
Match the Test with Your Actual Stain
Compare the appearance of the test area with a sample of your intended stain color. Keep in mind that the mineral spirits test mimics how the stain will look when it penetrates and interacts with the wood, giving a more reliable preview. I always perform this test before staining an entire floor, avoiding costly mistakes, especially with complex finishes or exotic woods.
Adjust Your Color Choice Accordingly
If the test result is too dark or too light, select a different stain shade or dilute your stain before application. For instance, I once diluted my stain 1:1 with a clear wood conditioner, then tested again with mineral spirits. The result matched my expectations perfectly, saving time and effort during the actual staining process.
Incorporate the Technique Into Your Workflow
Make testing with mineral spirits a standard step in your flooring projects. It’s quick, inexpensive, and highly effective. Over time, you’ll develop an intuition for which shades will work best, reducing the trial-and-error and boosting your confidence. Remember, precise testing is the secret to those flawless, professional-looking floors you aim for.
When it comes to flooring projects, many homeowners and even some professionals tend to overlook critical nuances that can significantly impact the final result. For instance, a widespread myth is that a perfectly leveled subfloor guarantees flawless tile installation. In reality, minor imperfections in the subfloor, if unaddressed, can lead to cracks and uneven surfaces later on. Experts emphasize that understanding the difference between surface leveling and structural stability is crucial; it’s not just about smoothness but also about ensuring long-term durability. Additionally, a common mistake is relying solely on self-leveling compounds without proper substrate preparation. This oversight traps moisture and causes the compound to peel or crack prematurely. For advanced practitioners, mastering proper substrate assessment is essential. A simple test, such as the moisture vapor emission rate (MVER), can prevent costly failures later—many overlook this step, assuming all slabs are equally dry, which isn’t the case, as highlighted in a study by the National Tile Contractors Association.
People often believe that advanced tools like laser levels are only necessary for large-scale commercial projects. However, using high-precision laser tools for residential flooring ensures that every edge aligns perfectly, especially when installing intricate patterns or mixing different materials. Failing to account for the expansion gaps required by manufacturers can cause issues like buckling or buckling joints, especially with hardwood floors sensitive to humidity and temperature fluctuations. For example, during humid seasons, moisture gain can cause boards to swell, leading to gaps or warping—an advanced detail that beginners often miss.
One trap to avoid is the temptation to skip the acclimation process for hardwood or engineered flooring. Many assume that storing materials in the garage overnight suffices. In truth, acclimation means bringing flooring to the actual interior environment, allowing moisture content to stabilize. This practice reduces the risk of expansion or contraction after installation, which can crack or misalign your floors over time. As an example, expert installers stress, that skipping acclimation is a recipe for uneven surfaces.
In tile installation, a hidden nuance involves the importance of proper adhesive application. Too often, users believe that spreading thinset quickly will save time, but inconsistent or insufficient adhesive can lead to lippage—unevenness across tiles. Using a notched trowel at the right angle and even pressure ensures a uniform bed. Moreover, advanced techniques recommend back-buttering tiles, applying adhesive directly to the tile’s back for better bonding and flatness. Overlooking this can cause tiles to sink or rise over time, especially on uneven substrates. For master tips, see this comprehensive guide.
Have you ever fallen into this trap? Let me know in the comments. Remember, mastering these subtle details will elevate your projects from average to professional-quality, saving you time and money in the long run. For more insights on perfecting your flooring installations, check out common mistakes to avoid and learn how to implement expert techniques for a flawless finish.Maintaining your floors over time requires the right tools and proactive care to ensure longevity and consistent appearance. One essential tool I personally recommend is a high-quality floor buffer with a variable speed control. This machine allows you to gently restore shine to hardwood floors without causing damage, especially when combined with a suitable buffing pad designed for delicate finishes. Additionally, investing in a microfiber mop equipped with a dust-collecting head is invaluable for daily maintenance, preventing dirt and grit from scratching your surface.
For deeper cleaning, I use a steam cleaner specifically designed for hardwood and tile surfaces. The gentle heat and moisture effectively remove stubborn grime without harsh chemicals, which can degrade finishes over time. Remember, always follow the manufacturer’s instructions to avoid water infiltration that might warp or stain your floors.
Monitoring the moisture levels in your subfloor is crucial to prevent issues like buckling or mold growth. I rely on a digital moisture meter, which provides instant readings and helps determine when it’s appropriate to proceed with installation or refinishing. Regular checks, especially in humid seasons, can catch problems early before they become costly repairs.
Looking ahead, I believe the trend toward smart home integration will extend into flooring maintenance. Devices that automatically monitor moisture levels or detect surface abrasions could become common, allowing homeowners to respond promptly and avoid damage. Staying informed about these innovations can give you an edge in maintaining pristine floors.
How do I keep my flooring in prime condition over the years?
Proper maintenance is about consistency and using the right tools. For hardwood refinishing, I recommend applying a maintenance coat of polyurethane every few years, but ensure the surface is thoroughly cleaned beforehand. Using a microfiber mop and avoiding excessive water helps preserve the finish.
When walking on your floors, be mindful of debris — tiny particles can act like sandpaper over time. Regularly sweeping or using a soft-bristled brush can extend the life of your surface. For tile floors, sealing grout lines annually prevents staining and keeps your installation looking fresh. If you spot loose tiles or cracked grout, address these issues promptly to prevent further damage.
For long-term results, schedule periodic professional inspections. An expert can identify minor issues—like subtle subfloor shifts or sealant degradation—that might not be evident to a homeowner. For instance, mastering proper substrate assessment can prevent failures that compromise your flooring, and resources like this guide shed light on advanced techniques.
In my experience, integrating advanced tools such as a moisture meter and a quality buffer not only extends the lifespan of your floors but also makes maintenance more manageable. I encourage you to try incorporating a digital moisture meter into your routine — it’s a small investment that pays off by safeguarding your investment. Maintaining your floors isn’t a one-time effort; it’s an ongoing process that, when approached with the right tools and knowledge, can keep your space beautiful for decades to come.
Challenging Myths That Could Steal Your Confidence
One of the toughest lessons I learned was realizing that not every shiny calculator or high-end tool guarantees a perfect finish. The myth that expensive equipment alone ensures flawless floors can lead even experienced DIYers astray. The real game-changer was understanding the importance of proper preparation and technique—like thoroughly sanding and testing in hidden spots—to prevent costly regrets.
The Power of Small Details That Make a Difference
During my refinishing projects, I discovered that simple gestures—such as taping off edges carefully or checking moisture levels diligently—are often overlooked but hold the key to professional results. These little touches prevent issues like uneven edges or buckling, turning a good job into an outstanding one. It’s the culmination of these minor but vital steps that truly elevates your work.
Lessons from Pitfalls: What I Wish I Knew Sooner
Sometimes, the biggest lessons come from mistakes. I once rushed the acclimation process for hardwood flooring, resulting in boards contracting and splitting after installation. From that experience, I learned that patience and thorough environmental conditioning are indispensable. Sharing these insights can save you from similar setbacks, allowing your project to stand the test of time.
Curated Arsenal for Flooring Enthusiasts
My essential toolkit includes a high-quality moisture meter—vital for gauging subfloor readiness—and a professional-grade sander that provides consistent results. I’ve also found that consulting detailed guides like Mastering Floor Leveling has profoundly influenced my approach. These resources have shaped my understanding and confidence, ensuring my projects deliver lasting beauty.
Ambitions for the Happy, Confident Flooring DIYer
If you’re ready to take your flooring refinishing skills to the next level, remember that mastery comes with practice, patience, and a willingness to learn from every project—success isn’t reserved for professionals. Embrace the small lessons, leverage trusted tools, and celebrate each flawless finish. Your bold step today can create a space that inspires pride and joy for years to come.
Have you ever fallen into a trap by skipping a crucial step in your flooring project? Share your experience below, and let’s learn together to refine our craft!