I remember the first time I installed hardwood floors in my living room. Everything was going smoothly until I noticed uneven planks and creaky spots just a few months later. That frustrating experience was a lightbulb moment for me—if I wanted lasting beauty, I needed to master proper installation techniques from the start. Since then, I’ve learned that the secret to durable, stunning hardwood floors isn’t just in choosing quality materials, but in following precise installation tips that stand the test of time.
Why Proper Flooring Installation Matters More Than Ever in 2025
With the growing popularity of hardwood floors, homeowners and DIY enthusiasts are eager to upgrade their spaces. But rushing the installation process or ignoring key steps can lead to costly repairs down the road. According to industry experts, poorly installed floors are among the top reasons for early damage and wear. This makes it crucial to understand the best practices for installation, especially as new materials and techniques emerge in 2025. Whether you’re hiring a professional or tackling the project yourself, knowing these tips can save you time, money, and stress.
Have you ever faced issues like buckling, gaps, or squeaks after installing hardwood flooring? If so, you’re not alone. Many homeowners discover these problems because of overlooked installation details. I made the mistake of skipping proper subfloor preparation early on, which caused uneven surfaces and premature damage. Learning from that mistake, I now prioritize meticulous surface leveling and moisture control. Want to avoid these pitfalls? Stick around as we explore the top strategies for lasting hardwood floors, backed by expert insights and real-world experience.
To build a solid foundation for your floors, it’s essential to start with a thorough understanding of the installation process. From selecting the right underlayment to precise leveling techniques, each step plays a vital role in achieving a flawless finish that endures. Ready to dive into the practical tips that will help you install your hardwood floors with confidence and ensure they stay beautiful for years to come? Let’s get started.
Start with a Thorough Subfloor Preparation
My first attempt at installing hardwood floors failed because I overlooked the subfloor’s condition. The surface was uneven and had moisture issues, which led to squeaks and gaps later. To avoid this, I used a laser level to identify low spots and filled them with a leveling compound. Ensuring the subfloor is perfectly flat and dry is like laying a solid foundation for a house—without it, everything above is unstable. Before moving forward, check moisture levels to prevent future warping. For detailed guidance, review the comprehensive strategies at this expert guide.
Ensure Proper Moisture Barrier Installation
After leveling, I installed a vapor barrier to prevent moisture from seeping into the wood. Think of this barrier as a raincoat for your floors—protecting against unseen damage that can cause cupping and buckling. Use a high-quality membrane designed for hardwood, and overlap seams by at least 6 inches. I learned that neglecting this step can lead to costly repairs, especially in basements or humid climates. For optimal results, consult this resource.
Acclimate Your Hardwood Properly
One mistake I made early on was installing hardwood right after delivery, without letting it acclimate. The wood needs to adjust to your home’s humidity and temperature—similar to how a good wine needs to breathe. I left the planks in the room for at least 72 hours, stacking them in the same environment where they would be installed. This reduces expansion and contraction later. Remember, acclimation is crucial for long-term stability, especially in 2025 with changing climate patterns. For detailed acclimatization techniques, see this guide.
Install with Precision and Consistency
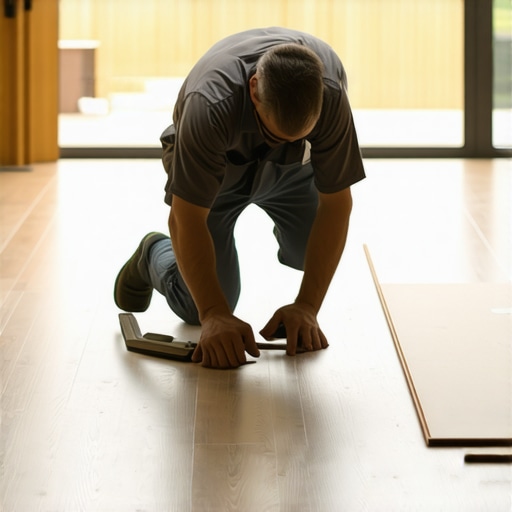
During installation, I used spacers to maintain a consistent expansion gap around the perimeter—about 1/4 inch. This gap allows the wood to expand without buckling. I also worked from one wall outward, locking planks securely and checking alignment frequently. Think of this process as quilting—each piece must fit tightly yet have room to breathe. I used a tapping block and a mallet to snug each plank without damage. For expert tips on layout and technique, visit this resource.
Use Proper Adhesives and Fasteners
Depending on the type of hardwood, I chose the right adhesive or nails. For glued-down floors, I applied the adhesive in a zigzag pattern, similar to spreading peanut butter, for even coverage. For nail-down installations, I used a pneumatic nailer set to the correct depth—too deep, and you risk damaging the planks; too shallow, and they may loosen over time. My experience showed that using the right tools and materials prevents squeaks and ensures longevity. For detailed product recommendations, check this expert advice.
Finish with Proper Sanding and Sealing
Once all planks were installed, I sanded the surface gradually from coarse to fine grit. Think of sanding as polishing a gemstone—each step reveals more brilliance. I then applied a high-quality sealant designed for durability, protecting against scratches and stains. Proper finishing is like putting on a durable coat of armor—lasting beauty depends on it. For the best sealing techniques, explore this detailed guide.
While many DIY enthusiasts and even professionals focus on the basic steps of hardwood flooring installation, there are subtle nuances that can make or break the longevity and beauty of your floors. Let’s dig deeper into some common myths and advanced mistakes that often go unnoticed, yet can cause costly issues down the line.
Myth: Moisture Content Isn’t Critical Once the Floor Is Laid
Many assume that once the hardwood is installed, moisture levels are a non-issue. However, this is a dangerous misconception. The reality is that fluctuations in humidity can cause wood to expand or contract significantly, leading to gaps, warping, or buckling. Experts emphasize the importance of ongoing humidity control in your home—ideally maintaining 35-55% relative humidity—to prevent these problems. For a comprehensive approach, consider installing a humidity monitoring system or a dehumidifier, especially in climates with extreme seasonal changes. Neglecting this can be a silent trap, resulting in premature floor failure.
Common Mistake: Overlooking the Subfloor’s Structural Integrity
Many installers focus on the surface, but the subfloor’s condition is a hidden factor that’s often overlooked. Even minor imperfections or hidden moisture issues can cause unevenness and squeaks. Advanced installers use tools like laser levels and moisture meters to assess the subfloor thoroughly. Additionally, understanding the type of subfloor—whether concrete, plywood, or existing flooring—and treating it accordingly, is critical. For example, concrete subfloors should be tested for moisture migration, and if high, a proper vapor barrier or moisture mitigation system must be installed. Failing to do so is a common mistake that leads to early damage.
What Most People Get Wrong About Expansion Gaps and Finishing
Another nuanced aspect is the precise calculation of expansion gaps. Too small, and your floors will buckle; too large, and you risk an unprofessional appearance. Many underestimate the importance of leaving a consistent gap around the perimeter and under door jams. Moreover, the finishing process — sanding, sealing, and applying topcoats — must be done meticulously. Over-sanding can thin the wood and compromise durability, while improper sealing can lead to stains or water damage. Advanced techniques involve multi-stage sanding and specialized sealants designed for high traffic areas. Skipping these steps or rushing them is a common pitfall among DIYers.
External Expert Insight: The Importance of Acclimatization and Climate Control
According to industry experts, acclimatization isn’t just letting the wood sit in the room for a few days. It involves measuring and balancing the moisture content of both the wood and the environment over several weeks, especially in regions experiencing rapid climate shifts. Proper climate control during and after installation is key to preventing long-term issues like cupping or gaps. For detailed strategies, check out this comprehensive guide.
In conclusion, mastering the finer details of hardwood installation can dramatically extend the lifespan and aesthetic appeal of your floors. Don’t fall for the common myths and pitfalls. Instead, focus on advanced preparation, precise calculations, and ongoing climate management. Have you ever fallen into this trap? Let me know in the comments.
Maintaining your hardwood floors is an ongoing process that ensures their beauty and durability for years to come. Over time, even the best installations can suffer from wear, dirt, and environmental factors. That’s why having the right tools and a solid maintenance routine is crucial. In my experience, investing in quality equipment and following specific care methods can significantly extend the lifespan of your floors. Let’s explore some essential tools and maintenance tips that will keep your hardwood floors working perfectly over time.
How do I maintain my hardwood floors over time?
First, regular cleaning is vital. I use a microfiber dust mop to remove surface dust and debris daily. This gentle but effective tool prevents scratches caused by dirt particles. For deeper cleaning, I recommend a pH-neutral hardwood floor cleaner applied with a damp (not wet) mop. Avoid harsh chemicals that can damage the finish. Additionally, maintaining proper humidity levels—between 35-55%—helps prevent wood expansion or contraction, which can cause gaps or warping. Using a hygrometer to monitor indoor moisture and a humidifier or dehumidifier as needed is a good practice.
Tools I recommend for ongoing maintenance
To keep your floors looking pristine, I rely on a few specific tools. A high-quality microfibre mop, like the Swiffer WetJet, allows for quick daily cleanings without damaging the finish. For more thorough cleanings, I prefer a flat mop with a removable, washable pad that can be used with gentle cleaning solutions. A soft-bristled brush is perfect for cleaning around edges and baseboards without scratching. For tackling stubborn stains or scuff marks, an eraser-type cleaning pad works wonders. Investing in a vacuum with a hardwood floor setting ensures that larger debris is easily removed without scratching the surface.
Long-term results and tools to consider
Over the years, I’ve found that periodic refinishing is essential to preserve the floor’s appearance. A floor buffer with a soft pad can be used for light sanding and applying a new coat of finish. For those interested in DIY refinishing, a high-quality floor sander and appropriate safety gear are must-haves. Modern tools like UV-cured finish applicators can speed up the process and provide a durable, glossy surface. Furthermore, installing a quality floor protector, like felt pads on furniture, minimizes scratches and dents. Regularly inspecting these pads and replacing them as needed is a simple but effective maintenance step.
Future trends in hardwood floor maintenance
Looking ahead, I believe smart home integration will play a role in floor care. Sensors that monitor humidity and temperature can alert homeowners before issues develop. Additionally, advances in eco-friendly cleaning solutions and self-healing finishes promise to reduce maintenance efforts and increase durability. For now, the best approach is to stay proactive with routine cleaning and minor repairs.
Try incorporating a microfiber dust mop into your daily routine and see how much longer your floors stay beautiful. Consistent maintenance with the right tools is the secret to flooring that keeps working perfectly for decades. For more expert tips on hardwood care, visit this guide.
The Hardest Lesson I Learned About Hardwood Flooring Installation
One of my most valuable insights came when I underestimated the importance of subfloor preparation. Initially, I skipped thorough leveling and moisture testing, which led to squeaks and uneven surfaces within months. This taught me that a flawless finish starts long before the first plank is laid. Taking the time to assess and prepare the subfloor can save you from costly repairs and frustration later on.
3 Myths About Hardwood Floor Acclimation That Held Me Back
I used to believe that simply leaving the hardwood in the room for 48 hours was enough for proper acclimation. Later, I realized that understanding your climate and allowing the wood to stabilize over a week or more makes a huge difference. Proper acclimation minimizes gaps and warping, ensuring your floors stay beautiful over time.
What Experts Won’t Tell You About Moisture Barriers
Many overlook the critical role of high-quality vapor barriers, especially in basements or humid environments. I learned that choosing the right material and correctly installing overlaps prevent moisture issues that can cause cupping and buckling. This simple step is a game-changer for durability.
Curated Recommendations for a Flawless Hardwood Floor
1. Use a Laser Level for Surface Preparation: Precise leveling tools help identify low spots, saving hours of sanding and patching. I trust the expert-level leveling guides.
2. Invest in a Quality Moisture Meter: Regular moisture checks prevent surprises after installation. I prefer the top-rated meters for peace of mind.
3. Choose Durable Sealants: A good sealant extends the life of your floors and resists stains. My favorite is the long-lasting finish recommended by professionals.
Your Turn to Try: Elevate Your Hardwood Flooring Skills
Remember, mastering hardwood flooring is a journey of continuous learning and patience. The effort you put into proper preparation, acclimation, and finishing will reward you with stunning, durable floors that last for decades. Don’t hesitate to experiment with new techniques and tools—your home deserves the best. Ready to transform your space? Share your experiences or questions below, and let’s grow together in this craft!