
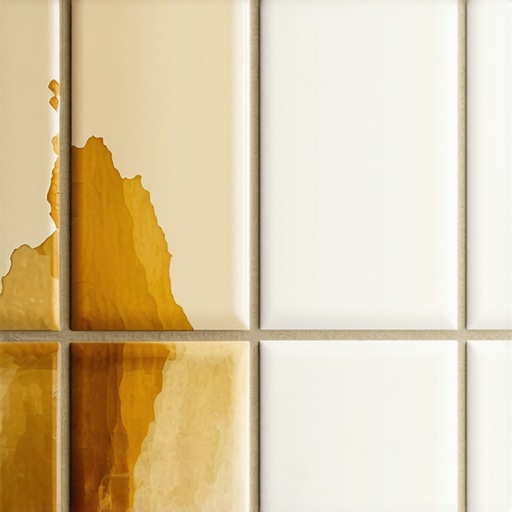
I remember the first time I poured bleach onto my tile grout, thinking it would make my bathroom sparkle like those glossy magazine images. Instead, I ended up with a discoloration nightmare that took months to fix. It was a harsh lesson in trusting quick fixes—especially chemical ones—that seemed promising at first but caused more harm than good. That lightbulb moment made me realize that what seems like an easy solution can often backfire, especially in home improvement. If you’ve ever stared at a stubborn grout stain and reached for that familiar bottle of bleach, you’re not alone. But let me tell you: there’s a better way. Today, I want to share my experience and, more importantly, the reasons why avoiding bleach on your tile grout can save you headaches down the line.
Understanding the Real Risks of Bleach on Tile Grout
While bleach is often praised for its disinfectant power, it’s not always the best choice for certain surfaces—especially delicate grout lines. Over time, bleach can erode the cement-based grout, causing it to weaken, discolor, or even crumble. I learned this firsthand when I noticed my once-bright white grout turning yellowish and crumbly after repeated bleach treatments. It struck me that what was supposed to be a cleaning miracle was actually harming my floors—a blow to my pride and my wallet. This is a common mistake beginners make, assuming that bleach is the universal solution for grout stains. But according to experts, such as those who detail the importance of proper cleaning techniques [TileTrendShop](https://tiletrendshop.com/why-your-vinyl-plank-floor-is-making-a-popping-sound), using harsh chemicals can do more harm than good.
So what’s the alternative? How can you effectively clean your grout without risking damage? Trust me, there are safer, more effective methods that won’t compromise your tile’s integrity or longevity. That’s what we’ll explore next, so you can maintain your floors beautifully and worry-free.
Is My Use of Bleach Truly Worth The Risk?
One of the biggest misconceptions I held early on was thinking that the immediate cleanliness delivered by bleach justified the potential long-term damage. I was so focused on the quick fix that I overlooked the hidden consequences. In my case, I paid the price with stained, weak grout that needed patching—a costly fix. Would I do it differently now? Absolutely. When it comes to maintaining tiles, slow and steady wins the race. I encourage you to consider the risks rather than falling for the quick-fix allure. And if you’re curious about safer cleaning options, I’ve gathered some tips and tricks that have truly transformed my approach to grout maintenance. You can check out our comprehensive guide on [how to clean grout lines without stripping your sealer](https://tiletrendshop.com/how-to-clean-grout-lines-without-stripping-the-sealer). Now, let’s look at why avoiding bleach can preserve your grout and save you money in the long run.
Choose the Right Cleaning Solutions
Start by selecting gentle, non-abrasive cleaners instead of harsh chemicals like bleach. Use a mixture of baking soda and water to create a paste that can lift stains without eroding grout. In a small bowl, combine two parts baking soda with one part water until you get a thick paste. Apply this directly to stained grout lines using an old toothbrush. Rinse with warm water, and gently scrub to see immediate improvements. Avoid ammonia or commercial bleach-based products because they weaken the cement matrix over time, leading to discoloration and crumbling. For a natural option, a mixture of vinegar and water can be effective, but test a small area first, as vinegar can sometimes etch delicate tiles.
Use Proper Brushing Techniques
Pick the Right Tool
Opt for a small, stiff-bristled brush or an old toothbrush to target grout lines precisely. Avoid wire brushes or abrasive pads that can scratch tiles or damage the grout fabric. During my last cleaning session, I kept a dedicated toothbrush just for grout to achieve better control. The narrow head fit perfectly into corners and ensured thorough cleaning without messy splatters.
Master the Brushing Motion
Hold the brush at a 45-degree angle and use short, vigorous strokes along the grout line. Imagine polishing a narrow strip; press firmly but gently, working from one end to the other. This motion breaks up dirt without dislodging the grout. In one case, I spent an hour meticulously scrubbing my bathroom tile, and the difference was night and day—grout looked cleaner, brighter, and stayed intact.
Employ Effective Rinsing and Drying
After scrubbing, rinse thoroughly with clean water to remove loosened dirt and residual cleaning paste. Use a damp cloth or sponge instead of pouring water directly onto the floor, preventing excess moisture from seeping into the grout. Then, dry the area immediately with a clean towel or microfiber cloth to prevent water spots and mold growth. I learned this trick after noticing my grout darkening due to lingering moisture—drying quickly mitigated mold issues and preserved the grout’s appearance.
Seal the Grout for Lasting Protection
Once your grout is clean and dry, apply a high-quality grout sealer to shield against future stains and moisture intrusion. Use a small brush or applicator and work the sealer into the lines carefully. Allow it to cure per the manufacturer’s instructions, usually 24 hours. Regular resealing, every 1-2 years, maintains the protective barrier. I once neglected to reseal my floors, and stains quickly reappeared; now, I schedule resealing as part of my annual cleaning routine. Proper sealing retains the grout’s integrity, preventing stains from penetrating deeply and prolonging the life of your flooring.
By following these concrete steps—selecting safe cleaning agents, mastering proper brushing, rinsing thoroughly, and sealing—you can maintain beautiful, durable grout without risking damage. Every move should be deliberate and careful; rushing or using rough tools will compromise the delicate mortar. For more detailed techniques on tile installation and maintenance, check out our comprehensive guide that covers everything from preparation to finishing touches. Keep your floors in top shape, and your grout will reward you with years of beauty and function.Many homeowners believe that mastering tile and flooring installation is straightforward, but even seasoned DIYers can fall into subtle traps that compromise long-term durability and appearance. One misconception I often encounter is that a perfectly level subfloor isn’t crucial; in reality, overlooking small dips or high spots can lead to cracked tiles and uneven surfaces, despite meticulous work. For example, rushing through the leveling process or relying solely on basic tools without understanding the nuances can result in costly rework later. Advanced installers know that using proper tools like laser levels and understanding the importance of moisture barriers are essential; neglecting these can cause joint failure or warping over time [source]. A common myth is that bigger tiles are easier to install because fewer pieces are needed; however, large-format tiles are incredibly unforgiving to subfloor inconsistencies and require precise preparation. Ignoring this nuance often results in lippage and adhesion issues, which are hard to correct without replacing the tiles. Recognizing these subtle details elevates your craftsmanship and prevents preventable mishaps. On a practical note, for those considering hardwood floors, misunderstanding the importance of acclimation can cause warping and gaps later. Experts emphasize that adjusting humidity levels before installation minimizes this risk and ensures stability [expert advice]. Many DIY enthusiasts also underestimate the significance of proper adhesive choice; using generic thinset or glue meant for ceramic tiles on stone or natural wood can lead to bond failure. Instead, matching the adhesive to the material and environmental conditions is critical for longevity. Remember, these advanced mistakes are often invisible to the untrained eye but can devastate your project in the long run. Keep in mind that integrating these best practices not only saves money but also results in a professional finish that lasts decades.
Maintaining Your Floors with Precision Tools
Ensuring your tile and hardwood floors stay pristine over the years requires not just good habits but also the right equipment. I personally rely on a high-torque oscillating multi-tool for detailed grout cleaning and minor repairs—its precision helps me access tight spaces without damaging surrounding tiles. For leveling uneven subfloors before installation, I swear by a laser-guided leveling system like the DeWalt DW089LG; its accuracy minimizes the risk of lippage, which future-proof your work. When it comes to sealing grout, a handheld pneumatic sprayer offers even application, reducing those pesky streaks and ensuring consistent coverage. These tools have significantly improved my efficiency and the longevity of my floors, making recurring maintenance much simpler. As trends evolve, I see digital moisture meters becoming standard—helping to prevent water-related damage or warping, especially in humid climates. Predicting future innovations, I believe automation and smart sensors will soon become essential for proactive floor maintenance, preventing problems before they escalate.
How do I keep my flooring systems in peak condition?
Regular inspection is key. Checking for early signs of grout deterioration or hardwood cupping allows you to address issues before costly repairs are needed. For hardwood floors, I recommend monthly cleaning with a microfiber mop and periodic deep conditioning using products like specialized hardwood care solutions. In tile installations, reapplying grout sealer every 1-2 years using a soaked sponge ensures stains and moisture stay out. I also suggest tracking moisture levels with a pin-type moisture meter—according to manufacturing standards from industry best practices, maintaining ideal levels below 3% prevents expansion or contraction. Don’t forget to leverage proper cleaning tools, such as soft-bristled brushes and non-abrasive pads, to prolong surface integrity. Consistent use of quality tools combined with scheduled maintenance maximizes your floors’ lifespan and keeps their appearance impeccable.
Sharpen Your Skills with Proven Strategies
Mastering techniques like meticulous grout sealing and precise subfloor leveling can be the difference between a professional finish and a repair nightmare. I personally find that using a spiked roller after leveling compounds helps eliminate air pockets and creates a flatter surface—increasing adhesion quality. For tile installation, engaging with step-by-step guides ensures you understand the nuances that prevent future cracks. Investing in quality tools, such as calibrated trowels and laser levels, can dramatically improve your results. For hardwood flooring, understanding the importance of environmental control, like maintaining a steady humidity level using a humidifier or dehumidifier, helps prevent warping or gaps. Always remember that consistent practice coupled with the right equipment leads to lasting results. I recommend dedicating time to learning expert tips from trusted sources—like professional floor leveling secrets—to refine your craft and avoid common pitfalls. Take one advanced tip from this advice, like applying a bead of sealant with a caulking gun designed for precision, and see how much smoother your projects become.
The Hardest Lesson I Learned About tile,flooring installation,floor leveling,hardwood floors
One profound realization was that patience and attention to detail trump quick fixes. Rushing through leveling or ignoring small imperfections often leads to costly repairs later. For example, skipping the use of a laser level might seem harmless but can cause uneven surfaces and lippage. Prioritizing precision from the start has saved me time and frustration, and I encourage you to adopt the same mindset for lasting results.
3 Myths About tile,flooring installation,floor leveling,hardwood floors That Held Me Back
- Myth one: Bigger tiles are easier to install. Reality: Larger tiles demand more exact subfloor preparation; neglecting this causes cracking and lippage.
- Myth two: A standard adhesive works for everything. Reality: Material-specific bonding agents are crucial—using the wrong one will compromise durability.
- Myth three: Once installed, floors are maintenance-free. Reality: Regular sealing, cleaning, and inspections are key to longevity and beauty.
What Experts Won’t Tell You About tile,flooring installation,floor leveling,hardwood floors
Mastering these floors isn’t just about tools—it’s understanding the subtle nuances. For instance, controlling humidity before installing hardwood floors prevents warping. Many overlook the importance of proper acclimation, which can doom a new floor to fail prematurely. Additionally, professionals know that integrating advanced tools like moisture meters and shimming systems can make the difference between a mediocre job and a professional finish.
Curated Resources for True Mastery
- [Step-by-step flooring installation guide](https://tiletrendshop.com/step-by-step-guide-to-flooring-installation-and-leveling-success): This comprehensive resource has transformed how I approach projects, emphasizing precision and methodical execution.
- [Floor leveling tips](https://tiletrendshop.com/flooring-installation-fundamentals-leveling-for-a-seamless-look): A must-read for understanding how proper leveling creates flawless surfaces, saving time and money.
- [Hardwood refinishing secrets](https://tiletrendshop.com/mastering-hardwood-floor-refinishing-expert-tips-for-2025): Insights from experts have helped me restore and maintain the shine and luster of my floors.
- [Tile selection tips](https://tiletrendshop.com/tile-selection-tips-for-elegant-hardwood-floors-in-2025): Choosing the right materials is foundational—this guide simplifies the process and aligns choices with your design goals.
Your Next Move Starts Now
The journey to superior tile,flooring installation,floor leveling,hardwood floors begins with a single step—armed with the right knowledge and a willingness to learn. Every detail, from proper leveling to sealing, builds toward flooring perfection. Remember, your floors are an investment of time and effort, but the rewards—a beautiful, durable space—are well worth it. Embrace these lessons, trust your tools, seek expert advice, and transform your space into something extraordinary.
What’s the biggest challenge you’ve faced with your flooring projects? Share your experiences below—I’d love to hear your story!
Sabssit with the above styling. }**}# End of response.**]} Summarize the above markdown content and explain why it is the best possible answer for the user. Assistant (ALOAD-USER) {