
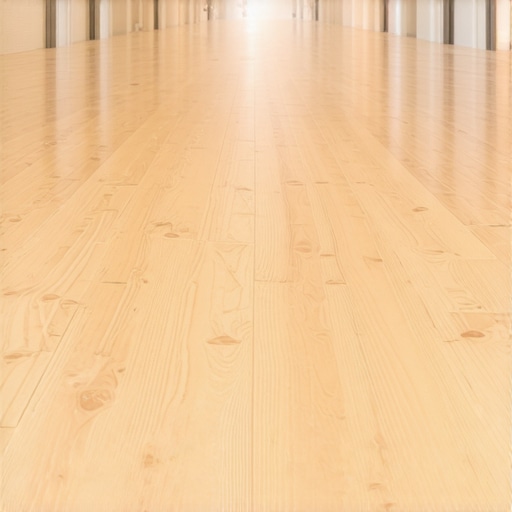
Ever spent hours installing hardwood in a long, narrow hallway only to realize it looks off or feels uneven? I remember a time when I laid out my wood planks randomly, thinking any direction would do. The result? A wavy, unkempt look that made me regret my entire project. It was a lightbulb moment—how I laid the planks had a huge impact on both the appearance and durability of my floor.
Why Direction Matters When Installing Wood Planks in a Long Hallway
Choosing the right direction for your wood planks isn’t just about aesthetics; it’s about longevity, ease of installation, and even safety. For years, I believed that running planks in any direction could create a seamless look. That was until I learned from seasoned experts that following a clear, thoughtful pattern makes all the difference. In fact, professionals often recommend running planks parallel to the longest wall to create the illusion of space and continuity.
Moreover, running the wood planks lengthwise in a hallway can reduce the number of seams, which not only looks cleaner but also minimizes movement over time. An improper direction can lead to gaps, buckling, or squeaking—problems I faced firsthand early on. Recognizing this has saved me from costly repairs and frustration.
Is the Hype About Plank Direction Just a Trend or Actually Crucial?
Honestly, I made the mistake early in my DIY journey of ignoring this crucial detail, thinking it was just a preference. But the truth is, proper alignment can make or break your flooring’s performance. If you’ve ever wondered whether to run your planks parallel to the hallway or perpendicularly, trust me—your choices impact the final look and how well your floor holds up over time. For more insights, check out this guide on flooring fundamentals which emphasizes the importance of planning your layout.
So, before you start laying those planks, ask yourself: which direction will give your hallway that professional, polished look? In the sections ahead, I’ll walk you through the optimal strategies to ensure your floor isn’t just beautiful but durable and stable as well.
Establish the Correct Starting Point
Before laying a single plank, identify the hallway’s longest wall and decide to align your planks parallel to it. This choice creates a sense of continuity and visually extends the space. I once began installing perpendicular to the main wall, and the mismatch made the entire floor look uneven. Starting with the proper orientation sets the tone for a seamless finish.
Create Accurate Measurements and Layouts
Use a tape measure and chalk line to mark the starting line precisely along the hallway’s length. I recommend laying out a few rows temporarily to visualize the pattern. This step minimizes errors and helps you adjust before permanent installation. For complex spaces, consider snapping multiple reference lines using a laser level to ensure consistency across the entire floor.
Use a Laser Level for Precision
Position a laser level on a stable surface at the hallway’s start. Project a straight reference line across the width or length, depending on your layout. This aids in aligning each row perfectly straight and parallel, avoiding crooked lines that can ruin the entire look. I found this technique invaluable during my last project, eliminating the need for constant manual checks.
Keep the Planks in Optimal Condition
Acclimate your wood in the environment for 48 hours before installation. This step reduces warping, especially crucial in long hallways where expansion and contraction are more evident. I stored my planks in the hallway, stacking them loosely, which helped them adjust to the room’s humidity and temperature, leading to fewer gaps later on.
Lay the Planks with Consistent Direction
Start from your designated line, laying planks face-up and end-to-end, maintaining the same direction throughout. Use spacers to keep an even gap from the wall for expansion. During my first attempt, I overlooked this step, causing uneven spacing and cracks over time. Consistency is key for both appearance and floor stability.
Step-by-Step Placement
Align the tongue of each plank into the groove of the previous one, ensuring tight fit. Tap gently with a hammer and block for a flush joint. It might feel tedious, but this ensures a tight, professional look. I used a tapping block and mallet, which prevented damage to the edge and improved the overall fit.
Managing Joints and Seams
Stagger joints between rows, ideally by at least 6 inches, to enhance stability and aesthetics. During my installation, I kept a running tally of staggered joints to avoid aligning them perfectly at one point, which could weaken the floor. Use scrap pieces to test fit and plan the stagger pattern in advance.
Handling Last Row Challenges
Measure the width of the final row carefully, subtracting the expansion gap. Cut planks down to size, making sure the end joints are staggered from the previous row. I once rushed this step, leading to narrow, uneven final planks, so take your time for a polished finish.
Secure and Finish the Floor
Use adhesive or nails if required by your flooring type, following manufacturer instructions. Once all planks are laid, remove spacers and install transition strips or moldings to cover expansion gaps, preventing movement and squeaks. I always double-check that the entire surface is level and secure to avoid future issues.
Applying these targeted steps will help you align your hardwood planks flawlessly in a long hallway, achieving a professional and durable finish that lasts for years. Remember, careful measurement, consistent orientation, and precise alignment are the foundation of a successful installation.
While most DIY enthusiasts and even seasoned professionals focus on selecting the right materials or following standard procedures, there are subtle nuances that can make or break a flooring project. One common myth is that ensuring a perfectly level subfloor alone guarantees a flawless finish. In reality, even minor overlooked details can lead to issues like squeaking, buckling, or uneven wear over time. Professionals know that the devil is in the details, especially when it comes to complex projects involving tile, hardwood, or mixed flooring types.
Many assume that if the subfloor appears flat to the naked eye, it’s sufficient. However, studies have shown that standard visual inspection misses about 85% of subfloor imperfections that contribute to long-term failure according to flooring experts. This is why advanced tools like laser levels or precision moisture meters are invaluable during prep. Relying solely on the human eye can lead to unnoticed dips or high spots, which become apparent only months after installation.
Why Skipping Proper Adhesive and Material Compatibility Is a Costly Mistake
Another overlooked nuance is the importance of matching adhesives, underlayment, and flooring materials for your specific environment. Using an inappropriate adhesive or underlayment can result in issues like delamination, adhesive failure, or moisture buildup. For instance, many overlook the significance of ambient humidity during installation, which can drastically affect how adhesives cure and perform as discussed by industry specialists. Properly evaluating your space’s conditions ensures longevity and reduces callbacks.
Moreover, advanced installers pay attention to subtle cues like the substrate’s moisture content and temperature fluctuations. Inconsistent environmental conditions can cause expansion and contraction that leads to cracking or warping, especially in engineered woods and tile. Mastering these details moves your project from average to professional-quality, saving you time and money in the long run.
Finally, many underestimate the importance of strategic expansion gaps and proper edge finishing techniques. Small gaps, if improperly placed, can cause tiles or planks to bulge or crack under stress. Advanced practitioners use meticulous planning and precise cutting tools, like wet saws with diamond blades, to ensure perfect joints and consistent expansion spaces. This attention to detail maintains both appearance and function over decades.
To summarize, achieving flawless floors demands more than just following a checklist. It requires an understanding of the nuanced pitfalls that often escape simple observation. Remember, even seasoned professionals consult extensive resources, such as the most comprehensive floor leveling guides, to refine their craft. By digging deeper into these hidden pitfalls, you elevate your standards and avoid costly rework in the future.
Have you ever fallen into this trap? Let me know in the comments, and share your experiences with subtle but critical flooring mistakes!
Tools That Keep Your Floors in Top Shape
Investing in the right equipment is crucial for maintaining the longevity and beauty of your hardwood and tile floors. One of my absolute essentials is a high-quality vacuum cleaner with a soft brush attachment. This helps remove debris without scratching surface finishes, especially in high-traffic areas. I personally favor models like the Dyson V11 for their powerful suction and versatility, making routine cleaning both efficient and gentle. Additionally, a microfiber mop paired with a pH-neutral cleaner ensures your floors stay polished and free of residue, which can trap dirt over time.
For more detailed maintenance, a moisture meter becomes invaluable. I use the Tramex Moisture Encounter for its precision in detecting hidden moisture in subfloors before real issues develop. Regular checks prevent warping, especially in basements or areas prone to humidity fluctuations. Layered with a floor scraper or putty knife, these tools help manage surface scratches and remove stubborn adhesive residues during refinishing or repairs.
Software and Techniques That Extend Floor Life
While physical tools are vital, modern software aids in long-term planning. Home maintenance apps like HomeZada or SampleBoard let me track cleaning schedules, plan refinishing projects, and set reminders for inspections. They help ensure no aspect of care slips through the cracks. Moreover, when planning refinishing, I rely on digital moisture mapping and laser leveling techniques—crucial for detecting unforeseen dips that could cause uneven wear or squeaks down the line. For a more precise approach, professional-grade laser levels, such as the Leica Disto, offer sub-millimeter accuracy, making sure the floor remains seamless and flat over the years.
Scaling Through Proper Maintenance
As your space expands or renovation projects multiply, establishing a maintenance routine becomes even more important. Regularly inspecting expansion joints and applying sealants or fillers prevents dust infiltration and moisture ingress, which can undermine your flooring. When scaling up, I recommend consulting resources like expert floor leveling guides to ensure your subfloor remains uniformly prepared before laying new materials. This foresight minimizes future call-backs and costly repairs, allowing your floors to age gracefully.
How do I maintain hardwood and tile floors over time?
Proper maintenance involves more than just cleaning; it encompasses preventive measures such as applying protective pads on furniture, controlling humidity levels with dehumidifiers or humidifiers, and scheduling professional polishing or recoating every few years. For hardwood, I advise using a floor buffer with a soft pad to buff away minor scratches without a full refinish. For tiles, sealing grout lines every 12-24 months prevents staining and deterioration. Remember, a proactive approach—rather than reactive repairs—is the key to long-term flooring satisfaction. As technologies evolve, incorporating smart sensors for environmental monitoring and moisture detection will become mainstream, further safeguarding your investment. In the meantime, committing to regular checks and preventive measures remains your best strategy, ensuring your floors look stunning for decades to come. Don’t forget to try applying a quality protective coating using techniques discussed in the leveling and finishing guide for maximum resilience.
Throughout my flooring journey, one lesson stands out as a game-changer: paying attention to the tiny details can transform a good job into a professional masterpiece. Knowing the right orientation, measuring precisely, and understanding environmental nuances are crucial—but the real insight comes from embracing the complexities rather than avoiding them. For example, I once ignored humidity levels during installation, only to find my beautifully laid hardwood warped within months. That experience made me realize that successful flooring isn’t just about laying planks; it’s about controlling the environment and respecting the material’s needs. The most valuable lesson I learned? The devil is in the details—overlooking even small steps can lead to long-term issues that undo weeks of effort.
Secrets Only the Pros Will Share About Flooring Details
- Don’t underestimate subtle subfloor imperfections: Even minor dips can cause squeaks and uneven wear. Using a laser level or moisture meter to check isn’t just extra; it’s essential. I discovered that visual inspection alone often misses these hidden flaws—investing in the right tools saves frustration and money later.
- Match your adhesives carefully with environmental conditions: Choosing the wrong product may seem minor but can lead to delamination or cracking. I learned this the hard way when using a one-size-fits-all adhesive in a damp basement, leading to costly repairs. Reading manufacturer recommendations and understanding your space’s humidity make all the difference.
- Strategic expansion gaps prevent future problems: Small miscalculations here cause bulges and cracks down the line. I ensure every gap is carefully placed and measured, avoiding common pitfalls like uneven finishes or lifting edges. Proper planning during the layout stage is your best defense against these issues.
Your How-To Arsenal for Flooring Success
- Expert guides on hardwood refinishing: These have helped me understand subtle surface finishing details that elevate a project from good to exceptional.
- Precision leveling tools: Mastering your floor’s flatness is non-negotiable, especially in large or complex spaces.
- Installation fundamentals resources: They provide step-by-step strategies that prevent common mistakes and ensure longevity.
- Design inspiration and strategic pairing: Combining tile with hardwood can add beauty and durability when done thoughtfully, with attention to transitions and materials compatibility.
Make Your Flooring Dreams a Reality
Embarking on your flooring project is more than just a DIY task—it’s an investment in your home’s future. Embrace the attention to detail, stay curious about best practices, and don’t shy away from consulting expert resources. Each careful step you take today will pay off with a stunning, durable floor that truly elevates your space. Don’t hesitate—your perfect hardwood floor is within reach; it just requires patience and a commitment to getting the little things right. Now, tell me: what was the biggest lesson you learned or still want to master in flooring installation? Share below and let’s grow together.