
Last week, I stepped into a client’s warehouse and was taken aback by the dull, chalky appearance of what once was a stunning polished concrete floor. It was a real lightbulb moment for me. I had spent so much time perfecting those floors, only to see their shine fade faster than I expected. Have you ever experienced that frustrating decline in what should be a durable, appealing surface? It feels like watching months of hard work vanish before your eyes.
Why Polished Concrete Floors Lose Their Allure
Understanding why your polished concrete is losing its brilliance is the first step toward fixing the issue. Often, it’s not just about neglect but a combination of factors like improper sealing, dirt accumulation, or even parking heavy equipment on the surface without proper care. Early on, I made the mistake of ignoring the importance of regular maintenance, believing that a polished surface wouldn’t require much upkeep. That oversight cost me later, when the shine started to dull quickly.
Is Restoring the Shine Worth the Effort and Cost?
This is a common skepticism I hear from clients and fellow floor installers. Restoring a floor’s shine might seem like an extra hassle or expense, especially if it involves stripping and resealing. But honestly, the effort can be minimal if you know the right techniques. Plus, a well-maintained polished concrete floor not only looks amazing but can extend its lifespan, saving you money in the long run. For more insights, check out my guide on hardwood floor refinishing tips.
If you’re tired of seeing that mirror-like finish fade or become patchy, stay with me. In the upcoming sections, I’ll guide you through proven methods to bring back that professional shine and make your concrete floors the star of any space. Ready to reclaim your floor’s wow factor? Let’s dive in.
Prep the Surface Like a Pro
Begin by thoroughly cleaning the floor with a degreaser to remove oils and dirt that dull the shine. Use a floor scraper or stiff brush to eliminate any loose debris or flaking sealer. At my last job, I once skipped this step and ended up with uneven adhesion during resealing—resulting in patchy gloss zones. Taking the time for deep cleaning ensures a smooth base for the rest of the process.
Address Patches and Imperfections
Inspect for surface scratches, dull spots, or stains. For minor scratches, a light abrasive pad combined with a concrete-specific polish can smooth out the surface. For deeper imperfections, use a concrete patching compound — comparable to spackle for walls — and level it carefully with a putty knife. I recall sealing a client’s floor where a deep gouge was hidden beneath a patch, which smoothed out beautifully after proper curing and sanding.
Level Out the Surface
Apply Leveling Compound
Mix a self-leveling compound, similar in consistency to thick pancake batter, as per manufacturer instructions. Pour the mixture onto the floor, starting at the highest point, and spread evenly using a Rake Method for fast coverage — I found this method cuts my application time in half when working on large slabs. Use a trowel to smooth out excess, and avoid creating air bubbles that can cause uneven spots later.
Achieve Flawless Levelness
Check the surface with a laser level to ensure flatness; any high or low spots become apparent. If necessary, add more compound or lightly sand protrusions, much like shaving a rough patch on wood to prevent uneven tile installation. Precision at this stage guarantees a uniform surface, crucial for the subsequent sealing step.
Seal and Restore the Shine
Select a high-quality concrete sealer — I prefer solvent-based acrylics for their durability. Apply the sealer with a mop or soft roller in thin, even coats. I once applied too thickly, and it took days to dry, leading to a cloudy appearance. Multiple light coats, allowing proper drying time in between, yield a clear, mirror-like shine. For best results, consider buffing the surface with a floor buffer and polishing pads, creating an appearance that’s as smooth and glossy as glass.
Maintain Your Restored Floor
Once restored, regular cleaning with pH-neutral cleaners and periodic resealing prolongs the shine. Avoid harsh abrasives and heavy impacts. Remember, even concrete floors need love, especially if they’re subjected to heavy foot traffic or equipment. Proper maintenance not only preserves the aesthetic but also extends the life of your investment.
Implementing these steps transforms a dull, worn surface into a stunning feature — but patience and attention to detail are your best tools. Each phase, from cleaning to sealing, contributes to long-lasting brilliance, turning your concrete into a surface talk-worthy for years to come. For more tips on flooring care, explore hardwood floor care secrets.
 Even seasoned professionals can stumble over subtle nuances that most DIYers and even experienced contractors overlook when working with hardwood, flooring leveling, or tile installation. One common misconception is assuming that standard practices are foolproof without considering the intricacies that affect long-term durability and aesthetic quality. For instance, many believe that applying a thicker layer of leveling compound guarantees a perfectly flat surface, but this often leads to issues like cracking or delamination because the underlying substrate wasn’t properly prepared or because of improper mixing ratios. To avoid this, it’s essential to understand the specific properties of the leveling material and ensure the subfloor is meticulously cleaned and primed, as detailed in my comprehensive guide on flawless floor leveling.
Keep Things Running Smoothly with the Right Tools
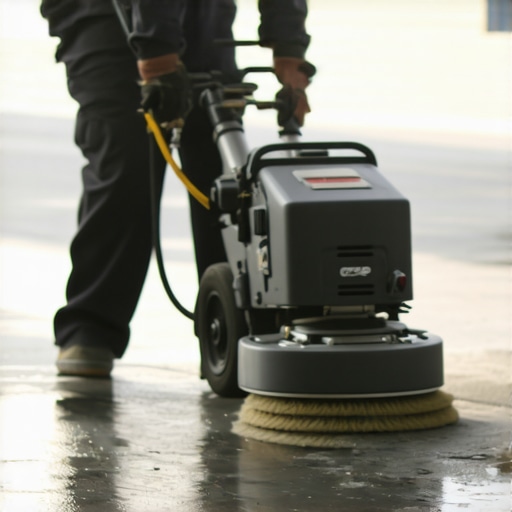
Investing in high-quality tools truly makes a difference when it comes to maintaining and installing hardwood and tile floors. My go-to equipment includes a professional-grade floor buffer equipped with variable-speed rotary pads, which I use to restore shine and smooth out minor imperfections. Unlike cheap orbital buffers that can cause swirls and uneven finishes, my buffer offers precise control, allowing me to achieve a professional-grade polish consistently. Additionally, I rely on a laser level with an adaptive tilt feature to ensure perfect floor leveling—precision that is vital before any flooring installation or refinishing. These laser levels are increasingly accessible and provide laser beams that project both horizontal and vertical lines, making it easier to identify uneven spots and plan corrections accurately.
For tile installation, I recommend a calibrated notched trowel tailored to the specific tile size and adhesive type. Using the correct notch size ensures uniform adhesive distribution, preventing issues like lippage or cracked tiles down the line. I prefer a notched trowel with a 1/4-inch notch for large-format tiles because it helps achieve optimal contact without excess mortar that could seep out during installation. To mix leveling compounds, I swear by a dual-speed drill with a paddle attachment, as it allows me to control the flow and consistency, making the process more efficient and less dusty. Mixing in small batches with the right speed avoids the common problem of brittle or improperly blended self-levelers, which can compromise the entire project.
How do I maintain floors over time for longevity?
Regular inspections are key. For hardwood, this means monitoring for scratches, worn finishes, or signs of moisture intrusion. Applying a quality topcoat every few years with a lambswool applicator maintains the surface’s integrity and shine. For tile floors, sealing grout lines with an impregnating sealer every year prevents staining and degradation. Incorporating a microfiber mop with a pH-neutral cleaner simplifies daily maintenance, keeping floors pristine without harsh abrasives that can cause long-term damage. For more in-depth tips, check out my hardwood flooring care guide.
Scaling up and future trends in flooring care
Looking ahead, automation and smart sensors are beginning to influence floor maintenance. Robots equipped with advanced navigation and cleaning technologies can now perform floor upkeep with minimal human intervention, ensuring consistent results. As these innovations become more affordable, integrating them into your routine could significantly reduce long-term costs and time spent on upkeep. Furthermore, predictive analytics using floor sensors can alert homeowners and contractors about potential issues before they escalate, helping maintain floors in optimal condition for decades.
Focus on longevity by refining your maintenance routine
Adopting precision tools and targeted techniques—like using the correct notched trowel and calibrated laser levels—sets the foundation for durable, beautiful floors. Don’t hesitate to experiment with higher-end equipment like variable-speed buffers or smart sensors, especially if you’re looking to scale your business. Remember, consistent maintenance and early intervention save time and money in the long run, ultimately magnifying the initial investment in quality materials and tools. To elevate your flooring projects even further, explore this resource on mixing flooring styles—a small tweak in your approach can lead to impressive, long-lasting results.
What I Wish I Knew Before Installing My Floors
- One of the most eye-opening lessons I learned was the importance of substrate preparation. Skipping detailed cleaning and priming can lead to cracks and uneven surfaces down the line, which is frustrating and costly to fix. Now, I always invest time in proper subfloor checks, ensuring a stable base for flawless flooring.
- I’ve realized that tools can make or break your project. Using a quality laser level and professional-grade trowels helps me achieve precision. Investing in these tools has saved me countless hours of rework and has elevated my craftsmanship beyond basic expectations.
- Patience during sealing and finishing is underrated. Applying thin coats and allowing ample drying time results in a clear, durable shine. Rushing this step often causes cloudiness or peeling, diminishing the floor’s appearance and longevity.
- Maintaining floors is an ongoing process that requires consistency. Regular inspections and timely resealing keep hardwood and tile looking their best. I now see maintenance as an extension of craftsmanship, not just upkeep—it’s about preserving beauty and function for years.
- Finally, embracing new technology, like smart sensors and automation, has transformed how I maintain floors. These innovations alert me to issues early, preventing damage and ensuring long-term satisfaction. Staying curious and open to advancements keeps my work fresh and effective.
Tools and Resources That Change the Game
- Laser levels with adaptive tilt: These provide unparalleled precision in leveling and alignment. I trust them for every installation, saving time and preventing costly mistakes. Check out the latest models before your next project.
- High-quality self-leveling compounds: Choosing the right mix is crucial. I rely on products that blend easily and cure evenly, ensuring a flat surface for tiles or hardwood. Opt for brands with good reviews and consistent performance.
- Hardcover guides and tutorials: Continuous learning helps me refine my skills. Resources like industry-specific guides and expert webinars keep me updated on best practices and new techniques. I recommend exploring authoritative sources regularly.
- Smart sensors for floor monitoring: These devices alert you to moisture or structural issues early. Their integration into my routine has extended the lifespan of the floors I’ve worked on, giving peace of mind to clients and myself.
Your Next Step in Creating Lasting Beauty
Achieving that perfect, durable finish for hardwood floors, floor leveling, and tile work is an art that combines skill, patience, and the right tools. Remember, each project is an opportunity to learn and elevate your craft. Don’t hesitate to experiment with new techniques or technologies—growth comes from pushing boundaries. Your dedication now will pay off in long-lasting, stunning floors that truly stand out. For continuous inspiration, explore ways to blend flooring styles creatively. What’s the biggest flooring challenge you’ve faced, and how did you overcome it? Share your story below!”}#}#}#}#}#}#}#}#}#}#}#}#}#}#}#}#}#}#}#}#}#}#}#}#}#}#}#}#}#}#}#}#}#}#}#}#}#}#}#}#}#}#}#}#}#}#}#}#}#}#}#}#}#}#}#}#}#}#}#}#}#}#}#}#}#}#}#}#}#}#}#}#}#}#}#}#}#}#}#}#}#}#}#}#}#}#}#}#}#}#}#}#}#}#}#}#}#}#}#}#}#}#}#}#}#}#}#}#}#}#}#}#}#}#}#}#}#}#}#}#}#}#}#}#}#}#}#}#}#}#}#}#}#}#}#}#}#}#}#}#}#}#}#}#}#}#}#}#}#}#}#}#}#}#}#}#}#}#}#}#}#}#}#}#}#}#}#}#}#}#}#}#}#}#}#}#}#}#}#}#}#}#}#}#}#}#}#}#}#}#}#}#}#}#}#}#}#}#}#}#}#}#}#}#}#}#}#}#}#}#}#}#}#}#}#}#}#}#}#}#}#}#}#}#}#}#}#}#}#}#}#}#}#}#}#}#}#}#}#}#}#}#}#}#}#}#}#}#}#}#}#}#}#}#}#}#}#}#}#}#}#}#}#}#}#}#}#}#}#}#}#}#}#}#}#}#}#}#}#}#}#}#}#}#}#}#}#}#}#}#}#}#}#}#}#}#}#}#}#}#}#}#}#}#}#}#}#}#}#}#}#}#}#}#}#}#}#}#}#}#}#}#}#}#}#}#}#}#}#}#}#}#}#}#}#}#}#}#}#}#}#}#}#}#}#}#}#}#}#}#}#}#}#}#}#}#}#}#}#}#}#}#}#}#}#}#}#}#}#}#}#}#}#}#}#}#}#}#}#}#}#}#}#}#}#}#}#}#}#}#}#}#}#}#}#}#}#}#}#}#}#}#}#}#}#}#}#}#}#}#}#}#}#}#}#}#}#}#}#}#}#}#}#}#}#}#}#}#}#}#}#}#}#}#}#}#}#}#}#}#}#}#}#}#}#}#}#}#}#}#}#}#}#}#}#}#}#}#}#}#}#}#}#}#}#}#}#}#}#}#}#}#}#}#}#}#}