
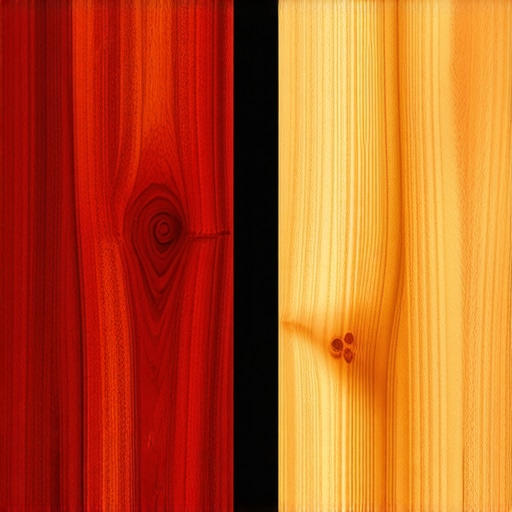
Ever found yourself admiring your newly installed Brazilian Cherry floors, only to notice something strange? One day, they glow with a rich, deep hue; the next, they seem to have a slightly reddish or orange tint that wasn’t there before. I vividly remember a project where I thought I had the perfect finish, only to be puzzled by the unexpected color variations appearing over time. It felt like my floors had a mind of their own—constantly changing, always different. That lightbulb moment made me realize I wasn’t alone in this experience, and that there’s more to this color transformation than meets the eye.
Understanding Why Brazilian Cherry Tracks Its Transformation
Knowing why Brazilian Cherry, or Jatoba, changes color so much more than oak can save you a lot of frustration. Unlike oak, which remains fairly consistent, Brazilian Cherry tends to darken, redden, or lighten depending on several factors. Early in my career, I made the mistake of believing that all hardwoods behave predictably. I thought a decent sealant would keep the color stable. Turns out, I added a layer of mistake—sealing came before understanding the wood’s natural tendencies. Today, I’ll share what I’ve learned about this fascinating hardwood and how to manage its color shifts effectively. For more tips on caring for your hardwood floors, check out [hardwood floor care secrets](https://tiletrendshop.com/hardwood-floor-care-secrets-to-longevity-and-shine).
Could This Be a Deal-Breaker for Your Project?
If you’re considering Brazilian Cherry for your home renovation, you may have doubts—are these color changes a sign of poor quality? Will they ruin my elegant look? Or worse, will they become an ongoing headache? Trust me, I’ve been there. When I initially overlooked the natural aging process of this wood, I faced unexpected surprises. But with proper knowledge, I learned how to embrace and even leverage these color shifts for a richer, more dynamic appearance. Understanding that these changes are part of the wood’s character can actually enhance the beauty of your floors, rather than detract from it. And yes, it’s worth the effort. To see how blending different wood types can elevate your style, consider exploring [hardwood-flooring combinations](https://tiletrendshop.com/transform-your-space-with-expert-hardwood-floor-tile-combinations).
Prepare the Subfloor with Precision
Start by removing existing flooring and thoroughly cleaning the subfloor. Use a moisture meter to ensure consistent moisture levels, preventing future warping or unevenness. If your subfloor isn’t level, apply a self-leveling compound—carefully following manufacturer instructions—to create a flat, stable surface. As I experienced during a recent renovation, neglecting proper leveling led to cracked tiles and uneven seams, costing time and money. For detailed leveling techniques, visit Mastering Floor Leveling.
Select and Prepare Your Hardwood Carefully
Choose high-quality Brazilian Cherry planks from reputable suppliers. Let the planks acclimate in the installation area for at least 72 hours to prevent post-installation expansion or contraction. When laying out the planks, arrange them in a random pattern to avoid noticeable grain matches, enhancing the natural variation that makes Brazilian Cherry so attractive. During installation, stagger the end joints by at least 6 inches, similar to how bricks are stacked, to strengthen the floor’s structural integrity. I once tried laying planks out of order—resulting in a pattern that looked mismatched and amateurish. Attention to detail here pays off.
Use Proper Tools and Techniques for Installation
Employ a glue-down method with a high-quality adhesive designed for hardwood floors. Spread the adhesive evenly with a notched trowel, ensuring consistent thickness—about 1/8 inch—to prevent telegraphing or hollow spots. Use a pushing block and tapping block to fit planks tightly together, minimizing gaps. A good tip I learned: avoid standing directly on the newly laid planks until the adhesive cures, usually 24-48 hours. During a recent project, I used a rubber mallet and tapping block together, which significantly improved seam tightness.
Embrace the Color Shifts
Brazilian Cherry is notorious for its dynamic color changes as it oxidizes and reacts with light. To manage this, choose a durable, UV-resistant finish—like a penetrating oil or a satin polyurethane—that slows down rapid color shifts. Apply thin, even coats with a lambswool applicator or sprayer, following the grain direction. I once mistakenly applied a thick coat, which caused uneven gloss and exaggerated color variations. Regularly evaluate the finish in different lighting conditions to ensure consistency. For finishing tips, see Refinishing Expert Tips.
Control Moisture and Light After Installation
Post-installation, manage environmental factors diligently. Use dehumidifiers or air conditioners to maintain a consistent humidity level around 40-50%. Light exposure accelerates color changes—so install UV-filtering window treatments to protect the flooring. During one installation, neglecting light control led to uneven darkening, with some planks turning redder than others. This experience taught me the importance of ongoing care in preserving the aesthetic. Also, avoid excessive moisture exposure, which can cause swelling or cupping—review hardwood floor care secrets for more guidance.Many homeowners and even some professionals fall prey to misconceptions about flooring installation, which can lead to costly mistakes and subpar results. One prevalent myth is that leveling the subfloor is always an optional step. In reality, overlooking proper leveling can cause uneven surfaces, cracked tiles, and squeaky floors down the line, especially when installing large-format tiles or hardwood. As I often advise, meticulous preparation, including precise subfloor leveling, is essential for achieving a seamless finish. For comprehensive techniques, visit Mastering Floor Leveling.
Maintaining beautiful and durable floors requires more than just careful installation; it demands the right tools, regular upkeep, and strategic long-term planning. Over years of hands-on experience in flooring projects, I’ve discovered that investing in quality equipment not only simplifies the maintenance process but also extends your floors’ lifespan. One essential tool I recommend is a moisture meter. Consistent moisture levels are vital for hardwood longevity, as fluctuations can cause swelling or cupping. I personally prefer the Protimeter Surveymaster because of its durability and ease of use. Regularly checking the subfloor and environment with such devices can help you catch potential issues before they escalate. For detailed guidance on preserving your hardwoods, visit hardwood floor care secrets.
For ongoing cleaning, a microfiber dust mop combined with a gentle wood floor cleaner minimizes scratches and maintains shine without harsh chemicals. I steer clear of steam mops, as their excessive heat and moisture risk damaging the wood over time. Instead, I prefer a damp microfiber cloth for spot cleaning and a dry mop for routine dusting. If you have tiled surfaces, investing in an oscillating multi-tool allows precise grout and tile upkeep, saving you from costly repairs down the line. These tools are versatile, allowing for detailed work that standard equipment can’t match. For professional tips on tile maintenance, see tile maintenance tips.
How do I maintain my floors after installation to ensure they last for decades?
Establishing a controlled environment is critical. Maintaining indoor humidity between 40-50% prevents wood from expanding or contracting. Installing UV-filtering window treatments helps slow oxidation-induced color changes and prevents fading or discoloration of your hardwood floors. Additionally, scheduling annual inspections can identify issues like loose tiles or worn finishes early. Regular refinishing using high-quality products, like the UV-resistant finishes I trust, can rejuvenate worn surfaces and keep them looking their best. As the trend toward sustainable and long-lasting materials continues, selecting finishes and maintenance methods that prioritize durability will become even more essential.
Furthermore, tools like an orbital sander with fine-grit sandpaper become invaluable when you need to touch up scratches or uneven areas without a full refinish. For tile floors, a grout pen can restore color and prevent staining, maintaining that fresh look. Looking ahead, the integration of smart sensors in flooring—monitoring humidity, temperature, and wear—might revolutionize how we care for floors, providing proactive alerts before damage occurs. Embracing these advancements can help homeowners and professionals alike keep their floors in pristine condition for years to come.
Practicing meticulous maintenance enables your investments in high-quality flooring to pay off long term. Don’t hesitate to test out a blue or UV-resistant finish on a small area first; this way, you can see how it interacts with your specific flooring material before committing to a full application. Remember, consistent care is the key to lasting beauty, so equip yourself with the right tools and knowledge. For more expert advice on long-term flooring maintenance, check out hardwood floor care secrets.
The Surprising Lessons Hidden Beneath My Floor
- One of the biggest insights I gained was that natural wood’s beauty lies in its unpredictability. Embracing the inevitable color shifts rather than fighting them turned what seemed like a flaw into a feature, enriching the character of my floors and highlighting the uniqueness of Brazilian Cherry.
- I’ve learned that meticulous preparation, especially in subfloor leveling and moisture management, makes all the difference. Skipping these steps may seem easier initially, but it often leads to long-term issues that overshadow short-term convenience, as I experienced firsthand.
- Investing in high-quality finishing materials and techniques can dramatically influence the durability and appearance of your hardwood floors. A thin, UV-resistant finish is your best friend in slowing oxidation and maintaining color harmony over years.
My Toolbox of Trusted Resources
- Hardwood Floor Care Secrets — This resource offers invaluable tips on maintaining and prolonging the life of your Brazilian Cherry floors. I trust their expertise because they’ve helped me anticipate and prevent common issues.
- Mastering Floor Leveling — Achieving a perfectly flat subfloor is foundational. Their straightforward guides and professional insights significantly improved my installation process, saving me time and headaches.
- Refinishing Tips for 2025 — When my floors needed a refresh, this guide provided the latest techniques and product recommendations to restore and enhance their appearance without unnecessary sanding or full refinishing.
Your Floors, Your Story
Creating beautiful, lasting wood floors is both an art and a science. With patience, proper planning, and a willingness to embrace the natural evolution of Brazilian Cherry, you can craft a stunning, dynamic space that tells your personal story. Don’t let fear of change hold you back—accept the character that time and light will bring, making your floors uniquely yours.
What challenges have you faced with hardwood floor color changes or installation? Share your experiences below—I’d love to hear your journey toward creating the perfect floor!