
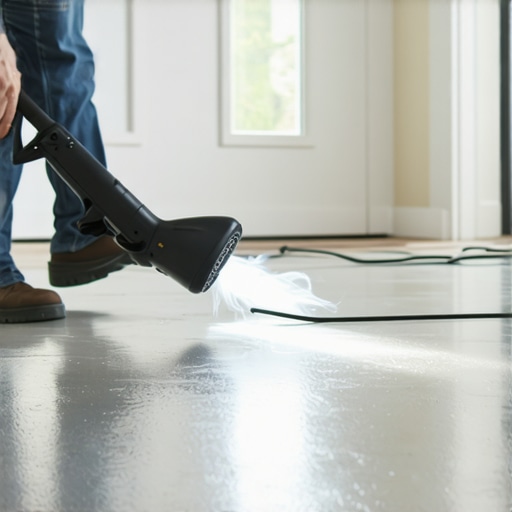
I remember the moment vividly—standing in my living room, eyes fixed on a tiny, stubborn dent in my vinyl floor that refused to flatten out. I had just finished a DIY flooring project and was feeling proud of my work, until that pesky dent appeared. It was like an itch I couldn’t scratch. No matter how many times I tried to flatten it with a heavy book or tap it down, it wouldn’t budge. That’s when I had my lightbulb moment: could a simple hairdryer do the trick?
Why a Hairdryer Could Be Your Secret Weapon for Vinyl Dents
After some quick research and a bit of trial and error, I discovered that using a hairdryer to fix small dents in vinyl flooring isn’t just a quirky hack—it’s a proven technique with real results. The heat softens the material just enough to allow the dent to rise back to level. Plus, it’s a safe, inexpensive, and accessible method that I can’t recommend enough for minor imperfections. Best of all, it’s gentle enough not to damage your flooring if done correctly. Want to see how I managed to turn my dented floor into a seamless surface? Keep reading, and I’ll guide you step-by-step.
Is the Hairdryer Method Really Effective, or Just a Myth?
I’ll be honest—I was skeptical at first. I’d made my fair share of flooring mistakes early on, like using the wrong adhesive or ignoring subfloor prep, which only complicated the problems. My mistake? Assuming every dent or bubble was a major repair. The truth is, for tiny dents and bubbles, applying controlled heat can do wonders. I found that the key isn’t just blasting heat blindly—it’s using the right temperature and patience. Need more tips? Check out some expert advice on flooring installation and leveling. Now, let’s get into how I perfected this method and how you can do it too—without turning your living room into a sauna.
Getting the Perfect Level with Heat
Start by cleaning the dented area thoroughly to remove dust and debris, ensuring the heat penetrates evenly. Next, set your hairdryer to a medium-high heat setting—think of it as warming up a sweater before stretching it. Hold the dryer about 6 inches above the dent and move it in small circles, maintaining consistent motion to prevent overheating. Use a fast, sweeping motion for about 30 seconds, watching the vinyl soften. During this process, I once accidentally held the dryer too close, causing the vinyl to bubble—lesson learned: keep the distance steady!
Applying Controlled Pressure
Once the vinyl is warm and pliable, gently press with a clean cloth or a soft rubber spatula to encourage the dent to flatten out. Imagine smoothing out a soft clay sculpture—gentle but firm pressure helps reshape the material effectively. I pressed down slowly and evenly, and within a few seconds, the dent began to rise. If needed, reapply heat in short bursts—avoiding prolonged exposure to prevent thermal damage. This step is crucial: patience and gentle force yield the best results, much like adjusting a delicate piece of furniture.
Cooling and Securing the Finish
Allow the vinyl to cool naturally, which helps set the material back into its original shape. To speed up cooling, you can press a cool, damp cloth over the area—think of it as giving a hot object an ice pack. I once applied a cold towel and watched the vinyl firm up perfectly, sealing the repair. For minor imperfections, this process restores the surface seamlessly. It’s similar to how a fresh coat of paint dries faster and adheres better when cooled gradually. When the area is cool and set, inspect the repair; if a slight indentation remains, repeat the heating and pressing steps. This simple technique works best for small dents and can save you from costly replacements, especially when combined with expert tips found on floor leveling guides.Many homeowners believe that achieving a perfectly level floor or flawless tile layout is solely a matter of following basic steps. However, even seasoned DIY enthusiasts often fall prey to nuanced mistakes that compromise long-term durability and aesthetic appeal. One widespread misconception is that a perfectly flat subfloor isn’t critical for tile success—contrary to expert advice, which emphasizes that unnoticed high spots or dips can lead to grout cracking and tiles cracking over time. According to industry standards outlined in flooring installation mistakes to avoid, precise subfloor prep is essential for a seamless finish.
Another misbelief revolves around the use of self-leveling compounds. Many assume that pouring a large batch guarantees a perfectly smooth surface without additional surface prep. In my experience, this leads to trapped air bubbles and unevenness that only surface grinding or patching can fix—a costly and time-consuming mistake. For expert insights, check out the ultimate guide to floor leveling.
When it comes to hardwood floors, a common myth is that acclimation is unnecessary if the flooring was stored in the same climate as the installation site. Advanced practitioners know that failing to properly acclimate wood can cause cupping or gapping months later. I recommend reading about proper acclimation techniques at choosing the right hardwood floors.
Don’t fall into the trap of underestimating moisture levels. Many assume that the moisture barrier beneath tile or wood is optional, but moisture issues are a leading cause of floor failure. Utilizing proper moisture testing and barrier systems is crucial. Studies, like those from the Building Science Corporation, confirm that poor moisture management causes more than 40% of flooring issues in new constructions.
Finally, advanced installers understand that tile layout planning isn’t just about aesthetics but also about layout efficiency and minimizing cuts. An overlooked detail is that improper layout can result in uneven grout lines and compromised integrity. For expert tips, see innovative tile designs.
Have you ever fallen into this trap? Let me know in the comments! Remember, mastering these nuances can save you time, money, and frustration—even if you think you know the basics.
Investing in the Right Equipment for Longevity
Choosing the appropriate tools is crucial to maintaining high-quality flooring installations over time. I personally rely on a high-precision laser level, such as the Bosch GSL 2 Professional, because it’s durable, easy to calibrate, and provides consistent accuracy for long-term projects. This tool ensures that tiles and hardwood planks stay perfectly aligned, reducing the need for repairs down the line. For subfloor assessments, I use a Penny Test combined with a specialized high-spot detector to identify irregularities that could compromise your floor’s durability.
Software That Enhances Precision and Planning
In today’s digital age, I recommend leveraging software like AutoCAD or RoomSketcher to create detailed layouts before starting any installation. These programs help spot potential issues related to spacing, transition points, and material estimates early on. By plotting your blueprint digitally, you can predict problem areas and avoid costly adjustments later. For hardwood flooring projects, I particularly trust this guide to selecting the best hardwood that minimizes maintenance and maximizes longevity, especially when combined with careful planning using these design tools.
Regular Maintenance Protects Long-Term Results
Maintaining your flooring isn’t just about aesthetics; it’s about protecting your investment. Routine cleaning with a damp microfiber mop helps prevent dirt buildup that can scratch surfaces. For hardwood floors, applying a quality finish like polyurethane every few years preserves their shine and resistance to wear. I also advocate for periodic inspections of grout lines or seams, re-silicon or re-grout where necessary, using expert techniques found in this article to prevent moisture infiltration and deterioration.
How do I maintain flooring systems over the long haul?
Consistent upkeep starts with understanding the unique needs of your material—whether vinyl, tile, or hardwood. Implementing a scheduled routine, combined with the right tools and products, ensures your floors remain functional and beautiful for decades. For instance, using a specialized cleaner designed for your flooring type and avoiding harsh chemicals will extend its life. I recommend setting up a maintenance schedule with reminders and keeping essential tools like a small hand scraper, gentle cleaning solutions, and a moisture meter handy at all times.
Looking ahead, I believe this trend of integrating smart tools and digital planning into flooring maintenance will continue to grow. Innovations such as app-controlled moisture sensors or automated floor inspection drones might become mainstream, offering homeowners and contractors unprecedented control over their projects’ durability and appearance. To get started today, try incorporating a professional-grade laser level into your next project—it’s a game changer for precision and long-term quality.
If you’re eager to elevate your flooring game, don’t hesitate to experiment with advanced tools like the Bosch GSL 2 or planning software. These investments will pay off in reduced errors, faster installations, and floors that stand the test of time.
Secrets the Pros Keep About Perfect Flooring
One of the most transformative lessons I learned was the importance of meticulous subfloor prep—skipping this step might save time upfront but causes long-term headaches like cracked tiles or uneven hardwood. Another eye-opener was realizing that not all leveling compounds are equal; choosing the wrong type can lead to bond failures that ruin months of work. Regularly, I underestimated the subtle effects of moisture, which caused wood floors to cupp or tiles to delaminate over time—testing and barriers are your allies here. Lastly, envisioning every project as a chance to learn has made me more cautious and detail-oriented, leading to flawless finishes that last for decades.