
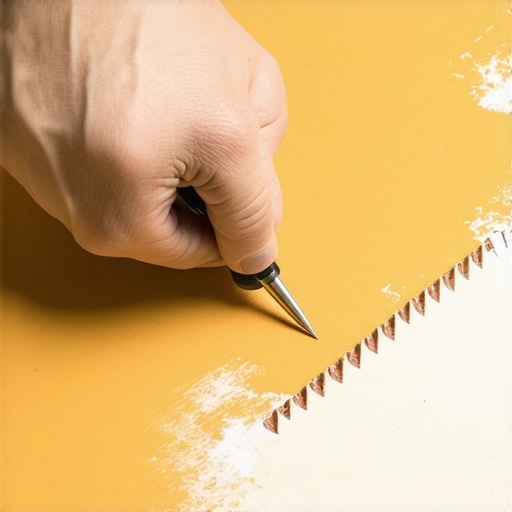
It was one of those frustrating mornings where nothing seemed to go right. I was in a rush to finish a flooring project, meticulously measuring and marking the casing for precise notches. But every cut felt like a gamble—especially when trying to get those perfect edges without splintering or uneven lines. I remember thinking, “There has to be a smarter way.” That’s when I stumbled upon a simple painter’s tape hack that changed my approach entirely. Instead of relentless trial and error, I started using painter’s tape as a guide for my saw blade. The results? Clean, accurate notches with half the effort.
A Problem Many of Us Know Too Well
Anyone who’s ever installed baseboards or casings understands the hassle. Achieving those flawless cuts isn’t just about steady hands; it’s also about having the right technique. In my early days, I often made mistakes—splintered wood, uneven notches, and countless wasted materials. It felt like an endless battle between my saw and my patience.
What I needed was a method that would hold my saw steady, prevent splintering, and guide my cut precisely along the line. That’s when I tried taping the area before cutting. The simple act of applying painter’s tape along the marked line transformed my workflow. The tape acts as a barrier that prevents splinters and helps the saw follow a straight path. Plus, it’s easy to see exactly where I need to cut. My confidence soaring, I tackled notches in tight corners and awkward angles with newfound ease.
But does this trick really hold up? Or is it just another passing hack? Well, I’ve tested it over several projects, and I can confidently say that this technique has become a staple in my toolkit. The best part? It’s inexpensive, quick, and adaptable for various types of cuts.
In this post, I’ll walk you through how to implement this painter’s tape hack and ensure your casing notches are nothing short of perfect. Trust me, once you give this a try, you’ll wonder why you ever cut without it.
Feel like you’ve faced the same frustrations? Keep reading—I have a feeling this simple trick might just save your next project. And if you’re interested in mastering other flooring techniques, check out this comprehensive guide on [floor leveling](https://tiletrendshop.com/the-ultimate-guide-to-floor-leveling-for-a-perfect-finish) to help you achieve flawless surfaces every time.
Secure Your Notch Line with Painter’s Tape
In my recent flooring project, I faced the challenge of making tight, clean notches for the casing, especially in a cramped corner. I first measured and marked the line thoroughly. Then, I applied painter’s tape along the entire marked line, pressing it down firmly to prevent any bubbles. This tape acts as a shield, guiding the saw and preventing splinters. I recommend two layers for extra durability, especially on hardwoods with grain patterns prone to splintering.
Prepare Your Saw for Accurate Cuts
Using a fine-tooth blade suited for your material is crucial. For hardwoods, a blade with 60-80 teeth offers smoother cuts. I set my saw to a shallow depth, slightly more than the thickness of the piece, reducing tear-out and ensuring tight notches. Before starting, I made a quick test cut on scrap to confirm the blade height and angle, which saved me from costly mistakes during the actual cut.
Align the Saw with Confidence
Position your saw blade within the gap of the tape line. Keep your hands steady and guide the saw along the edge of the tape, maintaining a consistent speed. My first attempt was a bit wobbly, but I corrected my grip and focused on the guide line. This control is vital—imagine trying to carve a delicate sculpture but with a saw; patience and a steady hand make all the difference.
Follow Through the Cut without Force
Begin the cut slowly, letting the saw’s weight do the work. Pushing too hard can cause the blade to veer off or splinter the wood. I found that maintaining a smooth, steady pace resulted in a clean notch. After completing the cut, I gently lifted the saw and removed the tape. The result? Perfectly notched casing edges, ready for installation without any chipping or unevenness.
Finish and Inspect the Notch
Use a small chisel or sandpaper to smooth out any minor roughness along the edges. The painter’s tape ensures minimal splintering, but a quick finish helps achieve a polished look. Checking the fit of your casing reveals whether further adjustments are needed. This simple, methodical approach saved me hours of sanding and re-cuts, proving that a straightforward technique can yield professional results.
Practicing this method on scrap before tackling your actual project can build confidence. Remember, the key is in the preparation—precise markings, appropriate tape application, suitable saw setup, and controlled cutting. Once mastered, this technique becomes invaluable for any flooring or casing notching, ensuring your edges are flawless every time.
While many DIY enthusiasts focus on the basics of tile and hardwood installation, there’s often a hidden layer of subtle pitfalls and misconceptions that can undermine even experienced professionals. One prevalent myth is that following industry standards alone guarantees success; in reality, understanding the *nuances* can set your work apart.
Myth of Perfectly Flat Subfloors. Many assume that if a subfloor appears level to the naked eye, it’s ready for flooring. However, small high spots or dips invisible to the eye can cause tiles to crack or hardwood planks to squeak over time. Engaging in detailed testing like the floor leveling process ensures a truly flat surface, preventing future headaches.
Another common misconception is that all hardwood finishes are equally durable. In fact, choosing the wrong finish or neglecting proper maintenance can significantly shorten your floor’s lifespan. Reading about the hardwood floor care secrets can help extend your investment’s life.
Are Standard Trowel Sizes Enough for Heavy Porcelain?
Many installers rely on universal trowel sizes, thinking they suit all tile types. Yet, for heavy porcelain slabs, a larger notched trowel provides better adhesion and reduces lippage — a detail that experts swear by. Neglecting this detail could lead to uneven surfaces or tiles popping up. For advanced techniques, consult this guide to improve your installation quality.
Finally, it’s tempting to underestimate the importance of precise measurements during floor leveling. Small errors compound, resulting in noticeable imperfections in the finished floor. The techniques for flawless leveling reveal how meticulous prep work pays off in professional-looking results.
Remember, these nuanced details often separate amateurish results from truly professional flooring. Have you ever fallen into this trap? Let me know in the comments and share your experiences—your insights could help others avoid costly mistakes and achieve stunning results.Maintaining your flooring tools and understanding proper upkeep are critical for ensuring longevity and flawless results in your projects. High-quality tools are investments that pay off through precise cuts and consistent performance over time. For example, I personally rely on a **Festool CTS 26** circular saw because of its precision, ergonomic design, and dust extraction system, which significantly reduces cleanup time and keeps my workspace healthier. Selecting the right accessories for your tools—like a fine-tooth blade specifically suited for hardwood—can dramatically improve your cutting accuracy and reduce splintering, ultimately saving you time and materials.
Regular maintenance of your tools extends their lifespan and maintains their performance. This means cleaning blades after each use, lubricating moving parts as per manufacturer recommendations, and periodically inspecting power cords for wear. For power saws, I invest in a **Bosch Blade Brush** to remove resin buildup, ensuring clean, sharp cuts every time. When it comes to leveling floors, employing a **laser level** has become indispensable. I recommend the **DeWalt Line Laser** because it provides bright, accurate vertical and horizontal lines—crucial for achieving a perfectly level surface, especially when dealing with uneven subfloors.
Adapting to technological advancements, software tools like **Flooring Management Apps** are gaining popularity. These apps help track maintenance schedules, inventory, and project progress, making it easier to stay organized. Looking ahead, I predict that smart, IoT-enabled tools embedded with sensors will become the norm, providing real-time health diagnostics and maintenance alerts, much like smart home systems.
How do I keep my flooring tools in top shape over time?
Implement a routine maintenance schedule that includes cleaning blades, lubricating joints, and inspecting electrical cords. For power tools, use manufacturer-specific cleaning kits and replacement parts—skimping here risks costly breakdowns. Storing your tools in a dry, temperature-controlled environment also prevents rust and degradation. Regularly calibrate laser levels and measure devices to ensure ongoing precision. For long-term results, consider investing in a **wet-dry vacuum** with HEPA filters; I use the **RIDGID Wet Dry Vac** which efficiently clears dust and debris, maintaining a cleaner work environment and better tool performance. Moreover, keeping spare blades, bits, and accessories on hand minimizes downtime during projects.
Looking forward, the trend in tool maintenance is moving toward automation, with robotic systems capable of recalibrating and cleaning themselves. Staying updated on these innovations can keep your setup cutting-edge and reliable.
Would you like to learn more about effective floor leveling techniques? Check out this comprehensive guide to keep your surfaces perfectly even. As an advanced tip, I recommend regularly testing your laser level with a calibration cube to ensure ongoing accuracy—this small step can prevent significant issues down the line. Give it a try on your next project, and notice the difference in project quality and efficiency.
The Hidden Truths That Changed My Flooring Approach
One of the toughest lessons I learned was that no matter how perfect your measurements are, a small oversight can lead to a less-than-perfect finish. The painter’s tape hack taught me that sometimes, simplicity trumps complexity—trusting a tape guide over fancy tools can make all the difference. Another revelation was that patience during the cut—allowing the saw to do its job without forcing it—results in cleaner, more precise notches. Finally, I realized that investing time in tool maintenance, like cleaning blades and calibrating laser levels, pays off with consistently professional results, turning a basic project into a showcase of craftsmanship.
Tools and Resources That Elevate My Craft
For anyone serious about flooring, I swear by the Pro Secrets for Perfect Installations. It offers detailed techniques that I’ve adopted to ensure every project starts with a level foundation. My go-to cutting tool is the precision blade set, which provides smooth, splinter-free cuts—indispensable for clean notches. When preparing the workspace, nothing beats the reliability of my high-quality dust vacuum; it keeps the area tidy and my tools working optimally. For leveling, I trust the ultimate floor-leveler for its ease of use and flawless finish, saving time and headaches.
Inspiring You to Elevate Your Flooring Skills
Remember, the journey to flawless flooring is a blend of patience, knowledge, and the willingness to try new techniques. Each project is an opportunity to refine your skills and learn from mistakes. I encourage you to experiment with simple hacks like painter’s tape for notches and to maintain your tools diligently. Your craftsmanship will shine through in the final result, making your space not just beautiful, but a true reflection of your effort. So, go ahead—start that next project with confidence, and watch your skills soar. Have you ever faced a flooring challenge that taught you an invaluable lesson? Share your story below, and let’s learn together.