
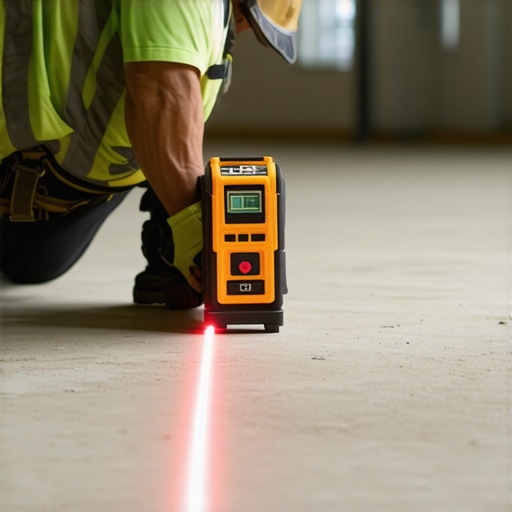
I remember the exact moment I realized I had made a rookie mistake during my flooring project. I was eager to achieve that sleek, open-concept look everyone raves about. Armed with my laser level, I confidently marked the floor, thinking I was on the right track. But when I started laying the tiles, a subtle, yet persistent unevenness became glaringly obvious. It wasn’t just an aesthetic hiccup—it disrupted the entire flow of the space, and I knew I’d have to redo sections, adding extra time and frustration.
The Crystal Clear Why Behind Why Laser Level Mistakes Ruin Your Flooring Plans
What went wrong? It turns out, that seemingly tiny mistake with aligning the laser level can snowball into a major problem—one that can distort the beautiful, seamless look of your open concept flooring. When your laser isn’t properly calibrated or has shifted, it leads to uneven lines and misaligned tiles or planks. Over time, this creates a visual jarring that defeats the purpose of a spacious, airy layout.
I share this story not to scare you but to help you dodge the same pitfall I fell into early on. The truth is, many DIYers and pros alike underestimate how critical proper laser level setup is. That mistake can compromise the entire project, making the floors look crooked or disjointed. And trust me, correcting it later is not only laborious but also costly.
In this post, I promise to guide you through the exact steps to avoid this costly mistake. We’ll explore how to verify your laser level’s accuracy, keep it calibrated, and ensure the perfect flow for your open concept flooring installation. Because no one wants that awkward, uneven stretch of tiles disrupting their beautiful space.
Is a Slight Laser Misalignment Really That Big of a Deal?
Early in my journey, I thought minor deviations wouldn’t matter much—until I walked into a room where the lines just didn’t match up, even by a fraction. Turns out, even small errors can lead to a domino effect, causing tiles or flooring planks to appear crooked or uneven. According to flooring expert advice, precise laser setup is essential for achieving professional-looking results that enhance your space, not detract from it. For a closer look at the common pitfalls and how to avoid them, check out this comprehensive guide on [floor leveling challenges](https://tiletrendshop.com/floor-leveling-challenges-common-mistakes-and-how-to-avoid-them).
Now that we’ve established why mastering your laser level is a game-changer, let’s dive into the practical steps to ensure your floors flow seamlessly from wall to wall, supporting the open concept you’re aiming for.
Calibrate Your Laser Level Before You Start
Think of your laser level as the foundation of your entire flooring project—if it’s off, everything else will follow suit. During my first big project, I skipped calibration and ended up with a crooked floor that took extra hours to fix. To avoid my mistake, I placed my laser on a stable surface, then used a trusted calibration kit. I adjusted until it read perfectly level by comparing it against a bubble level at various points. This initial step ensures your laser’s readings are accurate, preventing misaligned tiles or planks down the line.
Keep Your Laser Level Secure and Stable
Imagine trying to walk a straight line with a wobbly ruler—impossible, right? The same applies to your laser level. During installation, I used tripods and clamps to hold my laser steady on a flat, vibration-free surface. I avoided holding it in my hand or placing it on unstable furniture. Securing your device prevents shifts that cause misalignment, especially in large rooms where even minor tilts can cause big issues.
Check for External Interferences
Bright sunlight or reflective surfaces can cause your laser lines to appear faint or distorted. Once, I ignored reflective floors and the laser line was barely visible, leading me to double-check my work repeatedly. To mitigate this, I draped a cloth over reflective surfaces or used a laser detector outdoors or in sunlight. Ensuring consistent visibility means you can accurately follow the laser guide without guesswork.
Continuously Verify Laser Alignment as You Work
Just like a painter periodically steps back to check their work, you should verify your laser level’s alignment regularly. In a recent project, I set up markers along the room’s length, then periodically checked that the laser line matched these reference points. If I noticed any discrepancies, I adjusted the laser slightly. This ongoing verification is crucial for maintaining straight lines, especially during lengthy installations.
Use the Laser Level on Multiple Elevations
Floors are rarely perfectly flat; they often have dips and rises. During my last installation, I moved the laser from the main floor to the doorway threshold to ensure consistent height. I checked the laser beam against different spots and adjusted as needed. This technique ensures that tiles and planks will align seamlessly across varying elevations, maintaining that open, flowing look.
Document and Adjust for Room Variations
Some rooms have uneven subfloors or slight slopes. In such cases, I marked high and low points with chalk, then adjusted the laser to a median level, focusing on the most critical areas. For complex layouts, using a laser with built-in leveling capabilities or additional external sensors can save time and increase accuracy. Properly accounting for room variations ensures your flooring remains flat and visually perfect.
Align Your Final Rows Carefully
When laying the last few rows, I double-checked the laser line’s consistency. Sometimes, slight shifts become more noticeable at the edges. Using a straightedge or long level along the laser line helps verify you’re still on track. This precision is especially vital for large-format tiles or hardwood planks, where even minor misalignments can be obvious and distracting.
Many homeowners and even seasoned DIYers assume that following basic guidelines guarantees a perfect finish, but beneath the surface lie nuanced mistakes that can undermine your entire project. One common misconception is that all flooring materials are interchangeable when it comes to leveling and installation techniques. In reality, hardwood floors require a different approach than tile or luxury vinyl planks. For example, attempting to apply the same leveling process used for tile to hardwood can cause gaps, squeaks, or uneven surfaces, especially if the subfloor isn’t properly prepared or if moisture levels vary. To ensure your floors lay smoothly and last decades, it’s crucial to understand these subtle differences and adapt your methods accordingly. For advanced insight on installing various floor types, check out this comprehensive guide on [flooring installation fundamentals](https://tiletrendshop.com/flooring-installation-fundamentals-leveling-for-a-seamless-look).
Another often overlooked factor is the myth that a perfectly flat subfloor isn’t essential for hardwood. Many believe that minor imperfections will settle over time or that they don’t significantly impact the appearance. However, these small dips and rises can lead to squeaking, board gaps, or even buckling, especially in high-humidity environments. Using precise techniques such as the rake method or laser-guided leveling can prevent these issues early on. Remember, the devil is in the details, and catching irregularities at this stage saves you from costly repairs later.
Now, let’s confront a prevalent myth about hardwood floors—many think that darker stains are more forgiving of imperfections and scratches. This is a misconception. In fact, darker finishes tend to highlight imperfections, dust, and scratches more prominently, demanding greater precision during installation and finishing. Opting for a light or medium stain can provide a forgiving surface that masks minor flaws, while still maintaining aesthetic appeal. For maintaining longevity and shine, explore expert [hardwood floor care secrets](https://tiletrendshop.com/hardwood-floor-care-secrets-to-longevity-and-shine).
The trap to avoid here is neglecting the importance of meticulous subfloor preparation and understanding material-specific nuances. Skipping proper acclimation can also cause expansion or contraction issues post-installation. For example, engineered hardwood needs time to adjust to the local humidity levels, or it may buckle after a few months. Curious about advanced techniques? Dive into [installing tiles like a pro](https://tiletrendshop.com/installing-tiles-like-a-pro-step-by-step-strategies-for-2025) for detailed strategies that apply across different materials.
Finally, consider the hidden nuance of environmental factors—improper acclimation or fluctuating humidity levels are often the silent culprits of costly flooring defects. A study by the National Wood Flooring Association emphasizes that acclimation reduces the risk of board movement and warping. Always allow your flooring material to equilibrate in your space for the manufacturer’s recommended time before installation, especially in climates with significant seasonal variations.
Have you ever fallen into this trap? Let me know in the comments how you navigated or avoided these common pitfalls, and share your tips for mastering the art of perfect flooring. Remember, paying attention to these subtle details distinguishes a good job from a professional masterpiece.
To keep your flooring projects looking pristine and performing optimally over time, investing in the right tools and adopting disciplined maintenance routines is crucial. From advanced leveling compounds to specialized cleaners, the equipment you choose can significantly impact the durability and appearance of your floors. One of my favorite investments is a high-quality laser level, which ensures ongoing precision during installation and even for future repairs. Unlike basic bubble levels, a laser level with self-leveling capabilities, such as the DeWalt DLPT01, provides a reliable, consistent line that remains accurate over longer distances, making it indispensable for large rooms or multi-level renovations.
How do I maintain my flooring over time?
Regular cleaning combined with preventive measures extends the life of hardwood and tiled surfaces. For hardwood floors, I prioritize implementing a comprehensive cleaning regimen using a microfibre mop and pH-neutral cleaner, such as the hardwood floor care secrets, to prevent buildup of debris and avoid scratches. For tiles, sealing grout lines periodically using a high-quality grout sealer ensures they remain resistant to staining and moisture ingress. Additionally, using protective pads under furniture and area rugs can prevent dents and scratches, preserving the floors’ aesthetic appeal.
Why is floor leveling so essential for long-term results?
Uneven subfloors are a common source of ongoing problems, from squeaking to cracked tiles. To combat this, I rely on tools like the rake method with self-leveling compounds, which allows me to achieve a seamlessly flat foundation before laying down hardwood or tile. This process not only enhances the visual appeal but also prevents future structural issues. For complex or uneven surfaces, I recommend consulting professional-grade leveling systems that utilize laser-guided technology for pinpoint accuracy, providing peace of mind that your floors will stand the test of time.
Scaling your flooring work efficiently involves more than just the right tools
Efficiency in ongoing maintenance and future projects depends on methodical organization and the right software. Digital tools like PlanGrid or Trello help track maintenance schedules, document floor conditions, and plan updates, which is especially vital for larger properties or commercial spaces. Furthermore, adopting modular flooring systems that can be easily replaced or updated allows for scalable upgrades without complete demolition. As the trend shifts towards sustainable and adaptable flooring solutions, choosing materials and methods that support easy maintenance and upgrades will become increasingly important.
Mastering the art of repair comes from understanding your materials
One often overlooked aspect is knowing exactly when and how to repair versus replace. For instance, in hardwood flooring, minor scratches can often be buffed out or touched up with stain pens, whereas deeper gouges may require partial replacement. Tile cracks can sometimes be fixed with epoxy injections if caught early, avoiding complete removal. Maintaining a well-stocked repair kit tailored to your flooring type, including tools like a diamond-edged saw for refinishing or a grout removal tool, empowers you to handle minor issues before they escalate, saving significant time and money.
Future trends in flooring maintenance and installation
Looking ahead, innovations like smart sensors embedded in subfloors could monitor moisture levels and structural shifts, alerting homeowners to potential issues before visible damage occurs. Additionally, AI-based maintenance scheduling integrated with IoT devices will simplify long-term care, ensuring floors remain in top condition with minimal manual effort. Embracing these technologies now can position you at the forefront of efficient, sustainable flooring management.
When implementing any of these advanced maintenance tips, I highly recommend testing techniques such as the precise floor leveling methods to ensure your bases are solid. Take a proactive approach today by investing in tools that support your ongoing maintenance, and you’ll enjoy beautiful, durable floors for decades to come.
Lessons I Wish I Learned Sooner About Perfect Flooring
- Misjudging the importance of calibration was a costly oversight in my early projects; ensuring my laser level was perfectly calibrated before starting can save hours of frustration.
- Underestimating the impact of external interferences like bright sunlight or reflective surfaces resulted in confusing lines and uneven floors—testing your line visibility beforehand is crucial.
- Ignoring room-specific variations, such as dips or slopes, led to misaligned tiles and squeaky hardwood over time; adapting your leveling approach to room conditions makes all the difference.
- Thinking that small misalignments don’t matter turned out to be a false economy—little errors compound, making a big difference in the final look.
Tools and Resources That Accelerated My Flooring Success
- DeWalt DLPT01 Laser Level: Its self-leveling accuracy and durability help maintain consistent lines, especially in large or complex spaces.
- Self-leveling compounds from [Flooring Installation Fundamentals](https://tiletrendshop.com/flooring-installation-fundamentals-leveling-for-a-seamless-look): They ensure a perfectly flat subfloor, reducing long-term issues like squeaks or cracks.
- Leveling kits and calibration tools: Like my trusted calibration kit, these help verify your laser’s accuracy before and during the project, saving time and material.
- Expert guides and tutorials on [installing tiles like a pro](https://tiletrendshop.com/installing-tiles-like-a-pro-step-by-step-strategies-for-2025): They provide nuanced techniques tailored for different flooring types, ensuring a professional finish.
Step Into Your Flooring Future with Confidence
Transforming your living space with flawless flooring is a journey filled with lessons and personal growth. Each project offers a chance to refine your skills, recognize subtle details, and embrace innovative techniques. Remember, the difference between good and extraordinary lies in your attention to detail and willingness to learn from every experience. So start your next flooring adventure today with confidence—your beautiful, level floors are waiting to reflect the effort you put in. Share your progress or challenges below, and let’s learn from each other’s stories.