
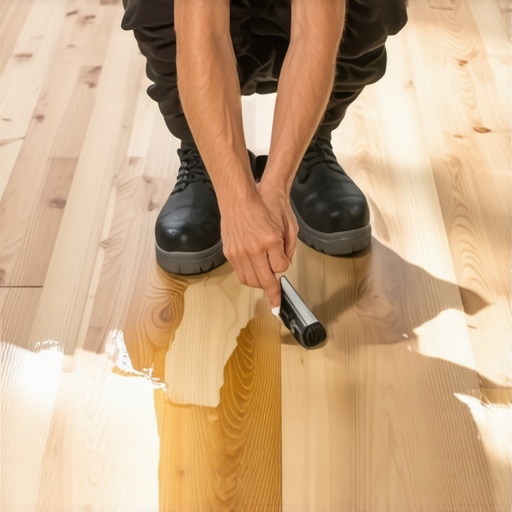
It was late one evening when I stepped into my living room and noticed a dark, wet patch spreading across my previously pristine hardwood floor. My heart sank. I had just finished restoring that floor, and now, water damage threatened to undo weeks of careful work. The immediate thought was: Do I have to tear out this beautiful plank and start over? Fortunately, I discovered that with the right techniques, I could save that water-damaged hardwood without ripping it up. That lightbulb moment changed how I approach water issues in floors and can do the same for you.
Reviving Water-Logged Hardwood Planks Without Demolition
Could Your Hardwood Floor Still Be Salvageable?
Many homeowners believe water damage automatically means replacement. But, surprisingly, a lot depends on how quickly you respond and the methods you choose. Early intervention can prevent costly repairs and maintain the aesthetic integrity of your floors. I learned this early on after making a critical mistake—ignoring minor spills and allowing water to sit. That oversight led to more extensive warping than necessary, and I realized that immediate action is essential to prevent irreparable damage. For best practices, check out hardwood floor care secrets for tips on maintenance and emergency repair. Today, I want to share how you can do the same before your water mishap turns into a floor disaster.
Start with Assessment and Drying
Immediately after noticing water damage, quickly locate the source of moisture and stop it, whether by shutting off water or removing standing water. Use a moisture meter or even a simple plastic drop cloth to gauge how deep the water has penetrated. I once faced a flooded corner of my living room; I grabbed my fans and dehumidifier, positioning them to target the wet area. Ensuring thorough drying within 24-48 hours minimizes warping and deterioration.
Remove Surface Water and Prevent Further Damage
Use towels or mops to soak up excess water on the surface. A squeegee can help push water out of tight spaces. For larger spills, employ fans and dehumidifiers to pull moisture from within the wood grain. Remember, the quicker you remove surface water, the less chance moisture will seep into seams and subflooring, preventing mold growth and structural issues. This step is crucial before any sanding or refinishing can occur.
Identify and Address Warped or Buckled Planks
Once dry, check for loose or warped planks—these are often noticeable as gaps or ripples. Use a pry bar carefully to lift slightly loose boards, then apply a wood adhesive like Titebond to secure them again. For stubborn warping, installing additional nails or screws in the subfloor can stabilize the affected planks. Think of this process as fixing a sagging roof truss; reinforcement is key to preventing future issues. For detailed methods, visit floor leveling techniques.
Sand and Clean for Restoration
After stabilizing the boards, lightly sand the problem areas to smooth out warping or rough patches. Use a belt sander with 120-grit paper, working along the grain to avoid scratches. In my experience, I learned that too much sanding can thin the wood and cause new problems, so focus on just enough to level surfaces. Follow up with a thorough sweep and vacuum to remove dust, then wipe with a damp cloth. Proper cleaning ensures good adhesion for stain or finish and helps you spot remaining imperfections.
Refinish the Surface for a Seamless Look
Apply a matching stain, blending the new and old sections. Use a brush or rag to feather the edges and hide repairs. When finished, protect the surface with a durable polyurethane coat, applied evenly with a high-quality brush or roller. A technique I found effective was applying multiple thin coats, allowing dry time in between. This process restores the original appearance and seals out moisture, preventing future damage. For further guidance on refinishing, see hardwood floor refinishing tips.
Even seasoned professionals sometimes fall prey to prevalent myths about flooring installation, particularly regarding the intricacies of floor leveling. One widespread misconception is that using a self-leveling compound guarantees a perfectly flat surface without additional preparation. In reality, improper substrate preparation or applying too much material can lead to new issues, such as cracking or delamination. For advanced installers, understanding the correct substrate testing and priming procedures is crucial; otherwise, the entire project may be compromised. Discover more about proper leveling techniques in this comprehensive guide. Additionally, many assume that flooring underlayments are a one-size-fits-all solution, but selecting the wrong type or thickness can result in uneven surfaces or squeaking floors over time. As an expert, I recommend evaluating the specific requirements of your subfloor and the flooring material, which can make all the difference in longevity and appearance. Also, be aware of common pitfalls such as ignoring moisture testing—something that experts like building scientists stress is vital for preventing future warping or mold issues. A notable study emphasizes the importance of concrete moisture testing before installation, as moisture can migrate and cause damage long after the project concludes. To avoid these hidden traps, meticulous assessment and proper execution are key. Remember, successful floor leveling isn’t just about tangible materials but also about understanding the nuanced behavior of substrates and adhesives throughout the process. This attention to detail can save you time, money, and potential headaches down the line. Have you ever fallen into this trap? Let me know in the comments, and share your experience—every project teaches us more.
Maintaining your flooring investments is key to ensuring they look stunning and perform well over time. From precise leveling tools to cleaning essentials, having the right equipment can make all the difference. One indispensable device I rely on is a high-quality moisture meter. It provides rapid, accurate readings of subfloor moisture levels—crucial before any installation or repair. Accurate moisture assessments prevent future problems like warping or mold, aligning with best practices discussed in this detailed guide. Another essential tool is a laser level, which guarantees perfectly flat surfaces, especially when transitioning between flooring types or preparing for tile installation. I personally prefer a rotary laser with a detector—the precision and ease of alignment significantly reduce leveling time and errors.
To keep your hardwood floors looking their best, invest in a microfiber mop and pH-balanced wood floor cleaner. These gentle tools help remove dust and grime without risking scratches or soap build-up. Regular cleaning prevents dirt from embedding into the finish, extending its lifespan as emphasized in hardwood care secrets. Additionally, a belt sander with variable grit options is a versatile equipment piece for minor repairs, smoothing out surface imperfections during refinishing. I recommend starting with a 120-grit for light sanding, then moving to finer grits for finishing touches, which produces a professional finish and saves you from costly replacements.
For those planning long-term maintenance, setting up a schedule is vital. I use a combination of digital reminders and detailed logs to track cleaning, inspections, and touch-ups. This routine helps catch issues early, like minor warping or scratches, before they escalate. Moreover, monitoring humidity levels with a hygrometer ensures environment conditions stay within the optimal range for hardwoods (typically 35-50%). Keep in mind, trends indicate a move towards automation—smart sensors connected to home automation systems can now monitor floor conditions in real-time, alerting you to potential problems before they become serious. This technology promises to make preventive maintenance more accessible and effective.
How do I maintain tile and flooring over time?
Long-lasting floors depend on consistent, proper maintenance. Regular sweeping and gentle mopping with suitable cleaners prevent buildup and wear. For grout lines, I recommend a steam cleaner with a grout brush attachment, which effectively removes embedded dirt without damaging tiles. Additionally, resealing grout periodically preserves its appearance and prevents staining. For more advanced techniques, such as fixing stubborn lippage or uneven surfaces, tools like a leveling compound applicator or a digital laser level are invaluable. They ensure a uniform surface, reducing trip hazards and enhancing aesthetic appeal. Staying current with new tools and methods, as well as adhering to manufacturer guidelines, helps you achieve superior results and extend the lifespan of your flooring investment.
If you’re eager to elevate your flooring maintenance game, try integrating a moisture meter into your routine prior to any repairs or new installations. Consistent use of this device can save you money and stress in the long run by preventing unseen water damage. To explore more about achieving flawless flooring, visit floor leveling essentials. Remember, proactive maintenance and the right tools are your best defense against costly repairs and premature wear. Keep your floors looking impeccable—your future self will thank you!”} ]}]}#END#}sk}}}#END#}#Answer to above: {
Peeling Back the Layers of Floor Fixes: Hard Lessons Learned
- Waiting too long to address minor spills can turn small issues into major headaches, like warping or mold—prompt action is your best ally.
- A good moisture meter isn’t just a gadget; it’s your secret weapon against unseen damage lurking beneath the surface.
- Even professionals can fall prey to myths—such as over-relying on self-leveling compounds—that compromise the quality of your flooring project.
- Understanding the behavior of your subfloor and choosing the right tools makes a difference between a lasting finish and recurring issues.
From My Toolbox: Essential Resources for Flooring Success
- Hardwood Floor Care Secrets: This guide shares practical tips on cleaning and maintaining your hardwood floors, extending their lifespan and shine—truly a trusted resource for daily upkeep.
- Floor Leveling Techniques: Mastering proper leveling methods can prevent future cracks and uneven surfaces; I rely on this comprehensive approach to ensure perfect results every time.
- Hardwood Floor Refinishing Tips: Upgrading your finishing skills? This source offers expert advice that has transformed my approach to blending repairs seamlessly with original flooring.
- Tile and Flooring Installation Guides: For any major project, having a detailed, step-by-step resource ensures clarity and confidence—you’ll want to bookmark this.
Take Charge and Elevate Your Floors
Remember, every DIY project is a learning journey, and your commitment to informed decisions will pay off in durable, beautiful floors that stand the test of time. Don’t wait for water damage to become a catastrophe—start implementing these insights today and unlock the true potential of your flooring
What’s been your biggest challenge when repairing or maintaining hardwood floors? Share your experience below—I’d love to hear your story!
,