

Ever had that sinking feeling when you realize your freshly cleaned white marble grout now sports an unsightly blue hue? I sure have. One moment, I was marking my tile lines with blue chalk to ensure perfect placement, and the next, I was staring at a stubborn stain that refused to budge. That lightbulb moment hit me hard—the blue chalk I thought was harmless had left a permanent mark, ruining my pristine mosaic.
Why a Simple Mistake Can Cost You a Beautiful Finish
The truth is, many DIYers and even seasoned pros fall into the trap of assuming that all chalks are safe for delicate surfaces like marble grout. But some, especially blue chalks, contain dyes that can embed into porous materials. Once stained, these marks don’t just fade—they become permanent blemishes that can mar your tile work for years.
Is Blue Chalk Really a Hidden Villain?
My early mistake was using generic blue chalk to mark my grout lines without considering its composition. I learned the hard way that colored chalks with synthetic dyes can seep into the grout, especially if the surface is slightly porous. Did you know that certain dyes can chemically bond with minerals in marble and grout, turning into stubborn stains that resist even heavy cleaning? According to industry expert advice, avoiding colored chalks altogether when working with natural stone is the safest bet.
If you’re like me, you might be skeptical about using other marking tools. I was too—until I faced my blue chalk nightmare. But don’t worry. Today, I’ll show you how to prevent this stain disaster and maintain your beautiful tiles without compromise.
Ready to stop your own blue chalk mishaps before they start? Let’s dive into how to identify safe marking options and proper cleaning techniques to keep your marble grout spotless for years to come.
Choose Your Marking Tools Wisely to Prevent Stains
Start by selecting non-dyed or washable marking tools like white chalk, pencil, or specialized tile markers designed for delicate surfaces. I remember when I first used a light-colored pencil on my marble; it left a faint but removable mark that didn’t risk staining. Avoid using traditional blue or colored chalks, especially on porous grout, because their dyes can penetrate and cause lasting discoloration.
Test Your Marking Method Before Full Application
Before marking the entire area, test your tool on a hidden or less visible section of the grout or tile. Use a damp cloth to see if the mark dissolves or smears easily. During my recent project, I tried a pencil on a small spot, and it erased cleanly with a damp sponge. This step saves time and prevents unexpected stains later.
Apply Marks Carefully and Minimize Contact
Use light, precise strokes instead of heavy lines. Less ink or chalk means less chance of absorption into the grout. I once over-marked with a thick chalk line, which after cleaning, left residual color that was hard to remove. Always mark in manageable sections, ensuring you can clean or correct any mistakes promptly.
Clean Immediately After Marking to Prevent Dyes from Penetrating
As soon as you’ve completed marking and before proceeding to grout or sealing, wipe the marks away with a damp sponge or cloth. The quick action prevents dyes from settling into the porous grout. I learned this tip the hard way when my blue chalk left stubborn stains despite multiple cleanings; quick removal is crucial. For stubborn marks, use a gentle tile cleaner or a mixture of baking soda and water, gently scrubbing to lift any residual color.
Employ Proper Cleaning Techniques for Any Accidental Stains
If stains do appear, treat them promptly with the right cleaning agents. For dye-based stains, a diluted hydrogen peroxide solution can help bleach out dyes without damaging the grout. Always test on a small area first. Remember, harsh chemicals can damage marble if not used correctly. Regular maintenance and avoiding colored markers will keep your grout pristine in the long run.

Illustration showing the proper use of a white tile marker on grout with a diagram of testing and cleaning techniques.
When tackling flooring projects, many assume that common industry advice always applies universally. But in my experience, some of the most talked-about ‘rules’ can be misleading or oversimplified. For instance, the idea that flooring installation is merely about laying tiles or hardwood without attention to subfloor preparation is a dangerous misconception. Properly understanding the nuances of subfloor conditions can make or break your project’s success, and overlooking this can lead to costly repairs down the line.
Why is subfloor preparation often underestimated by even seasoned DIYers?
Many believe that a quick cleaning suffices before installing new flooring, but the reality is that undetected moisture, unevenness, or debris can cause severe issues, like tile cracking or hardwood buckling. Industry experts emphasize that meticulous subfloor inspection and leveling are foundational steps, yet it’s a step most skip or shortcut, leading to pitfalls. According to studies from the Flooring Contractors Association, about 70% of installation failures are due to inadequate subfloor prep.
Another common myth revolves around the use of thinset and adhesives. Many think that applying excessive amounts ensures better bonding. However, over-application can cause uneven surfaces and trapping air, resulting in lippage or tile cracking. Instead, following recommended trowel notch sizes and proper mixing techniques guarantees a seamless, durable finish. For tips on proper application, check out tile installation pointers that save time and money.
Advanced flooring enthusiasts often debate the impact of climate control during installation. It’s frequently assumed that temperature and humidity conditions are secondary concerns. Yet, fluctuating moisture levels can affect materials’ dimensions, causing gaps or buckling over time. Experts recommend maintaining consistent environmental conditions and letting materials acclimate. Learn more about this in fundamentals of flooring installation and leveling.
Take a closer look at how advanced mistakes can sneak into your project
One overlooked aspect is the sequence of steps: some installers neglect to address subfloor imperfections before laying the flooring, assuming leveling is only necessary for finished floors. This oversight is especially costly with large-format tiles or wide plank hardwoods, where small deviations become glaring. A seasoned pro knows that proper floor leveling is a step that must not be rushed or ignored—because imperfections show prominently once the project is complete. For comprehensive guidance, visit how to achieve flawless floor leveling before tile laying.
Playing advocate for meticulousness, I challenge you to question common notions about flooring installation. The real secret often lies in the details—thorough preparation, correct materials, environmental control, and careful technique. When overlooked, these nuances turn into hidden traps that can drain your budget and ruin your aesthetic. So, are you aware of all the pitfalls that may be lurking in your project? Have you ever fallen into this trap? Let me know in the comments.Maintaining hardwood floors, tiles, and level surfaces over time requires the right tools and techniques to ensure longevity and flawless aesthetics. One of my go-to equipment pieces is the **digital moisture meter**, which I use regularly to monitor moisture levels in subfloors before installation or during repairs. This device helps prevent common issues like warping or buckling caused by hidden moisture, which I learned the hard way early in my projects. Advanced models, such as the Protimeter Surveymaster, provide instant readings and Bluetooth connectivity for data tracking, making regular checks effortless.
Another indispensable tool is the **floor level laser**. I prefer laser levels with high precision—like the Bosch GLL3-330CG—which I employ when checking for uneven tiles or hardwood planks. These tools quickly reveal deviations, saving hours of manual checking and ensuring perfect installation. For long-term maintenance, I suggest investing in a **floor scraper and buffer**. A rotary buffer with appropriate pads can gently strip and restore finish layers, removing scuffs and minor scratches without damaging the surface.
Software also plays a role in modern flooring maintenance. I rely on apps like **Flooring Scanner** to keep track of maintenance schedules, product warranties, and care instructions tailored to specific materials, ensuring I follow best practices for longevity.
Prediction-wise, the industry is moving toward integrating IoT-enabled sensors directly into flooring materials. These sensors will continuously monitor conditions like humidity, temperature, and wear levels, providing real-time alerts through smartphone apps. This future tech could drastically reduce repair costs and prolong flooring life, just as smart home devices have transformed residential management.
Thinking about long-term results, consistency is key. Regular cleaning with a **microfiber mop** paired with pH-neutral cleaners preserves material integrity, especially for delicate finishes. Also, scheduling annual inspections with specialized tools can spot early signs of wear or damage before they escalate.
How do I maintain hardwood or tile flooring over time? Consistently monitor environmental conditions, use the right cleaning and polishing products, and invest in quality tools for inspections and repairs. For example, I always recommend checking floor leveling using the principles outlined in this comprehensive leveling guide, which helps prevent issues like lippage or uneven surfaces that can ruin the look and feel of your floors. Give one of these tools or techniques a try today—your floors will thank you in the years to come! 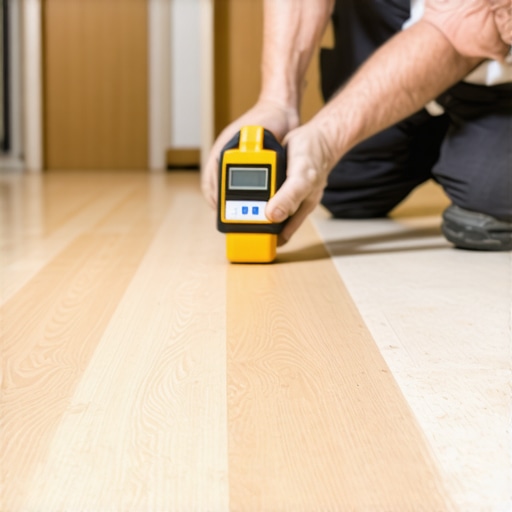
Imagine a well-maintained floor that resists wear and remains stunning for decades. With the right equipment like a digital moisture meter and laser level, combined with diligent routine care, you’ll achieve professional results in your DIY or contractor projects. Don’t skip these steps—investing in quality tools now saves money and frustration down the road.
The Hidden Lessons From My Flooring Journey
One of the most valuable insights I’ve gained is that meticulous preparation in flooring isn’t just a step—it’s the foundation that determines the lifespan of your investment. I once skipped detailed subfloor inspections, thinking surface beauty was enough, only to face cracks and shifts months later. That experience taught me that understanding the underlying structure is crucial for durability. Additionally, using the right tools, like a good moisture meter, has saved me from headaches caused by hidden moisture lurking beneath the surface. These practical lessons have transformed my project approach from reactive to proactive, ensuring my floors stand the test of time.
Must-Have Resources That Changed My Approach
Over the years, I’ve come to rely on specific tools and guides that elevate my flooring projects. First, the Ultimate Guide to Hardwood Floors provided insights into material selection that align with longevity and style. Second, the Mistakes to Avoid During Installation article helped me sidestep common pitfalls, saving both time and money. Lastly, investing in a quality floor leveler and a trusted laser level made precision achievable, turning a daunting task into an achievable craft. These resources have become my go-to references whenever I embark on flooring upgrades, ensuring I deliver professional results each time.
Your Next Step Toward Perfect Floors Starts Now
The path to durable, beautiful hardwood or tile floors isn’t hidden—it’s built through consistent effort, learning, and the right tools. I encourage you to approach your project with patience and curiosity, knowing that attention to detail today will payoff with stunning floors that last for decades. Whether you’re refreshing your current surface or undertaking a new installation, remember that every step, from subfloor prep to finishing touches, counts. You’ve got this, and I’m here cheering you on toward your flooring success! Don’t forget to ask yourself: what’s one small change I can make today to improve my flooring project? Share your thoughts below—I love hearing about your experiences.