
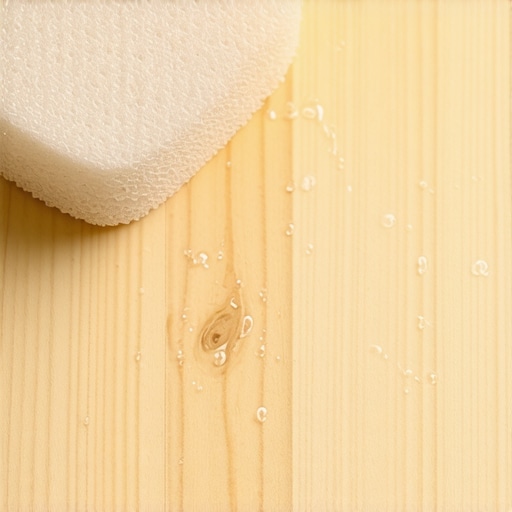
I remember the first time I tried applying a stain to my newly installed hardwood floors. Eager to see those rich, warm tones, I overlooked a simple step—checking the wood’s porosity. The result? Bleeding, uneven color, and a finish that looked more DIY disaster than professional shine. That lightbulb moment hit me hard. Turns out, a little thing called the Damp Sponge Test can make all the difference.
Why Checking Wood Porosity Before Staining Matters More Than You Think
As someone who’s been knee-deep in flooring projects, I can tell you that understanding your wood’s porosity isn’t just a small detail—it’s the foundation of a flawless stain job. Wood acts like a sponge, absorbing stain at different rates depending on its moisture content and surface condition. If you skip testing, you risk blotchy, uneven coloration or even finish failure. Early on, I made the mistake of assuming all wood surfaces are equally thirsty for stain, which led to disappointment and extra work.
Ever wonder why some parts soak up the color beautifully while others repel it? That’s porosity in action. Performing the Damp Sponge Test gives you the insight necessary to tailor your staining process, ensuring a uniform, professional-looking finish. Plus, it helps you avoid common problems like finished glossiness or patchiness. Trust me, mastering this step transforms your project from a gamble to a guarantee.
Is the Damp Sponge Test Actually Worth the Hype?
In the beginning, I was skeptical—another step, another tool, would it really make that much difference? Spoiler: It does. When I first ignored this test, I ended up re-staining sections, wasting time and materials. Once I learned the proper technique, I could predict how the wood would accept stain and adjust my approach accordingly.
A mistake I made early was assuming all wood reacts the same—an understandable oversight, but one that costs patience and resources. Learning this simple test’s value saved me countless headaches and improved my results significantly.
If you’re tired of uneven stains or reworks, stay tuned—next, I’ll show you how to perform the Damp Sponge Test correctly and interpret the results to nail your finish. Whether you’re refinishing an old floor or starting fresh, this knowledge is essential for achieving that perfect, even tone. For more tips on hardwood care and staining strategies, you might find it helpful to explore articles like [Hardwood Floor Care Secrets for Longevity and Shine](https://tiletrendshop.com/hardwood-floor-care-secrets-to-longevity-and-shine), which covers maintenance techniques that enhance your floor’s appearance over time.
Prepare the Subfloor Thoroughly
Begin by inspecting the subfloor for debris, dust, or loose particles. Use a heavy-duty vacuum or broom to remove all contaminants, ensuring a clean surface that promotes adhesion.
Check for moisture issues by performing a simple moisture test—if the subfloor feels damp or shows signs of water damage, resolve these problems before proceeding, as moisture can cause tiles to crack later.
Identify High and Low Spots with a Leveling Tool
Set up a long spirit level or a laser level across the entire floor. This helps visualize uneven areas; think of it like tuning a musical instrument—precision is key for harmony, or in this case, a flat surface.
Mark areas where the level indicates deviations greater than 1/8 inch, since these will need correction.
Correcting Low Areas
For depressions and low spots, mix a self-leveling underlayment, following the manufacturer’s instructions meticulously. Pour the mixture into the low zones and spread it with a spiked trowel, allowing it to flow into and fill the voids, creating a smooth surface. The goal is to imitate pouring syrup—steady and even.
Use a spiked roller to eliminate air bubbles and ensure proper bonding, which prevents future cracks or unevenness. Monitor the process closely, making adjustments as needed to keep the surface level.
Tackling High Spots
High spots, or humps, can be ground down using a concrete grinder equipped with a diamond cup wheel. Work systematically, starting from the highest point and gradually lowering the surface, akin to sanding down a rough wood piece for a smooth finish.
Always wear appropriate safety gear—dust masks and eye protection—and dampen the area to reduce airborne dust, which helps keep the workspace clean and safe.
Double-Check the Levelness
After corrections, reapply the level across the entire surface. Repeat the process until deviations are within 1/16 inch over 10 feet—a standard for professional flooring installations. This precision ensures the tile will lay flat and look seamless.
Prior to laying the tile, consider test-fitting small sections to confirm the surface’s flatness. If imperfections persist, address specific spots again with additional leveling or grinding. This proactive step mirrors the meticulous preparation discussed in how to achieve flawless floor leveling.
Address Transitions and Edges Carefully
At doorways or transitions to other flooring types, ensure the level is consistent to prevent trip hazards or uneven seams. Use shims or trims as needed—think of these as the Many DIYers and even seasoned pros often fall into the trap of oversimplifying floor leveling, especially when it comes to hardwood floors, tiles, or general flooring installation. Common wisdom suggests that a flat surface is merely about avoiding height discrepancies, but in reality, there’s a complex interplay of subtle nuances that determine the long-term success of your project.
One widespread myth is that you can achieve a perfect floor by simply using a self-leveling compound and a level. While these tools are essential, relying solely on them without understanding the underlying causes of unevenness can lead to problems like tile lippage or squeaky hardwoods. For example, many overlook the importance of inspecting the subfloor’s condition thoroughly, including moisture content, which can cause future warping and cracking if neglected.
An advanced mistake many skip is ignoring the differential porosity and moisture levels across different sections of the subfloor and flooring material. This oversight can lead to uneven expansion, contraction, and, ultimately, buckling or gaps. Recognizing these nuances requires more than just assessing surface level—it’s about understanding how materials interact at a microscopic level. A study by the Building Science Corporation highlights that moisture imbalance is a leading cause of flooring failures, emphasizing the need for comprehensive moisture management before installation.
What Are the Consequences of Overlooking Material Compatibility?
In my experience, one of the most insidious errors involves mismatched flooring types or finishes that don’t accommodate each other’s natural movement. For instance, installing a rigid tile floor over a flexible subfloor without proper reinforcement can cause cracking or lippage. Similarly, installing glued-down hardwood without accounting for environmental humidity can lead to cupping and buckling. It’s this depth of understanding that separates an amateur job from a professional finish. To master these details, I recommend familiarizing yourself with detailed guides such as how to achieve flawless floor leveling before tile laying and exploring expert tips for installing hardwood floors that [maximize longevity and aesthetic appeal](https://tiletrendshop.com/mastering-hardwood-floor-refinishing-expert-tips-for-2025).
Additionally, consider the subtlety of edge transitions and expansion gaps. Overly narrow gaps or improper sealing can trap moisture and debris, leading to maintenance headaches later on. Proper planning includes understanding where to place expansion gaps and how to incorporate acclimation time for different materials. For a comprehensive overview of these advanced nuances, tools like precise floor leveling techniques can be invaluable.
In essence, the secret lies in the details—knowing when to measure moisture levels meticulously, choosing compatible materials, and understanding how environmental factors influence your flooring’s behavior. Don’t fall into the trap of superficial fixes; instead, dig deeper. Have you ever fallen into this trap? Let me know in the comments.
Keep It Working: Essential Tools and Maintenance for Longevity
Achieving a perfect floor isn’t a one-and-done task; it requires ongoing care and the right tools. From routine cleaning to periodic inspections, maintaining your hardwood, tile, or sealed subfloor ensures it remains beautiful and functional for years to come. One of my go-to tools is a high-quality microfiber mop, which I personally favor over traditional brooms because it traps dust and debris effectively without scratching delicate surfaces. Regular dusting prevents grit buildup that can develop into scratches or dullness, which is vital for hardwood floors. Proper maintenance techniques can extend your floor’s life and keep its shine vibrant, even in high-traffic areas.
For deeper cleaning, I recommend using a pH-balanced wood floor cleaner—avoiding harsh chemicals preserves the finish and prevents premature peeling or dulling. I’ve found that checking and reapplying a protective finish every few years, depending on wear, can significantly prolong your flooring’s appearance and structural integrity. When it comes to repairs or refinishing, a detail-oriented approach with the right tools makes all the difference. For example, a professional-grade floor sander with adjustable grit belts allows for smooth refinishing without damaging the wood beneath. Choosing the correct grit sequence—starting with medium grit and finishing with fine—ensures a uniform, professional-looking result.
How do I maintain my flooring over time?
Establishing a regular inspection routine helps catch issues before they escalate. Pay attention to areas where the finish shows signs of wear, or where gaps and creaking begin to appear. This proactive maintenance can prevent costly repairs and preserve the value of your investment. Additionally, controlling environmental factors, such as humidity levels and temperature, plays a critical role in preventing expansion, contraction, or warping. Installing a hygrometer to monitor humidity and an appropriate HVAC system can be incredibly beneficial. For tile, maintaining a clean grout line is essential; periodic sealing helps prevent staining and deterioration. I personally use a grout sealer every few years, which preserves the integrity of the joints and maintains a fresh appearance.
Looking ahead, the trend in flooring care is moving toward smart maintenance solutions, such as sensor-integrated systems that alert you to moisture or structural issues early. Incorporating these innovations can save time and money, and keep your floors in prime condition long-term. For professionals, using a moisture meter during initial inspections, as described in technical standards for moisture management, remains essential for accurate assessments.
If you want to take your maintenance game up a notch, try implementing a monthly cleaning schedule combined with seasonal inspections, and consider investing in tools like a microfiber mop and a good quality floor buffer. Consistency is key to lasting beauty and durability. For more advanced refinishing tips, I recommend reviewing professional-level refinishing techniques. Don’t wait until damage shows—stay ahead with regular care, and your floors will reward you with decades of style and function.
What I Wish I Knew Before Starting Out
One of the most impactful lessons I learned was that patience outweighs speed when it comes to floor leveling. Rushing the process often introduces errors I could have avoided with a little more time and careful measurement. Another insight was the importance of testing subfloor moisture levels—not just on the surface, but throughout the entire slab—to prevent future buckling or cracks. I also discovered that investing in quality tools, like a reliable moisture meter or a high-grade leveling compound, can elevate your results from amateur to professional. Lastly, understanding how environmental factors, such as humidity and temperature, influence your materials transformed my approach entirely—making all the difference between a listing floor and a smooth, flawless finish.