
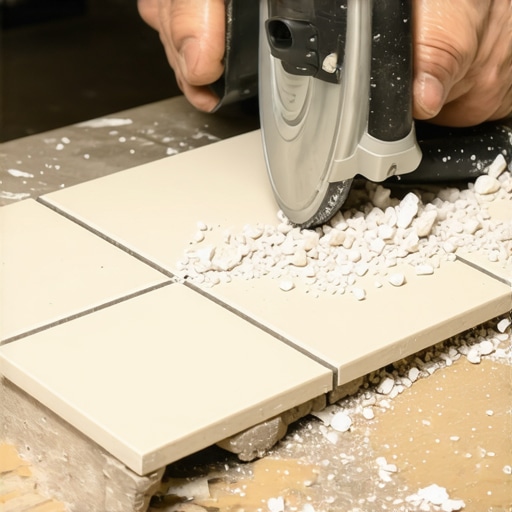
I’ll never forget the frustration that hit me the moment I watched a beautiful porcelain tile crack into pieces just as I was about to finish my bathroom backsplash. It felt like a punch to the gut. That lightbulb moment revealed something I hadn’t paid enough attention to: the delicate nature of porcelain and the importance of proper cutting techniques. If you’ve experienced similar heartbreak, you’re not alone. Many DIY enthusiasts and even seasoned pros face this exact problem.
Dealing with Chips Like a Pro
Today, we’re diving into why porcelain tiles tend to chip during the cut—and more importantly, how to prevent it. Trust me, once you understand the core issues and adopt the right methods, you’ll be slicing with confidence and avoiding those embarrassing cracks that ruin your day. I’ll share my personal tips, backed by industry advice, so you can get flawless cuts every time and save money on replacements.
Is Cutting Porcelain Actually More Fragile Than Other Tiles?
First off, some skeptics wonder if porcelain is really that much more delicate. The truth is, porcelain’s density makes it stronger but also more prone to chipping when mishandled. Early in my projects, I made the mistake of rushing through cuts with a dull blade, which increased the likelihood of chips. That’s a common mistake I see many making—using subpar tools or improper techniques. Want to avoid breaking your tiles before they even go down? Check out these tile-installation pointers for smarter cutting strategies.
Now, how do you stop the chips from happening? Well, it begins with understanding the factors that cause cracks—like blade type, cutting speed, and tile support—and then applying proven methods. The good news? Fixing this isn’t complicated if you know what to do. Ready to become a porcelain-cutting expert? Let’s explore the practical steps next.
Use the Right Tools and Prepare Properly
Start by selecting a premium diamond blade designed specifically for porcelain. During my first attempt, I used a generic blade which caused numerous chips and wasted tiles. Now, I always opt for a continuous rim diamond blade, which reduces chipping and ensures cleaner cuts. Also, mark your cut line clearly with a fine pencil or a tile marker. Secure the tile firmly on a stable surface with clamps or a non-slip mat to prevent movement, which can lead to uneven cuts or cracks.
Adjust Your Cutting Technique for Precision
Employ a Slow, Steady Pace
When cutting, don’t rush. Pushing the saw too quickly can generate heat and stress, causing chips. I once tried speed-cutting a large tile, and it resulted in a chipped edge. Instead, let the saw do the work, moving slowly and steadily along the marked line. This controlled approach causes less stress on the tile, minimizing breakage. If using a wet saw, ensure the water flow is steady—this helps keep the blade cool and reduces dust that can obscure your cut line.
Use Proper Support and Supportive Techniques
Porcelain tiles are dense and brittle; improper support can cause cracking during cutting. I learned this when I placed a tile on a flimsy workspace and the tiles cracked at the edges. To prevent this, always support the tile on both sides of the cut with saw guides or a piece of plywood underneath. For intricate cuts, consider using a tile score-and-snap method for straight cuts, but avoid applying excessive pressure which can lead to chips. If necessary, make multiple shallow passes with the saw, gradually deepening the cut—this reduces stress and preserves the tile’s integrity.
Post-Cut Care and Finishing
After cutting, inspect the edges. Use a rubbing stone or diamond pad to smooth out any rough or chipped edges carefully. For particularly delicate cuts or edges, lightly wet-sanding the area helps achieve a clean, professional finish. I once finished a bathroom backsplash and noticed slightly rough edges; gentle smoothing made the final install look flawless. Remember, proper finishing ensures your tiles fit perfectly and reduces the risk of cracks developing over time.
If you’re facing common challenges like uneven cuts or unexpected cracks, consider reviewing floor leveling techniques to ensure your surface is even before cutting. Also, mastering the correct trowel size and grout application methods can complement your cutting skills for a seamless installation. Applying these precise steps will help you cut porcelain tiles confidently and keep chips at bay, saving time and money in the long run.
Many homeowners and even some professionals often fall into misconceptions about floor leveling that can lead to costly mistakes. A prevalent myth is that applying a self-leveling compound alone guarantees a perfectly flat surface, but in reality, the success of leveling depends heavily on proper substrate preparation and technique. Neglecting these nuances can result in uneven floors, cracked tiles, or uneven hardwood when finished. To truly master this aspect, it’s crucial to understand the importance of the ‘step-by-step’ approach outlined in our comprehensive guide on [floor leveling success](https://tiletrendshop.com/flooring-installation-fundamentals-leveling-for-a-seamless-look).
The Heart of Long-Term Success
Maintaining beautifully installed floors requires more than just good initial work; it hinges on consistent upkeep with the right tools and techniques. As flooring professionals and DIY enthusiasts alike increasingly adopt specialized equipment, understanding what genuinely makes a difference can save you time, money, and headaches down the line. In this section, I’ll share my tried-and-true tools and methods that keep hardwoods, tiles, and levelers in optimal form for years to come.
Invest in Quality Floor Buffers and Polishers
I personally rely on a high-grade rotary floor buffer equipped with variable speed settings. This versatile machine not only restores luster but also helps remove minor scratches and dirt build-up without harming the finish. For softer hardwoods, I prefer microfiber pads that gently lift debris and apply polish evenly. Remember, regular buffing prevents buildup of grime that can cause uneven wear over time. Complement your buffer with a good-quality wood or tile-specific polish, like those recommended by flooring finishing experts.
Use a Moisture Meter for Ongoing Checks
Flooring, especially hardwood, is sensitive to moisture fluctuations. I use a reliable pin-type moisture meter to periodically check the wood’s moisture content in different areas of a room. This simple step catches potential problems early, such as swelling or shrinking, before they cause irreparable damage. Incorporate this into your standard maintenance routine—it’s a proactive approach endorsed in our guide to preventing installation mistakes.
Maintain Proper Expansion Gaps and Sealants
Ensuring existing gaps are kept clear and sealing joints with appropriate materials helps prevent moisture ingress and debris accumulation. For tile floors, I recommend inspecting grout lines annually, reapplying sealant if necessary. Hardwood floors benefit from periodic application of natural oils or finishes that penetrate the wood, protecting against wear and environmental changes. My favorite, a clear penetrating oil, helps preserve color and integrity without affecting the surface’s appearance.
Future Trends in Floor Maintenance
Looking ahead, technological advances such as automated moisture sensors and smart finishes will become more commonplace, making maintenance more accessible and effective. Staying ahead of these innovations will allow DIY enthusiasts and pros to catch issues even before they manifest visibly. To get started, try integrating simple tools like moisture meters into your routine and observe how much longer your floors stay pristine.
How do I keep my floors looking perfect with minimal effort?
One of my top recommendations is to adopt a routine of quarterly buffing combined with annual deep cleans using specialized tools. For hardwood, periodically reapplying protective oils keeps the surface resilient against scratches and moisture. Essential for tile, ensure grout lines are sealed properly and re-sealed every 2-3 years. For leveling and large-scale installations, I always review best practices in floor leveling to maintain a perfectly flat surface. By incorporating these practices and equipment into your routine, you’ll extend the life of your flooring, maintaining its beauty and functionality for years to come. Ready to refine your maintenance game? Test out a moisture meter on your floors today and see how simple proactive care can be.
What I Learned the Hard Way About Precision Cutting
One of the most valuable lessons I discovered was never to underestimate the importance of steady hands and patience when cutting porcelain tiles. Rushing the process not only increases the risk of chips but also wastes money and time. Fine-tuning your technique, such as making shallow passes with your saw and supporting the tile properly, can dramatically improve your results, as I found out through many trial-and-error moments. This insight before starting a project could save many DIYers from unnecessary frustration.
How Knowing Your Tools Can Make or Break Your Project
Choosing the right diamond blade isn’t just a minor detail; it’s the cornerstone of flawless cuts. I learned that investing in a high-quality, continuous rim diamond blade can reduce chipping and give you cleaner edges. Using inappropriate tools might seem tempting to save money initially, but in the long run, it leads to redoing work and extra costs. Trusted sources, like industry-specific brands, provide tools that turn a challenging task into a manageable one, transforming your experience from stressful to satisfying.
The Unexpected Power of Preparation and Support
During my early projects, I underestimated how critical proper support during cutting is. Supporting tiles on both sides with guides or plywood prevents stress points that lead to cracks. The simple act of ensuring your workspace is stable and your tiles are supported can be the difference between achieving perfect edges or ending up with broken pieces. Precise support ensures your cuts are clean, and your finished project looks professional, making all the difference in achieving that seamless aesthetic.
Key Post-Cut Touch-Ups That Save You Time
Beyond just cutting, I found that lightly smoothing rough edges with a diamond pad or wet-sanding can greatly enhance the final appearance. It’s tempting to overlook the finishing touches, but those small details contribute to the overall durability and look of your installation. Proper post-cut care ensures your tiles fit perfectly and reduces the chance of future cracks or chipping, maintaining your hard work’s beauty over time.
Recommended Resources for Mastering Flooring Techniques
Elevating your flooring skills requires more than just practice—it benefits immensely from learning from quality resources. I trust this guide on common flooring mistakes for foundational knowledge, while this step-by-step installation guide helped refine my technique. Investing in top-tier tools like the ones from professional-grade leveling products makes my projects much smoother and more accomplished.
Believe in Your Ability to Transform Spaces
Taking on flooring projects might seem daunting at first, but with patience, proper tool selection, and preparation, you can achieve professional results. Each project is an opportunity to improve your skills and express your creative vision. Remember, the journey toward perfectly leveled floors and flawless tile cuts is as rewarding as the final outcome. So, embrace the process and start transforming your space today.
Have you faced particular challenges in flooring installation? Share your experience below—let’s learn and grow together!
,