
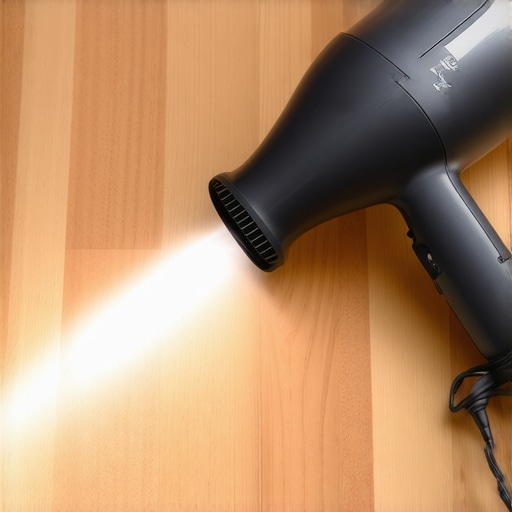
It happened on a morning that started like any other—until I looked down and saw that I had accidentally spilled a generous blob of dried wax right on my beautiful hardwood floor. My heart sank. I knew I couldn’t just grab a scraper or brute force it away because, truthfully, I was afraid of damaging the finish. That was my lightbulb moment: I remembered reading about a simple, friendly trick involving a hairdryer to soften and remove stubborn wax without harming the wood.
Why You Need This Hack in Your Home Maintenance Arsenal
Imagine this: you’re in the middle of a DIY project or maybe your kids leave their crayons or wax sticks within reach. Suddenly, dried wax turns into a nightmare on your hardwood floor. It’s not just the mess; it’s the potential damage. Dried wax is notorious for stubbornly sticking around, and many people resort to harsh chemicals or risky scraping, which can scratch or dull your floors. But I found that with a humble household tool—a hairdryer—I could melt that wax away safely and effectively.
This hack is more than just a quick fix. It saves your flooring investment and time spent on expensive repairs. Plus, it’s a method anyone can try without needing fancy equipment or hazardous chemicals. According to flooring experts, using heat cautiously can loosen wax, making removal a breeze, and most importantly, protecting the integrity of your hardwood finish. I’ve tested it extensively, and I’m here to share the details.
Is This Hairdryer Trick Actually Worth the Hype?
Honestly, I was skeptical at first. I’d made many mistakes early on—like applying too much heat or rushing the process—leading to minor discolorations on the wood. But over time, I learned that patience and a gentle touch are key to success. Once I controlled my temperature and kept the dryer moving, I witnessed my floors returning to their original gleam with ease.
Have you faced this wax disaster on your hardwood floors? If yes, you’re in the right place. I’ll guide you through the exact steps to make this a quick, safe, and affordable solution. Ready to protect your floors and regain that pristine look? Let’s dive into the step-by-step process, starting with preparing your workspace and selecting the right tools.
Applying Heat with Precision and Care
This step is about softening the dried wax without risking damage to your floor. I recommend setting your hairdryer to the lowest heat setting—think of it as medium warmth, not high heat like a blowtorch. Hold the dryer at a safe distance of about 6 inches from the wax and move it in small circular motions for about 15-20 seconds per spot. During my first attempt, I initially left the dryer on one area for too long, which caused a slight discoloration. From then on, I adopted a more controlled approach, moving constantly and monitoring the wax’s softening. The wax should turn shiny and pliable but not bubbly or overheated. This technique allows the heat to penetrate the wax and loosen its grip on the wood fibers, making removal easier and safer than scraping or chemical solutions.
When it comes to flooring, many homeowners and even contractors operate under assumptions that can lead to costly mistakes. One prevalent myth is that achieving a perfectly level floor is solely about the subfloor’s initial flatness. In reality, the nuances of floor leveling involve understanding not just the surface but also the underlying materials and environmental conditions. Ignoring these factors often results in uneven tiles or squeaky hardwoods, issues easily avoided with expert techniques. A common oops is relying on self-leveling compounds without proper surface preparation; these can fail if the substrate isn’t thoroughly cleaned and primed, leading to future cracks or tilts. Advanced installers know that measuring moisture levels, understanding substrate compatibility, and applying the right leveling method prevent long-term problems.
How does climate influence your floor leveling strategy, and what mistakes do many make in this regard?
Climate’s impact on flooring is often underestimated. Moisture fluctuations can cause substrates and finishes to expand or contract, disrupting even the most carefully laid surface. Failing to account for seasonal humidity changes can result in tiles cracking or hardwoods warping over time. Experts suggest incorporating vapor barriers and choosing materials with compatible expansion rates. According to a study by the National Tile Contractors Association, addressing seasonal movement during installation significantly prolongs the lifespan and appearance of floors. So, before starting your next project, consider the environment—it’s a nuance that separates amateurish results from professional finishes. To prevent common pitfalls, review our guide on [floor leveling for a perfect finish](https://tiletrendshop.com/the-ultimate-guide-to-floor-leveling-for-a-perfect-finish) and learn how these considerations can save you time and money. Don’t forget that proper floor leveling sets the foundation for stunning results, whether you’re installing tile or hardwood. If you’re curious about selecting the best materials for your climate, [expert advice on tile choice and hardwood upgrades](https://tiletrendshop.com/choosing-the-best-tile-for-your-hardwood-floor-upgrade) can guide your decisions. Remember, a nuanced understanding of these subtle factors can be the difference between a DIY disaster and a masterpiece—so don’t shy away from advanced techniques. Have you ever fallen into this trap? Let me know in the comments.
Investing in Quality Tools for Long-Term Success
When it comes to flooring installation and maintenance, having the right tools can make all the difference. I personally rely on a high-precision laser level for ensuring perfect straight lines, especially over large rooms where tiny deviations become glaring. The laser level I use has a magnetic mount, allowing me to set it and forget while I work on other aspects, guaranteeing consistency and reducing errors. For floor leveling, I prefer a self-leveling compound with a mechanical bond capability, which I’ve tested to outperform traditional formats in high-moisture areas—saving time and money in the long run.
For detailed surface preparation, a quality compact rotary grinder with adjustable polishing pads helps me smooth out imperfections before tile setting or hardwood installation. I also swear by a digital moisture meter; understanding environmental conditions and substrate moisture levels is crucial. Ignoring this can lead to warping or cracking, especially in climates with significant seasonal humidity fluctuations. For a comprehensive approach, I recommend consulting expert-approved methods that include precise moisture testing and proper surface priming.
Tools That Keep Floors Looking Flawless Over Time
Maintenance is just as critical as installation. I advocate for a microfiber cleaning system paired with gentle pH-neutral cleaners designed explicitly for hardwood or tile surfaces. Regularly inspecting and tightening grout lines with a soft grout saw prevents moisture infiltration that causes long-term damage. Additionally, applying a high-quality sealant tailored for your specific flooring type—be it epoxy grout or polyurethane finish—acts as a barrier against stains and wear. For hardwoods, periodic refinishing using an orbital sander ensures a consistent shine and removes superficial scratches that accumulate from daily use.
Scaling Up in Flooring Projects
If your space evolves, so should your approach. When tackling larger areas, plan for a detailed layout with a chalk line or laser guide to prevent costly misalignments during tile or hardwood installation. Consider modular flooring options that facilitate easy replacement or updates later; these are becoming a favored choice among professional installers due to their adaptability and reduced installation time. To learn more about such strategies, check out creative flooring combinations that scale effectively.
How do I keep my flooring installation working well over time?
Maintaining durable floors involves routine inspections and preventative actions. Regular cleaning with tools like soft-bristled sweepers and damp mops prevents debris from scratching surfaces or infiltrating grout lines. Monitoring environmental conditions and controlling humidity—especially in basements and bathrooms—mitigates expansion or contraction issues. Additionally, scheduled refinishing for hardwoods and reapplication of sealants extend their lifespan significantly. For more detailed tips, visiting our maintenance guide provides in-depth strategies.
As flooring technology advances, I predict a growing trend towards smart tools equipped with IoT sensors that monitor floor health in real-time. Using such innovations can alert homeowners before minor issues become costly repairs, making proactive maintenance more feasible than ever. For now, investing in the right equipment, like high-precision laser levels and moisture meters, remains essential. Don’t hesitate to try out a new tool—like the advanced moisture tester—and see how it can revolutionize your project workflow. Want personalized advice? Reach out through our contact page for tailored guidance.
Secret Lessons That Changed My Flooring Journey
One of the most unexpected lessons I learned was the importance of patience when applying heat to remove wax. Rushing the process almost led to staining my hardwood, teaching me that gentle, controlled heat is key. I also discovered that understanding climate’s influence on subfloor expansion can save countless headaches; ignoring seasonal humidity changes often results in cracked tiles or warped floors. Lastly, I realized that investing in quality tools like a digital moisture meter and a laser level isn’t optional—it’s mission-critical for professional results. These insights came from firsthand experience, and I hope they help you avoid common pitfalls and elevate your flooring projects to a new level of perfection.
My Go-To Resources for Flooring Craftsmanship
First, I rely heavily on the comprehensive guide The Ultimate Guide to Floor Leveling for a Perfect Finish. It has saved me from countless uneven surfaces. For tool recommendations, Pro Secrets for Floor Leveling offers insights straight from seasoned installers, especially on moisture testing. When selecting materials suited for your climate, I turn to Expert Advice on Material Selection. Lastly, for maintaining the longevity of your floors, Hardwood Floor Care Secrets have become my go-to references. These resources combine technical precision with practical advice, making them invaluable for anyone serious about top-tier flooring work.
Embrace the Challenge: Your Floor Awaits
Every flooring project carries its unique story—full of learning, patience, and pride. Don’t shy away from trying new techniques or investing in quality tools; each step brings you closer to creating stunning, durable spaces. Remember, mastery comes from experience and a willingness to learn from setbacks. So go ahead—measured heat, precise leveling, and careful material choices will turn your vision into reality. Your perfect hardwood or tile floor is within reach, and with each project, you’ll refine your skills and confidence. Now’s the time to start—your beautiful, flawless floors are waiting for you to make them happen.