
It was a typical Saturday morning when I stepped into my living room and instantly noticed it—the uneven gap where my new hardwood floor met the tile threshold. My heart sank a little. I had spent weeks perfecting the flooring install, but that pesky transition was throwing off the entire aesthetic. Honestly, I felt defeated. Have you ever experienced that frustrating moment when something as simple as a threshold ruins an otherwise stunning floor? If so, you’re not alone. I’m here to tell you there’s a solution—one I learned the hard way—and I want to share it with you today.
The Power of a Level Threshold: Why It’s Worth Getting Right
A perfectly level threshold isn’t just about looks; it’s essential for safety, durability, and even the longevity of your flooring. When transitions are uneven, it can lead to tripping hazards, accelerated wear, and unsightly gaps that diminish your home’s appeal. I quickly realized that a common mistake many DIYers make is rushing through the leveling process or using the wrong tools, thinking that minor imperfections don’t matter. Trust me, that’s a false economy. I once overlooked the importance of meticulous subfloor preparation, which resulted in my first attempt at a threshold that looked promising but felt uneven underfoot. The damage was done, and I learned a costly lesson—attention to detail makes all the difference.
Did you know that uneven flooring transitions can decrease your floor’s lifespan by years? According to industry experts, poor level transitions are among the top reasons flooring fails prematurely. This realization motivated me to dig deeper into the *why* and *how* of achieving a flawlessly level threshold. I discovered that the secret lies not just in the materials but also in mastering specific techniques that ensure the surface is perfectly flat—no dips, no bumps.
Now, I make it a point to follow proven methods, and I want to guide you through the process so you can avoid the errors I made early on. Before we jump into the practical steps, let me address a common concern—many believe that perfect thresholds are impossible outside professional settings. Well, that’s simply not true. With the right knowledge and tools, anyone can achieve it. For example, learning how to use a laser level effectively can be a game-changer in creating that seamless transition.
So, if you’ve faced the same problem of uneven thresholds or if you’re just starting your flooring project and want to ensure a flawless finish, stick with me. We’re about to dive into the techniques that will elevate your craftsmanship and, ultimately, your home’s style.
Prep the Subfloor Thoroughly
The foundation of a perfect threshold starts with a clean, stable subfloor. I once ignored this step and ended up with an uneven transition that made the entire floor look crooked. To prevent this, remove all debris and dust, then inspect for loose boards or soft spots. Use a pry bar to tighten or replace loose sections. For uneven areas, mark high spots with a chalk line and grind them down with a concrete grinder or use a self-leveling compound. Think of your subfloor as the canvas for your flooring; a smooth surface ensures the final result mimics a professional finish rather than amateur patchwork.
Accurate Measurement and Scribing
Before laying your threshold, measure the height differences meticulously. Use a laser level or a long spirit level stretched across the area to identify dips or bumps. I remember using a laser level in my last project—placing it at one end of the doorway and adjusting until the beam was level—revealing hidden dips that I had to fill. Scribe the threshold edge to match the floor contours precisely. In another instance, I used a contour gauge to trace the uneven profile of the adjacent flooring, then cut my threshold material accordingly. Correct measurements prevent gaps and ensure a seamless transition.
Proper Material Selection
Choose a flexible, durable threshold material suitable for your flooring types. For hardwood, a solid wood or engineered wood threshold works well; for tile transitions, a metal or vinyl profile provides flexibility. I once installed a metal transition that naturally accommodates slight height differences, avoiding the need for excessive leveling. When you select the right material, it becomes easier to achieve a flush fit. Remember, the ideal threshold should neither be a trip hazard nor a glaring gap—it’s the bridge that connects your surfaces elegantly.
Apply Leveling Techniques
Implementing the correct leveling method is crucial. If there’s a minor height variation, fill low spots with a high-quality self-leveling compound—just like pouring pancake batter into a pan, pour and spread evenly. I recommend using a gauge rake or trowel to ensure the compound flows into all nooks and crannies. For larger discrepancies, shim the subfloor with plywood or concrete shims, then secure tightly. Think of shims as the scaffolding that supports your flooring until the surface stabilizes. Always work in small sections, checking progress frequently with your laser level to confirm the surface remains flat.
Finishing and Sealing
Once the leveling compound is cured, smooth out any imperfections with a sanding block or grinder. This step is like sanding a piece of wood to get rid of rough edges—crucial for a sleek look. Seal the edges of your threshold with a sealant compatible with your flooring to prevent moisture infiltration. In my experience, a well-sealed threshold not only looks better but also extends its lifespan by resisting wear and damage from foot traffic and spills.
Final Adjustment and Testing
Place your flooring pieces against the threshold to test the fit. Use shims or planers as needed to make final adjustments. Walk across the transition zone to feel for any bumps or dips; a good rule of thumb is to walk at different speeds and directions. I once had to re-level after noticing a slight bump when stepping on the threshold—reading the room with a critical eye makes all the difference. When satisfied, secure everything permanently with fasteners or adhesive. Remember, the goal is a threshold that feels integrated into the space, not a separate piece that stands out.
Many homeowners and even seasoned DIYers fall prey to misconceptions about hardwood floors, flooring installation, and floor leveling, often leading to costly mistakes and subpar results. Let’s bust some myths and reveal nuanced truths that can elevate your project from amateur to expert level.
The Myth That All Floor Leveling Products Are Created Equal
It’s a common belief that any self-leveling compound will do the job equally well. In reality, different products have specific formulations tailored for various subfloor types and desired finishes. Using the wrong compound can lead to cracks, uneven surfaces, or poor adhesion, compromising the integrity of your flooring. For complex or large-scale projects, consult industry experts or trusted sources like floor leveling guides that detail product suitability.
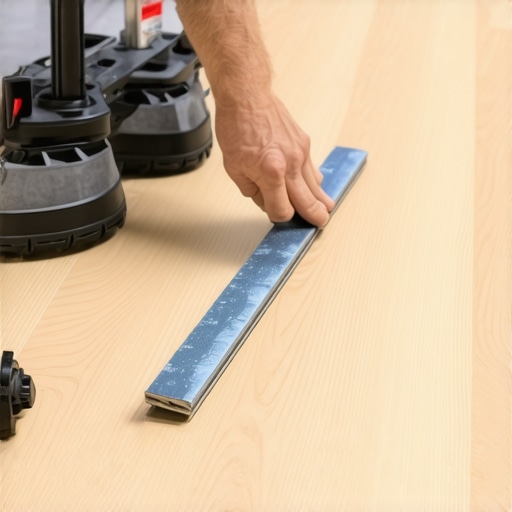
Imagine a professional-grade leveling compound being poured smoothly over a subfloor—precisely the kind of nuanced understanding that separates good installations from great ones.
Why Most People Overlook the Importance of Subfloor Preparation
Many believe that the subfloor’s condition doesn’t significantly impact the final appearance. However, neglecting thorough cleaning, inspection, and repairs can result in uneven floors, squeaks, and even cracks. Proper subfloor prep is the foundation of durable flooring; skipping this step is akin to building on a shaky base. For advanced techniques, see installation mistakes to avoid that highlight the critical nature of this step.
Are Wide-Plank Hardwoods More Difficult to Install Correctly?
Many assume that wider planks are more challenging due to their size and weight. While they can be more susceptible to issues like cupping or expansion, professional installation techniques—such as acclimation and proper expansion gaps—make wide planks equally manageable. This misconception can lead DIYers to limit their choice unnecessarily. Learn how to handle wide planks properly by exploring expert tips on hardwood flooring.
The Hidden Trap That Undermines Tile and Hardwood Durability
A less obvious mistake is failing to consider environmental factors like humidity and temperature. For instance, in humid climates, unacclimated hardwood can expand and cause buckling, while in dry areas, it might shrink and crack. Similarly, improper moisture barriers can lead to mold or warping. Recognizing these nuances is vital for long-lasting results. Industry-stated best practices, such as those found in floor leveling guides, emphasize the importance of environmental considerations.
Have you ever fallen into this trap? Let me know in the comments. Understanding and avoiding these misconceptions will help you achieve flooring installations that stand the test of time, aesthetic appeal, and safety.Maintaining flawless flooring requires more than just the initial installation; it demands the right tools, consistent care, and strategic upgrades. One tool I cannot recommend enough is a high-precision laser level. I personally rely on a laser level with adjustable mounting options and a bright, clear beam, like the Bosch GCL100-40G, because it offers unmatched accuracy over large spans—crucial when ensuring level thresholds or preparing for tile installation. Its ability to project both horizontal and vertical lines simplifies aligning multiple elements, saving time and reducing errors. Additionally, investing in a good cordless oscillating multi-tool makes edge trimming and detail refinements effortless, especially when working around existing moldings or uneven surfaces. I discovered that the Fein MultiMaster, with its variable speed and precision attachments, enables me to perform delicate cuts and removal work without damaging adjacent surfaces, which has been invaluable for long-term projects. For ongoing maintenance, adopting a regular cleaning routine using microfiber mops and pH-neutral cleaners preserves the finish of hardwood floors, preventing scratches and wear. I particularly follow tips from expert sources linked here [hardwood floor care secrets] to extend the lifespan and shine of my floors. Looking ahead, I predict advances in automated floor care robots and AI-driven inspection devices will further simplify maintenance by detecting issues early, such as moisture intrusion or wear spots. How do I keep my floors in top shape over time? It starts with establishing a routine that combines these precise tools and knowledge, then scaling your efforts with innovative solutions as they emerge. For example, adopting a dedicated moisture meter like the Protimeter Surveymaster helps monitor subfloor conditions, preventing future problems—something I highly recommend before laying new floors or during regular checks. Don’t wait for visible damage—try integrating one of these advanced tools into your maintenance regimen today to ensure your flooring remains stunning and durable for years to come.Consistent upkeep, aided by these finely tuned instruments, not only preserves your floors but also enhances their natural beauty—all while avoiding costly repairs down the line. Remember, leveraging technology now is an investment that pays dividends in longevity and style, so explore what modern tools can do for your home.
3 Hard-Won Truths About Creating Seamless Hardwood and Tile Transitions
Looking back, the most valuable lesson I learned is that every detail counts—what seems minor can make or break your flooring project’s appearance and safety. Skipping subfloor prep or rushing measurements might save time initially but can lead to costly fixes later. Patience and meticulousness are your best allies in achieving flawless thresholds, as I discovered through many trials and errors.
Secondly, investing in quality tools isn’t just a luxury—it’s a necessity. A good laser level, for example, transformed my approach from guesswork to precision, ensuring each transition was perfectly flat. These tools may seem expensive at first, but they pay dividends in your project’s outcome and your peace of mind.
The third realization is that understanding environmental factors, like humidity and temperature, is crucial for long-lasting results. I learned the hard way that hardwood acclimation and moisture barriers prevent buckling and gaps, keeping your floors beautiful years down the line. This comprehensive awareness elevates DIY work from basic installation to professional craftsmanship.
Craft Your Flooring Genius Toolbox
For every DIY flooring adventure, I rely on a dedicated set of tools and resources that have helped me succeed. The precision floor leveler and a sturdy laser level like Bosch GCL100-40G are my go-to essentials—they ensure my thresholds are truly level and seamless. Books such as Expert Flooring Guides have expanded my knowledge on material choices and installation techniques. Exploring design combinations has also transformed my approach to home aesthetics.
Your Next Step Toward Flawless Floors
Embrace the challenge of flooring installation with confidence and curiosity. Every successful threshold I created boosted my home’s safety and style, proving that patience and preparation are the real craftsmanship secrets. Start small, learn continuously, and soon you’ll realize that beautiful, durable floors are within your reach. Have you ever encountered a tricky transition? Share your stories below—I love hearing about your flooring journeys.