
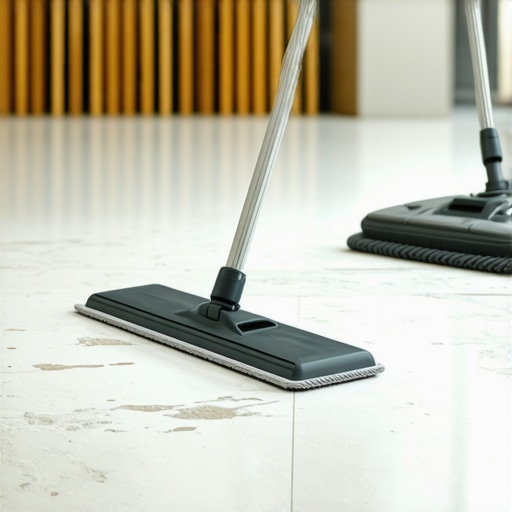
It was a typical Saturday morning when I thought I could finally tackle the dreaded task of cleaning my luxury vinyl floors. Armed with my trusty steam mop, I started to steam away, only to notice in horror that the planks began to warp and peel right before my eyes. That sinking feeling of realizing I had just damaged my expensive flooring was unforgettable. I learned the hard way that not all cleaning tools are suitable for every surface, especially delicate luxury vinyl. If you’ve ever felt that pang of regret after a cleaning mishap, you’re not alone. Today, I want to share why steam mops are a big no-no on luxury vinyl and how to keep your floors pristine without risking costly damage.
The Hidden Dangers of Steam Cleaning on Luxury Vinyl Floors
Many homeowners believe that steam cleaning is the ultimate shortcut for maintaining spotless floors. It’s quick, chemical-free, and seemingly effective at removing dirt and grime. But here’s the shocking reality: the high heat and moisture from steam mops can cause irreversible damage to your luxury vinyl. The reason lies in the composition of vinyl flooring, which, while durable, can be sensitive to excessive heat. Heat can cause the planks to warp, bubble, or delaminate, leading to costly repairs or replacements. I wholeheartedly recommend avoiding steamers and instead opting for gentle cleaning methods that respect your flooring’s delicate structure.
Is a steam mop really worth the hype?
Initially, I thought the convenience of steam cleaning outweighed the risks. My mistake? I underestimated how sensitive vinyl floors are to heat and moisture. Early on, I didn’t realize that the intense steam could penetrate beneath the surface and weaken the adhesive or backing. According to flooring professionals, improper cleaning is among the top mistakes that cause premature wear and tear. For more insights on flooring care, check out this informative guide on common floor installation and maintenance mistakes. Once I understood the science behind it, I made a promise to myself to avoid steam mops altogether.
Now, I want to show you exactly what safer and more effective cleaning routines look like, so your floors stay beautiful for years to come. But first, let’s address the biggest doubts we all have: is it really that bad, and what should I be doing instead to keep my luxury vinyl looking its best? Stay with me—your floors will thank you.
Start with a Clear Assessment of Your Subfloor
Begin by inspecting your subfloor for uneven spots, cracks, or moisture issues. Lay a long straightedge across the surface; any gaps or rocking indicates areas needing correction. During my own project, I noticed a slight bounce in one corner, prompting immediate action before proceeding. This early step prevents future tile cracks and ensures a seamless finish.
Apply a High-Quality Floor Leveler Correctly
Choose a self-leveling compound suitable for your substrate and climate. Mix it according to the manufacturer’s instructions, paying close attention to the water-to-powder ratio, as improper mixing leads to inconsistent curing, much like trying to build a house on shifting sands. When pouring the leveler, start at the lowest point, allowing the material to naturally flow and fill depressions. Use a gauge rake or trowel to aid spreading, avoiding air pockets that compromise adhesion. I onceexperienced uneven surfaces because I skipped vibrating the poured leveler, which caused curing issues later.
Understand the Science Behind Leveling
Think of leveling as pouring pancake batter; too thick, and it won’t spread evenly; too runny, and it separates. The goal is a homogenous mix with the right viscosity, facilitating a smooth surface without bubbles or cracks. For detailed techniques, check out this comprehensive guide on floor leveling.
Ensure Proper Curing and Surface Preparation
Patience during curing is crucial—most levelers require at least 24 hours before tile installation. During this period, keep the area dust-free and prevent drafts that could disturb the leveler’s surface. Once cured, test the uniformity again with a straightedge; any minor imperfections can be sanded or filled with patching compound. I remember rushing the cure, leading to a wavy tile surface that took days to rectify.
Address Common Mistakes That Undermine Your Work
One frequent pitfall is overwatering the leveler, which weakens its bond and causes bubbles. Another is pouring too much material all at once, resulting in uneven thickness. To avoid these, use the right tools like a trowel and spiked roller, and work in sections if necessary. For a deep dive into pitfalls and how to prevent them, review this guide on common installation mistakes.
Final Check Before Laying Your Tile
After the leveling compound has fully cured, perform a final inspection with a straightedge and a level. Fill any discrepancies and allow a few additional hours before proceeding. This meticulous step ensures your tiles will lay firmly and evenly, saving you time and money in the long run. I learned this lesson when a visibly uneven section caused tiles to crack under minimal pressure, forcing a redo that could have been avoided with proper prep.
Many DIY enthusiasts and even seasoned professionals often cling to oversimplified beliefs about floor leveling, tile, and hardwood installation, which can lead to costly mistakes. One widespread misconception is that perfect subfloor leveling guarantees flawless tile or wood flooring. While proper leveling is crucial, it’s only one piece of the puzzle. Factors like subfloor material compatibility, moisture content, and precise curing times play a significant role in ensuring long-lasting, aesthetically pleasing results. For deeper insights into these complexities, I recommend exploring this detailed guide on leveling challenges, which debunks many common myths and reveals nuanced techniques often overlooked.
Another misconception revolves around the belief that more adhesive or grout inherently equals better durability. Actually, using excessive amounts of thinset or grout can trap air pockets and create uneven surfaces, jeopardizing the integrity of your installation. Precision in applying these materials, combined with the right tools and techniques, is essential. In fact, advanced installers know that meticulous attention to application methods can prevent issues like cracking or delamination years down the line. You can learn about such advanced practices by reading about this collection of installation pointers.
For the savvy DIYer or pro, understanding the importance of surface porosity, coupled with proper surface preparation, is often underestimated. An overly porous subfloor may absorb moisture or thinset unevenly, leading to bonding failures or uneven tiles. Conversely, non-porous surfaces require specific primers or surface treatments. Making the mistake of ignoring these nuances can result in future repairs and reinstallation efforts. This advanced tutorial elaborates on the science of surface preparation, emphasizing the subtle yet critical steps that prevent failures.
What about the advanced question of how environmental conditions influence leveling and installation quality? Many overlook the impact of ambient humidity and temperature, which can affect material curing times and bonding strength. For example, self-leveling compounds may cure too quickly or too slowly if humidity levels aren’t controlled, compromising floor flatness. Experts recommend testing subfloor moisture levels with a calcium chloride meter before proceeding. According to a 2022 study in the Journal of Building Materials, environmental control during installation significantly improves long-term performance. You can explore methods to optimize your environment and material curing by reviewing this comprehensive environment control guide.
By appreciating these hidden nuances—like surface porosity, environmental factors, and application precision—you elevate your craftsmanship from basic to expert level. Remember, rushed or careless work often manifests as cracks, unevenness, or delamination. With patience and nuanced understanding, your flooring investment will stand the test of time. Have you ever fallen into this trap? Let me know in the comments and share your experiences!
Keeping It Working: Tools I Recommend for Flawless Floors
Achieving professional-grade results in flooring installation or repair hinges on selecting the right tools and maintaining them properly. One of my go-to equipment pieces is a high-quality, adjustable notched trowel. Specifically, I prefer a 1/4″ x 1/4″ V-notch trowel from brands like SlimLine; it offers consistent coverage and helps prevent air pockets, especially when applying thinset for tiles. I’ve found that using a trowel with the right notch size significantly reduces voids, ensuring a durable bond and a perfectly flat surface. For leveling compounds, I swear by a self-mixing paddle. In my experience, hand-mixing often leads to lumps or incomplete blending, which can cause uneven surfaces downstream. An industrial-grade paddle with variable speeds ensures thorough mixing, which is vital for a seamless finish—see this guide on floor leveling for more on mixing techniques.
Additionally, a vibrating wood or rubber float is indispensable during the leveling process. It helps eliminate bubbles and ensures the compound settles evenly. I personally prefer floats with a textured surface, providing better control and grip. Maintenance of these tools is crucial; cleaning the trowel immediately after use prevents hardened thinset from damaging the blade, and checking the paddle’s bearings ensures smooth operation over time.
How do I keep my tools in prime condition permanently?
Proper cleaning after each use is non-negotiable. Use warm water and a stiff brush for tools with residual adhesive or mortar. For tools with hardened material, a scraping session with a plastic or wooden implement prevents damage. Regularly inspecting and replacing worn trowel blades or float pads maintains accuracy and reduces the risk of flaws in your finish. Investing in premium tools might seem costly initially, but they translate into savings over time by reducing rework and material waste. As the industry moves toward more eco-friendly and precise methods, tools with ergonomic handles and anti-corrosion features are becoming standard, helping extend their lifespan.
Looking ahead, I believe automation and smart tools will play a larger role, such as laser-guided leveling devices or digital moisture meters. These advancements promise to streamline workflows and increase consistency, especially for complex projects. For instance, using a digital hygrometer during subfloor prep can ensure optimal moisture levels, preventing future issues like warping or delamination. Learn about tools like these in this article on installation pitfalls and remedies.
Remember, maintenance extends beyond tools—it includes staying updated with the latest techniques. Try adopting a rigorous cleaning routine for your equipment after each project, and consider upgrading to smart leveling devices as they become more affordable. These small but impactful adjustments dramatically boost the longevity of your work and minimize long-term repair costs.
The Hardest Lesson I Learned About Floor Leveling and Flooring Installation
One of my most eye-opening experiences was realizing that rushing the subfloor preparation can lead to cracked tiles or warped vinyl. I learned that meticulous surface assessment and correct leveling lay the foundation for a stunning, durable finish, saving me time and money in the long run.
The Myths That Stalled My Flooring Projects
Believing that a quick pour of leveling compound would fix unevenness was a mistake. Proper mixing, environment control, and patience are vital. This myth compressed my timeline but cost me more repair work. For more on common installation misconceptions, revisit this in-depth guide.
What Experts Realistically Keep Under Wraps About Floor Care
Professionals know that the smallest surface flaws can amplify over time, especially with premium flooring. They emphasize that careful surface prep, environmental stability, and tool maintenance are the behind-the-scenes secrets to lasting floors. Unlocking these subtle techniques has transformed how I approach installation and maintenance.
Curated Resources That Will Elevate Your Skills
- This comprehensive guide on floor leveling: Offers step-by-step insights into achieving flawless surfaces, reducing future issues.
- High-quality tools from trusted brands: Investing in durable trowels, self-mix paddles, and vibrating floats has improved my workflow immensely.
- Online courses and tutorials: Platforms offering hands-on demonstrations help translate theory into practice effectively.
- Expert blogs and case studies: Reading real-world experiences exposes you to nuanced challenges and solutions, such as understanding environmental impacts on material curing.
Believe in Your Ability to Transform Spaces
With patience, knowledge, and the right tools, anyone can achieve professional-grade flooring results—whether leveling a subfloor or protecting their luxury vinyl. Every project is an opportunity to learn and improve, turning challenges into triumphs. Don’t be afraid to start your next flooring journey today; your future self will thank you.
What part of flooring installation have you struggled with most? Share your stories below—I’d love to hear and help!