
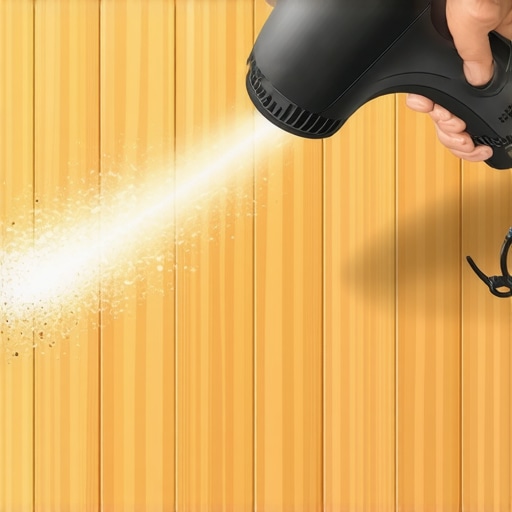
I remember the moment vividly—there I was, attempting to salvage my beautiful hardwood floor after an innocent candle mishap turned into a stubborn wax disaster. A blob of dried wax sat stubbornly on my planks, refusing to budge despite my frantic scrubbing. My initial instinct? Reach for the usual cleaning products, hoping for magic. Spoiler alert: it didn’t work. That lightbulb moment came when I grabbed my hairdryer. Who knew that a simple household tool could prove to be my secret weapon?
Why A Hairdryer Is Your Best Friend in Wax Removal
Using a hairdryer to melt and lift dried wax off hardwood may sound unconventional, but trust me, it’s a game-changer. The heat softens the wax without risking damage to your floor’s finish—a risk that harsh chemicals or aggressive scraping can pose. I was skeptical at first; after all, isn’t heat dangerous for wood? However, when used carefully, it becomes a safe and effective method. I discovered that directing the hot air onto the wax heated it enough to become pliable, allowing me to gently blot or scrape it away with minimal effort.
Is This Trick Actually Worth the Hype?
Early on, I made the mistake of applying too much heat too quickly—lesson learned! Too much heat can cause the wax to seep into the grain or even damage the finish. This is a common mistake among DIY enthusiasts who rush in without understanding the nuances. When I slowed down and kept the dryer on a medium setting, the wax softened perfectly without any harm to the floor. This personal experience mirrors what flooring experts recommend: patience and proper technique are key. If you’re interested in more professional tips on protecting your hardwood, check out [this comprehensive guide on hardwood floor care secrets](https://tiletrendshop.com/hardwood-floor-care-secrets-to-longevity-and-shine).
Are you tired of trying ineffective remedies and risking your floors? Stick around—I’ll walk you through the step-by-step process to safely and efficiently remove that dried wax, restoring your hardwood’s natural beauty without the need for costly repairs or replacements.
Prepare Your Workspace and Tools
Start by clearing the area around the wax stain to prevent accidental spreading. Gather a hairdryer, plastic scraper or credit card, microfiber cloths, and some rubbing alcohol or mineral spirits. I once used an old gift card to carefully lift the softened wax, which worked flawlessly without scratching the surface.
Soften the Wax with Heat
Set your hairdryer to medium heat and hold it about 6 inches from the wax spot. Move in small circles to evenly distribute heat, just like tuning a guitar string to avoid over-tightening. Keep the dryer running for 30-60 seconds until the wax appears glossy and pliable. Be patient—rushing can cause uneven melting or damage.
Watch for Signs of Melting
The wax will soften and become tacky. If it starts to bubble or smoke, immediately reduce the heat or stop. Using a plastic scraper, gently lift the softened wax. Avoid metal tools—they could scratch the finish. I remember delicately lifting a stubborn corner with an old credit card, which prevented scratches and made the removal cleaner.
Remove Residue and Clean the Surface
After lifting most of the wax, dampen a microfiber cloth with rubbing alcohol or mineral spirits. Test in a small, inconspicuous area first to ensure compatibility. Gently wipe the area to remove any remaining residue, much like polishing a favorite pair of shoes to restore their shine. Rinse with a clean, damp cloth and dry thoroughly to prevent moisture damage.
Addressing Stubborn Spots
If bits of wax stubbornly cling, repeat the heating and lifting process. For any lingering discoloration or dullness, consider applying a hardwood floor polish or finishing oil to restore the sheen. Regular maintenance and prompt action prevent future wax-related mishaps, keeping your floors looking pristine.
Prevent Future Wax Disasters
To avoid similar incidents, never leave candles unattended near hardwood surfaces. Opt for flameless LED candles as a safer alternative. Also, place a protective mat or tray under candles to catch drips before they reach your floors. This simple step can save you hours of cleanup and preserve your home’s beauty.
Many DIY enthusiasts and even seasoned professionals often overlook critical details that can make or break a flooring project. One common misconception is that leveling floors is simply about applying self-leveling compounds evenly. In reality, achieving perfectly flat surfaces requires understanding substrate conditions, moisture levels, and proper curing times. Ignoring these factors can lead to uneven tiles, cracked grout, or even flooring failure over time. For instance, I once skipped testing the moisture content of a concrete slab, which resulted in tile debonding months later. Always consult expert guides like [floor leveling challenges and solutions](https://tiletrendshop.com/floor-leveling-challenges-common-mistakes-and-how-to-avoid-them) to avoid such pitfalls.
Another area where many get it wrong is in the installation of hardwood floors, especially concerning acclimation. The myth that hardwood can be installed immediately after delivery is widespread. In fact, wood needs to acclimate to the home’s humidity and temperature for at least a week. Failing to allow for proper acclimation can cause gaps, cupping, or buckling as the wood expands and contracts. I learned this the hard way when I hurried my hardwood installation and ended up with a wavy surface. For detailed insights, check out [best practices for flooring installation](https://tiletrendshop.com/flooring-installation-mistakes-to-avoid-for-lasting-results).
Making the mistake of choosing adhesives or fasteners without considering environmental factors can also backfire. For example, many assume that strong adhesives alone ensure longevity, but exposure to moisture or temperature fluctuations may weaken them. Modern flooring materials require specific adhesives engineered for conditions like high humidity or thermal shifts. Neglecting this can result in peeling or loosening over time.
What’s the risk of ignoring these nuanced details in your project?
Overlooking these finer points can lead to costly repairs, deteriorated aesthetics, or compromised structural integrity. Studies show that proper installation techniques significantly extend the lifespan of flooring, reducing maintenance costs. For example, the [ultimate guide to floor leveling](https://tiletrendshop.com/the-ultimate-guide-to-floor-leveling-for-a-perfect-finish) emphasizes the importance of substrate preparation, moisture barriers, and professional tools.
Have you ever fallen into this trap of underestimating the importance of nuance in flooring work? Let me know in the comments. Your experience might save someone else from an avoidable mistake.
Keep Your Flooring Running Smoothly with the Right Tools
Maintaining hardwood and tile floors over time requires precision, consistency, and the right equipment. One essential tool I personally rely on is a calibrated laser level. It ensures that your tiles are perfectly aligned and maintaining a level surface, which is crucial for longevity and aesthetic appeal. I use the DEWALT DW089K laser level—its accuracy within 1/8 inch over 100 feet makes all the difference when checking your leveling work, preventing uneven surfaces that could lead to cracks or grout issues. For floor leveling projects, a high-quality self-leveling compound like Sakrete Floor Leveler provides a durable, flat base. Applying it with a gauge rake ensures you get a consistent thickness, which is vital for a seamless finish.
Investing in a good oscillating multi-tool, such as the Milwaukee M18 Fuel Oscillating Tool, can streamline repairs like replacing damaged tiles or smoothing out uneven edges. Its variable speed control helps prevent damage to delicate finishes, making repairs safer and more manageable. For routine cleaning and maintenance, a soft microfiber mop paired with a pH-neutral hardwood floor cleaner like Rejuvenate All Floors helps preserve the finish and prevent wear. Regularly inspect your floors for signs of moisture or other issues, addressing small problems before they escalate.
Incorporating Technology for Better Results
Looking ahead, automation and smart tools will become more prominent in flooring maintenance. Automated moisture meters and IoT-enabled sensors can monitor subfloor conditions in real-time, alerting you to potential problems before they manifest visibly. This proactive approach can extend the lifespan of your investment significantly. To stay on top of the latest advancements, follow industry updates and consider integrating these innovations into your maintenance routine.
How do I maintain flooring over time?
Routine maintenance involves more than just cleaning; it requires inspecting for signs of damage, keeping humidity levels stable—ideally between 30-50%—and using proper tools for repairs when needed. Regularly reapplying protective coatings and addressing minor issues promptly will keep your floors looking pristine for years. For larger projects or complex repairs, consult detailed guides like these precise leveling techniques to ensure professional-quality results every time. Remember, a little investment in the right tools now can prevent costly replacements later. Consider trying your hand at creating a custom, moisture-resistant sealant blend using marine-grade silicones to reinforce your floor’s resilience—a tip derived from specialized flooring repair manuals. Take this step today to safeguard your floors against future wear and tear, ensuring they stay stunning and functional for the long haul.
Lessons I Didn’t Expect to Learn About Floor Leveling
One of the most surprising insights was that achieving a seamless surface isn’t just about applying more leveling compound; it’s about understanding the substrate’s history. Damaged or improperly prepared subfloors can sabotage even the most careful installations. I once assumed that a quick pour would fix unevenness, only to see cracks develop months later, reminding me that patience and thorough prep are essential.
Another lesson was that timing and environmental conditions significantly impact drying and curing. High humidity or rapid temperature fluctuations can cause self-leveling compounds to behave unpredictably. Watching the process unfold taught me to monitor not just the products but also the surrounding environment, much like tending a delicate garden.
I also learned the importance of proper tool selection. Cheap trowels or inconsistent mixing paddles can lead to uneven pours, which magnify over time. Investing in quality tools isn’t just about convenience—it directly influences the longevity and appearance of your flooring project. For a deeper dive into these nuances, I recommend exploring techniques for flawless floor leveling.
Tools and Resources That Have Transformed My Approach
Over the years, I’ve come to rely on a handful of tools that consistently deliver professional results. A laser level like the DEWALT DW089K has been a game-changer, ensuring straight lines and perfect alignments. Pairing it with a high-quality self-leveling compound such as Sakrete Floor Leveler minimizes guesswork. For mixing, my favorite is a paddle with variable speed, like the MixMate, which guarantees an even blend and prevents lumps.
In terms of learning, books like Flooring Installation Mistakes to Avoid have been invaluable. They’re packed with practical tips and real-world insights that I wish I’d known sooner. Additionally, consulting with professionals through resources like expert tutorials has helped me troubleshoot issues faster and avoid common pitfalls.
Your Next Step Toward Floor Mastery Starts Now
Don’t let fear of making mistakes hold you back from transforming your space. With the right knowledge, tools, and patience, you can achieve stunning, durable floors that will stand the test of time. Remember, mastery isn’t about perfection from the start but about continuous learning and applying best practices. Embrace these lessons, and your floors will thank you for years to come.
What’s the biggest challenge you’ve faced when leveling or installing floors? Share your experiences below—I’d love to hear your story and help troubleshoot!