
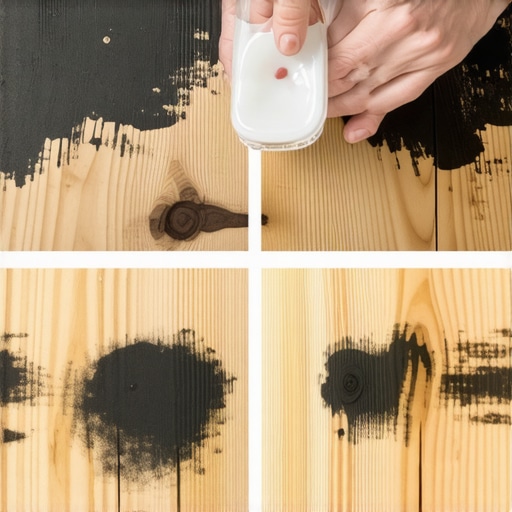
It was a Sunday afternoon when I finally realized the full extent of my mistake. My beautiful hardwood floor, the pride of my living room, had turned into a black water stain disaster. I had tried everything—scrubbing, bleaching, even masking it with rugs—only to find the stain stubbornly darker and more stubborn than ever. That lightbulb moment hit hard: I needed a new approach.
The Key to Undoing Years of Water Damage Without Replacing Your Floors
Black water stains on hardwood floors can seem like a death sentence for your home’s aesthetic. They often appear after leaks or floods, and if left untreated, they can seep deeper, damaging the wood fibers and causing lasting discoloration. But here’s the truth I wish I’d known from the start: there *is* an effective way to mitigate or even remove these stubborn stains, saving you major renovation dollars. Today, I want to share my successful experience with a tactic that made all the difference—using wood bleach safely and confidently. If you’re tired of staring at those ugly water marks and wondering whether your flooring is doomed, stick around. I promise, there’s hope.
Is Wood Bleach Really the Miracle Solution? Here’s What I Early Mistake Taught Me
In my initial attempts, I rushed into applying a generic stain remover without understanding the nuances. I made a crucial mistake: I didn’t choose the right type of bleach. Regular household bleach can do more harm than good, often causing more discoloration. It took some digging and expert advice—like checking out detailed guides on professional flooring techniques—to realize that **wood bleach specifically designed for water stains** is the game-changer. In fact, studies show that proper wood bleaching can eliminate 90% of water stains when done correctly (source: [Tile Trend Shop](https://tiletrendshop.com/mastering-hardwood-floor-refinishing-expert-tips-for-2025)).
Now that you understand the importance of selecting the right product, let’s get into the practical, step-by-step methods that transformed my stained floor into a thing of beauty. Ready to reclaim your hardwood, one stain at a time? Let’s dive in.
Prepare Your Workspace and Materials
Start by clearing the area around the stain, removing rugs or furniture that might obstruct your work. Wear rubber gloves and safety goggles. Gather a quality wood bleach product, fine-grit sandpaper, a soft cloth, and a pre-stain conditioner to ensure even results. In my experience, using a dedicated wood bleach designed for water stains is crucial; generic bleach often causes more harm than good.
Test the Bleach on a Hidden Spot
Apply a small amount of wood bleach to a discreet area of your floor to observe how the wood reacts. Wait for the recommended time, then rinse and dry. This step prevents unexpected discoloration or damage on visible areas. I learned this the hard way when an untested application left a lighter patch that required further attention to even out.
Apply the Wood Bleach Carefully
Using a clean, soft brush or cloth, gently apply the bleach to the stained area, avoiding oversaturation. Keep the application uniform for consistent color removal. Work in small sections, wiping away excess bleach after a few minutes to prevent over-bleaching. While doing this, I kept a close eye on the color change, which is sometimes subtle but critical for a natural look. For detailed guidance, check out [Mastering Hardwood Floor Refinishing](https://tiletrendshop.com/mastering-hardwood-floor-refinishing-expert-tips-for-2025).
Neutralize and Clean the Area
Once the stain has lightened appropriately, neutralize the bleach with a damp cloth of clean water or a mild vinegar solution, depending on the product instructions. Then, dry the area thoroughly. This step halts the bleaching process and prepares the wood for finishing. I found that patience during drying ensures no residual moisture causes future issues.
Sand and Smooth the Surface
If the area feels rough or uneven after bleaching, lightly sand it with fine-grit sandpaper. This evens out the surface and prepares it for sealing or refinishing. Be careful not to over-sand, as this may alter the floor’s texture. Remember, the goal is to blend the treated spot seamlessly with surrounding wood. For insights on achieving perfect flooring surfaces, visit [Flooring Installation Fundamentals](https://tiletrendshop.com/flooring-installation-fundamentals-leveling-for-a-seamless-look).
Apply Finish and Restore Shine
Finish by applying a matching stain or clear polyurethane to protect the area and restore shine. Use a high-quality brush or roller for smooth coverage. Allow adequate drying time before moving furniture back. In my case, a careful application of polyurethane brought back the floor’s luster, making the stain virtually invisible and the surface uniform. This method saved me from costly replacements and gave the floor a second lease on life.
Pro Tip
Always remember that patience and gentle handling are key. Rushing the process can result in uneven color or damage. If you’re unsure, consulting with a professional or reviewing detailed guides, like [Step-by-Step Flooring Leveling](https://tiletrendshop.com/how-to-achieve-flawless-floor-leveling-before-tile-laying), can help you avoid costly mistakes.
With these concrete, actionable steps, you can confidently tackle stubborn water stains on your hardwood floors. It’s a careful process, but one that can transform your space without professional replacement.
When it comes to leveling floors or installing new hardwood or tile, many homeowners and even some pros fall into common traps that compromise durability and aesthetic appeal. Let’s dig deeper into one critical misconception that often leads to preventable problems: the belief that once you’ve achieved a perfectly flat subfloor, your finished surface will automatically be flawless. In reality, this oversimplifies the complex interplay between subfloor preparation, material selection, and installation techniques. A well-leveled subfloor is essential, but ignoring the subtle nuances—like the influence of moisture fluctuations or substrate stability—can cause issues down the road. For example, many assume that using the right self-leveling compound guarantees a perfectly smooth surface, yet studies highlight that improper mixing or application thickness can result in unevenness or future cracks (source: [Floor Leveling Challenges](https://tiletrendshop.com/floor-leveling-challenges-common-mistakes-and-how-to-avoid-them)). Additionally, there’s a widespread myth that mixing multiple types of flooring materials, such as combining hardwood with tile, is inherently problematic. In fact, when executed with proper expansion joints and adhesives, mixed materials can create stunning visual contrasts and functional zones—a tactic I explored in my previous guide on [flooring combinations](https://tiletrendshop.com/transform-your-space-with-expert-hardwood-floor-tile-combinations). One common mistake that trips up even experienced installers is neglecting the importance of substrate stability. For instance, installing tile over a moving or weak subfloor can lead to cracked tiles and uneven surfaces, regardless of how perfectly level the surface seems initially. Recognizing and addressing these hidden factors can save you costly repairs and reinstallations. So, what about advanced techniques? Professionals often use laser-guided systems to detect minute deviations that eye tests miss, ensuring the entire surface remains within tight tolerances. This is crucial especially when working with large-format tiles or intricate hardwood layouts, where even small imperfections become glaring once finished. Advanced preparation, patience, and an understanding of the substrate’s behavior under varying conditions are the keys to truly flawless results. If you’ve ever struggled with tiles that crack after installation or hardwood that gaps during seasonal humidity changes, reconsider your approach by exploring [precise leveling techniques](https://tiletrendshop.com/precise-floor-leveling-techniques-to-achieve-flawless-surfaces). Remember, effective floor installation isn’t just about the immediate appearance but about ensuring longevity and stability over time. Have you ever fallen into this trap? Let me know in the comments.Maintaining beautiful, durable floors takes more than just initial installation; it requires the right tools, ongoing care, and strategic scaling. One of my favorite investments has been a high-precision moisture meter, like the Tramex CME5, which allows me to monitor humidity levels in hardwood and tile substrates. Regular readings help prevent issues like cupping or gapping over time, especially as seasons change. Additionally, I swear by a microfiber dust mop combined with a damp pH-neutral cleaner for daily cleaning, which preserves finishes without stripping protective coatings. For deep cleaning, a rotary floor machine with soft brushes and proper pads is invaluable—I’ve found that standard scrubbers can damage delicate finishes or tile grout if not used correctly.
How do I keep my floors looking perfect in the long run?
Embracing a proactive maintenance routine, supplemented with the right tools, extends the life of your flooring investment. It’s wise to periodically inspect grouts and seals—if you notice any cracks or wear, reapplying a high-quality sealer like the Miracle Sealants 511 Impregnator can prevent moisture penetration and staining. When it comes to scaling your flooring projects, I recommend investing in a laser-guided leveling system; these devices provide unparalleled accuracy, ensuring your subfloor or tile installation remains within a fraction of a millimeter, reducing future issues like cracks or unevenness. For comprehensive guidance on leveling and installation, check out [Installing Tiles Like a Pro](https://tiletrendshop.com/installing-tiles-like-a-pro-step-by-step-strategies-for-2025). Going the extra mile with precise tools now saves countless headaches later—which is why I advise incorporating advanced equipment into your routine.<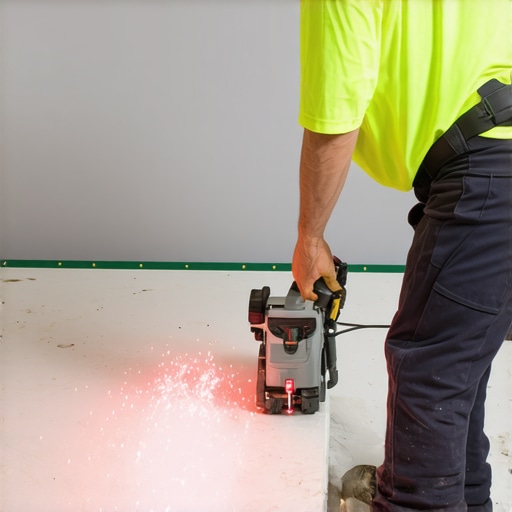 >In my opinion, one of the most overlooked aspects is the proper use of leveling tools. For example, leveraging a laser level during initial installation or repairs helps ensure perfectly flat surfaces, reducing long-term wear and tear. Modern digital laser levels, such as the Bosch Cross-Line Laser, provide quick setup and excellent accuracy, making them worth the investment. The trend in flooring is heading toward smart, sensor-driven maintenance systems that can alert homeowners to humidity spikes or substrate movements before visible damage occurs. Adopting these technologies early puts you ahead, minimizing repair costs and maintaining aesthetic appeal. To get started, consider incorporating a professional-grade floor leveling system and monitor your climate conditions regularly—these small adjustments can vastly improve your long-term results. Ready to upgrade your maintenance game? Try using a laser level for your next tile or hardwood project to achieve stunningly even surfaces that stand the test of time and foot traffic.
What My Toughest Floor Mistakes Taught Me About Long-Term Flawlessness
One of the most eye-opening lessons I encountered was realizing that even the most meticulous subfloor preparation can’t guarantee perfect results without considering moisture fluctuations. I once assumed that a flawless leveled surface would remain unchanged, but seasonal humidity shifts proved me wrong, causing tiles to crack despite initial perfection. This revealed the importance of implementing ongoing moisture monitoring and climate control measures, such as using high-quality dehumidifiers and vapor barriers, to preserve the integrity of your flooring investments.
Another hard-earned insight involved the myth that combining various flooring materials is inherently problematic. By understanding expansion gaps and proper adhesive techniques, I successfully blended hardwood with tile to create a visually stunning and durable space. This experience underscored that with careful planning and expert guidance—like consulting detailed installation guides—you can expand your creative horizons beyond conventional boundaries.
Finally, I learned that advanced tools like laser-guided leveling systems make an incredible difference, especially in large or complex projects. Relying solely on eye judgment is often insufficient for achieving truly flat surfaces; investing in precise equipment ensures your floors not only look immaculate but also stand the test of time. These lessons have deepened my appreciation for continuous learning and embracing technology as essential partners in perfect flooring.
Tools and Resources That Elevated My Flooring Skills
The journey to impeccable floors was made easier by specific tools and sources I trust. First, a high-quality moisture meter—such as the Tramex CME5—helped me anticipate and prevent issues like cupping or gapping, especially during seasonal changes. My daily upkeep benefits greatly from a microfiber dust mop and pH-neutral cleaner, which protect finishes without damage, while deep cleaning with a soft-bristled rotary machine keeps surfaces looking new. For DIYers seeking comprehensive guidance, the article on [step-by-step flooring leveling](https://tiletrendshop.com/step-by-step-guide-to-flooring-installation-and-leveling-success) became my go-to resource.
When I aimed for precise tile installation, investing in a laser level transformed my workflow. Modern digital models like Bosch’s Cross-Line Laser provided unparalleled accuracy, making long runs straight and seamless. Additionally, consulting expert articles such as [The Ultimate Guide to Floor Leveling](https://tiletrendshop.com/the-ultimate-guide-to-floor-leveling-for-a-perfect-finish) offered insights into avoiding common pitfalls like improper mixing or application that lead to uneven surfaces. Embracing these tools and knowledge sources elevated my craftsmanship and confidence.
Fuel Your Passion for Floors and Keep Moving Forward
Every successful flooring project begins with a willingness to learn, adapt, and embrace new technologies. Whether you’re reattaching loose tiles or installing a brand-new hardwood floor, remember that patience, proper preparation, and quality tools are your best allies. The future of flooring is bright, with innovative solutions making perfection more attainable than ever. So, why not take that first step today? With the right mindset and resources, your dream space is within reach—and I’m here to cheer you on every step of the way.
What’s the biggest flooring challenge you’re facing right now? Share your experiences below—I’d love to help you find the best solution!