
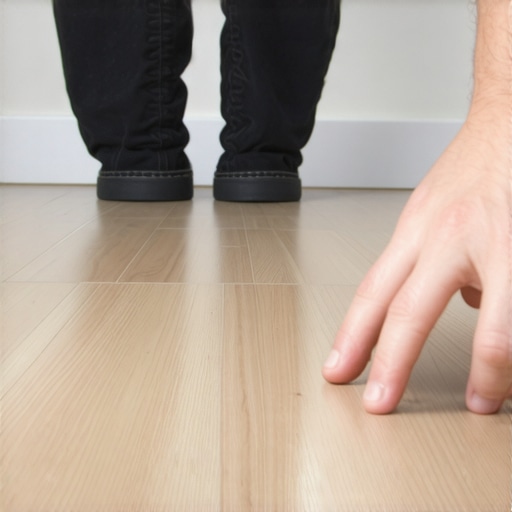
I remember the moment it hit me—standing in my living room after a long day, walking gently across my brand-new vinyl click-lock flooring, only to be met with an embarrassing squeak every time I crossed a certain spot. It was as if my floor was protesting, revealing its low spots with a loud, unwanted voice. That unexpected noise not only ruined the serenity of my space but also made me question whether I had chosen the right flooring or installed it properly. Frustration crept in, and I wondered, “Why does this keep happening?” And more importantly, how could I fix it?
Dealing with the Click-Lock Squeak Dilemma: A Common Headache
Vinyl click-lock floors have gained popularity because of their ease of installation and durability. However, a nagging problem persists—squeaking sounds, especially when walking over low spots or uneven subfloors. These noises aren’t just annoying; they can be symptoms of underlying issues like improper leveling, poor subfloor preparation, or manufacturing variances. Understanding the root cause is essential because a squeak over a low spot usually indicates movement in the locking mechanism or gaps that allow the planks to rub against each other.
My early attempts at a quick fix—like pressing down harder or adding some DIY lubricant—only provided temporary relief. It wasn’t until I realized that a proper, strategic approach to leveling and installation could truly address the problem that I found lasting peace. Proper leveling not only prevents squeaks but also extends the life of your flooring and maintains its aesthetic appeal. For more comprehensive guidance, I recommend checking out some of the essential [floor leveling techniques](https://tiletrendshop.com/precise-floor-leveling-techniques-to-achieve-flawless-surfaces) that can save you headaches down the line.
> Did you know that uneven subfloors are responsible for the majority of squeaking and creaking issues in modern flooring installations? According to industry experts, addressing floor irregularities before laying down your flooring is one of the most critical steps to ensure a squeak-free experience.
Making mistakes early in the process can lead to recurring issues, so understanding the causes and solutions is vital. In the next sections, we’ll explore how to identify low spots, correct them effectively, and prevent squeaks from returning—arming you with the confidence to tackle your flooring projects like a pro. Ready to restore both silence and stability to your floors? Let’s dive into the practical steps that will make your vinyl click-lock look and feel perfectly solid.
Identify and Address Low Spots with Precision
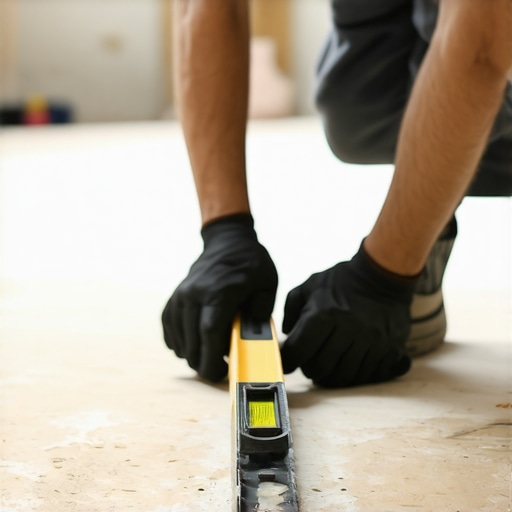
When I encountered squeaks at specific points, I grabbed a straightedge and a carpenter’s level—tools that are as essential to flooring as a chef’s knife is to a cook. I dragged the level across the problematic area, watching for gaps and dips. Discovering even a quarter-inch depression, I marked it with a crayon for clarity. This initial step is crucial, as uneven subfloors are the root of many squeaking issues. To get professional insight on perfectly leveling your floor, check out our detailed guide on precise floor leveling techniques.
Prepare Your Subfloor Before Laying New Planks
Once the low spots were identified, I cleared the area, removing any debris or loose particles. Then, I used a concrete grinder with a diamond pad to grind down high spots around the depression gently. For depressions, I applied a self-leveling compound, pouring it slowly while pulling a spiked roller across its surface to eliminate air bubbles and ensure adherence. This process resembled smoothing a pancake batter—uniform and bubble-free is the goal. Remember, proper preparation here can save hours and frustration later, especially if you plan to fix multiple spots. For an in-depth walkthrough, see flawless floor leveling methods.
Secure the Flooring to Prevent Future Movement
After leveling, I prepped the area for the click-lock installation by inspecting the locking mechanism for debris or damage. I then pulled up the affected planks slightly, applying a light bead of construction adhesive into the locking groove with a caulking gun, akin to buttering a slice of bread. Pressing the planks back into place ensured a tighter fit. This method mimics how you might tape a loose corner of wallpaper—adding adhesive stabilizes and prevents further movement. Be cautious not to over-apply adhesive, as excess can seep out and mar the surface. For more on proper installation techniques, our step-by-step flooring guide offers comprehensive strategies.
Monitor and Maintain to Keep Quiet and Stable
With the fix in place, I walked over the area, listening carefully for any sounds of movement. I also secured baseboards and trim, which can sometimes create pressure points that induce squeaks. Additionally, maintaining consistent humidity levels prevents expansion or contraction that may cause gaps or movement over time. Applying a small amount of lubricant designed for hardwood floors into the joint zones can also help, but only as a supplementary measure, not a primary fix. Steady maintenance is a key to long-lasting silence and stability, so incorporate regular inspections into your routine. For tips on preserving your hardwood floors, see hardwood maintenance secrets.
Many homeowners assume that installing hardwood or tile is simply about laying materials and calling it a day, but the reality is far more nuanced. One common misconception is that floor leveling is a straightforward process—yet, even professionals often overlook subtle irregularities that can lead to squeaks, cracks, or uneven finishes over time. For example, a slight dip of just 1/8 inch in a subfloor might seem negligible but can cause significant problems if not properly addressed, especially with large-format tiles or high-end hardwoods. In my experience, relying solely on a quick visual check without precise tools like laser levels can result in hidden inconsistencies that only reveal themselves after installation, when corrections become costly.
A frequent mistake I’ve seen is the belief that self-leveling compounds are foolproof. While they are excellent for minor imperfections, they can fail if the substrate isn’t adequately prepared or if a mechanical bond isn’t achieved on older concrete slabs. In fact, a study by industry expert Mike Holmes emphasizes that proper substrate preparation is the most critical step—yet, it’s often rushed or ignored, leading to delaminations or movement that’s mistaken for flooring defects. To avoid these pitfalls, I recommend diving into practices outlined in our guide on precise floor leveling techniques and understanding the importance of thorough subfloor assessment.
Another myth is that managing expansion gaps is as simple as leaving a standard space around the perimeter. The truth is, the size of these gaps should vary with humidity levels, material type, and room dimensions. Overlooking this nuance can cause buckling or gaps, especially in climate-sensitive areas. Experts like those consulted in the flooring installation fundamentals stress that adaptive planning and seasonal adjustments are essential for long-lasting results.
Thinking about tile installation, many believe that a perfect, flat subfloor is all they need. However, the real challenge lies in addressing minor undulations that can compromise even the most careful layouts. Small deviations can cause tile lippage, leading to uneven surfaces that are both unsightly and a tripping hazard. Advanced installers compensate for this by using feeler gauges and conducting the ultimate floor leveling for a perfect finish. This attention to detail ensures a seamless, professional appearance and durable installation.
Have you ever fallen into this trap? Let me know in the comments. Remember, mastering these nuances elevates your projects from average to exceptional—all it takes is this deeper understanding and attention to detail.Maintaining your flooring investments is crucial to ensure they retain their beauty and functionality over time. Precision tools and proper techniques form the backbone of effective maintenance. For instance, I can’t recommend enough investing in a high-quality laser level to regularly check for any uneven spots that might develop, especially after seasonal changes, since slight shifts in the subfloor can cause creaking or buckling. Additionally, a detailed vacuum with a soft brush attachment is essential for removing debris from grout lines and between tiles without scratching surfaces. Keeping a set of lubricants designed for hardwood—like silicone-based spray—can also help prevent squeaks in high-traffic areas. As flooring technologies evolve, I see a trend toward smart moisture meters that monitor humidity and detect potential issues before they become visible problems, which I plan to incorporate into my routine. Regular inspections—at least biannually—paired with these tools, make a remarkable difference in prolonging your floors’ lifespan. Having the right equipment allows you to address minor issues early, saving you from costly repairs in the future. If you’re serious about long-term flooring health, I recommend trying out a combination of a laser level for precise area assessments and a dedicated hardwood floor maintenance kit. These tools will empower you to spot irregularities swiftly and handle them before they escalate. For more detailed insights, check out our comprehensive guide on common flooring mistakes to avoid. Remember, proactive maintenance isn’t just about fixing problems—it’s about preventing them. Have you considered integrating a moisture monitoring system into your flooring care routine? It’s a game-changer for those living in fluctuating climates, helping you maintain perfect conditions that safeguard your investment.My journey with flooring taught me that even the tiniest imperfections—like a subtle low spot—can cause squeaks and lasting frustrations. Embracing precise leveling techniques and investing in quality tools transformed my approach, revealing that attention to detail truly makes all the difference. I wish I had learned earlier that comprehensive subfloor preparation and understanding material behaviors prevent problems before they start, saving time and costly repairs. This experience underscored that craftsmanship isn’t just about installation—it’s about anticipating issues and addressing them proactively, a lesson that elevates any flooring project from average to professional-grade. For anyone serious about durable, silence-filled floors, integrating expert-level practices into your routine will pay dividends long-term. Remember, the key to beauty and longevity lies in the details you tend to early on—don’t overlook them. Curious about the specific tools or strategies I recommend? Dive into my curated resources below and discover what truly works for seamless, squeak-free floors.