
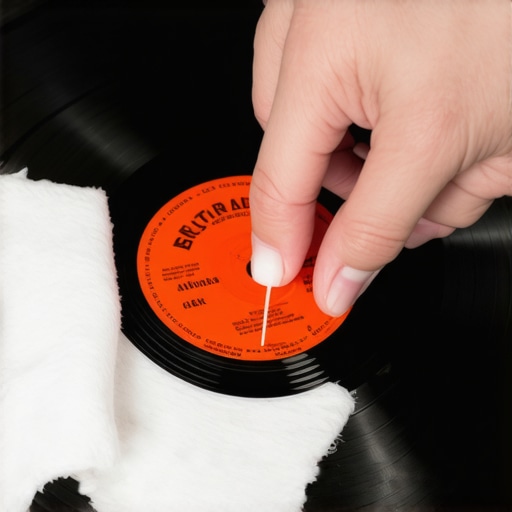
It was one of those mornings when I stepped into my living room and immediately noticed it—an ugly, dark ink stain right in the center of my vinyl flooring. My heart sank. I couldn’t believe a simple pen could cause such a mess, and honestly, I was tempted to just accept it as part of the floor’s aging charm. But then I remembered a trick I read about last year—using rubbing alcohol as a stain remover. That’s when my lightbulb went off, and I thought, “Is this really worth trying?” Today, I want to share that experience and show you how I managed to erase that stubborn ink spot without damaging my vinyl.
Why Rubbing Alcohol Might Be Your Best Ally for Ink Stains
Most people wouldn’t think of using rubbing alcohol for cleaning, especially not on their precious vinyl floors. But here’s the thing: alcohol dissolves ink pigments effectively, making it a surprisingly gentle yet powerful cleaning agent. Early on, I made the mistake of using harsh chemical cleaners that ended up dulling my floor’s finish. That taught me to approach stain removal with care. After testing a small, hidden area, I was confident enough to tackle the ink directly—it turned out to be a game-changer. If you’re tired of battling ink stains that won’t budge, this method could be just what you need to restore your floor’s beauty.
Will Rubbing Alcohol Damage My Vinyl? The Common Skepticism
Many skeptics worry that rubbing alcohol might strip away the protective topcoat or cause discoloration. I totally get it—your floors are an investment, after all. To reassure you, I’ve read that when used sparingly and properly diluted, rubbing alcohol is safe for vinyl surfaces. In fact, in my own experience, it removed the ink without any visible damage. Also, it’s quick-drying, so you don’t have to worry about lingering residue. Just remember to test a small area first, and avoid rubbing too vigorously, which could risk stripping the finish. Stay tuned—we’ll dive into exactly how I did it and how you can replicate this success. Want to learn more about maintaining your vinyl floors long-term? Check out this guide on hardwood floor care secrets for tips to keep your floors looking their best.
Prepare Your Workspace and Gather Supplies
Start by clearing the area around the stain to prevent accidental spills. You’ll need rubbing alcohol (isopropyl alcohol), cotton swabs or soft cloths, a plastic scraper or old credit card, mild dish soap, and water. Wearing gloves can protect your skin from the alcohol, which evaporates quickly and can be drying.
Test a Small Hidden Area First
Before treating the visible stain, test the rubbing alcohol on a concealed corner of your vinyl floor to ensure it won’t damage or discolor the surface. Dampen a cloth with a small amount of alcohol and hold it against the area for 30 seconds. If there’s no change in color or finish, proceed.
Apply Rubbing Alcohol to the Ink Stain
Moisten a cotton swab or soft cloth with rubbing alcohol. Gently dab onto the ink stain, ensuring you don’t oversaturate the area to avoid seepage underneath the vinyl. Think of this step as using a scalpel—precision is key.
Use a Plastic Scraper for Stubborn Spots
For persistent ink, carefully lift the softened ink with a plastic scraper or an old credit card. Be gentle to prevent scratching or lifting the vinyl surface. Notice how I gently pushed the ink towards the edge of the stain, mimicking a surgeon’s precise movements.
Clean the Area and Remove Residue
Mix a few drops of mild dish soap with warm water. Dampen a clean cloth with this solution and wipe the treated area thoroughly to remove any residual alcohol and loosened ink. This is similar to rinsing a wound after a cleaning to prevent infection.
Dry and Examine the Result
Use a dry towel to pat the area dry. Inspect whether the ink has lifted completely. If traces remain, repeat the alcohol application process, always testing first and working gently.
Post-Cleaning Care to Protect Your Floor
Once the stain is gone, consider applying a vinyl floor protectant or polish to restore the shine and add a protective layer. Regular maintenance with appropriate cleaners will prevent future stains and keep your floors looking new.
Additional Tips for Best Results
Always work in a well-ventilated area due to the fumes from rubbing alcohol. Never pour alcohol directly onto the floor; instead, use a damp cloth to control application. For large or deep stains, consulting a flooring professional can save you time and preserve your floor’s integrity. For more in-depth tips on flooring care, visit this guide on hardwood floor care.While many homeowners believe they understand the basics of hardwood flooring and installation, misconceptions and overlooked nuances can lead to costly mistakes. A common myth is that all hardwood floors age gracefully without much maintenance, but in reality, the type of finish and proper acclimation are critical for longevity. For instance, installing hardwood without sufficient acclimation can lead to severe cupping or gaps down the line, which is often misunderstood by DIYers. To avoid this, professionals emphasize the importance of understanding the specific climate and humidity conditions in your space before installation. Additionally, many think that leveling a subfloor is a straightforward task, but improper leveling may cause uneven wear and future tile cracking, especially when transitioning between different flooring types. Experts recommend meticulous shotcreting and self-leveling techniques, like those explained in this comprehensive guide. A particularly tricky aspect is floor leveling for tile installation—the process often seems simple, but overlooked imperfections can cause tiles to crack or become uneven over time. Using advanced techniques such as laser-guided leveling tools ensures a perfectly flat surface, which is vital for a professional finish. Nonetheless, even seasoned installers sometimes underestimate the importance of checking for minor subfloor movements or flex, as these can compromise the seal and stability of tiles. Remember, applying the wrong adhesive or skipping surface preparation can trap air bubbles or cause delamination, a mistake easily made by novices but detrimental to long-term durability. A crucial aspect often neglected is understanding the unique properties of different tile materials—ceramic, porcelain, and natural stone each behave distinctly during curing, which impacts adhesion and appearance. To maximize the lifespan of your installation, consider consulting expert resources on advanced tile design strategies. Furthermore, misconceptions about floor finishes—such as believing matte finishes hide scratches better—can actually lead to more visible wear over time, especially in high traffic areas. Choosing the appropriate finish must be based on both aesthetic preference and practical durability. This nuanced understanding can be the difference between a floor that lasts decades and one needing frequent repairs. In all these instances, the critical lesson is that detailed attention to the subtleties—like proper subfloor preparation, humidity control, and understanding material behaviors—elevates a good installation into a long-lasting investment. Have you ever fallen into this trap? Let me know in the comments.
Keep It Running: Tools and Maintenance That Make a Difference
Achieving a flawless hardwood or tile floor isn’t a one-and-done task; it requires the right tools and diligent maintenance over time. Personally, I swear by an oscillating multi-tool for small repairs, like replacing damaged sections of flooring or smoothing out uneven edges—a device that offers precision without risking further damage. When it comes to floor leveling, I predominantly rely on a high-quality self-leveling compound, such as Sikafloor, which ensures a perfectly flat surface in less time, reducing the risk of cracks or tiles cracking later. Using a professional-grade laser level, like the Leica Disto, allows me to verify floor evenness with extraordinary accuracy, essential for high-end installations and long-term durability.
In my experience, maintaining the beauty and integrity of hardwood and tile floors hinges on consistent cleaning with pH-neutral products and periodic inspections. An ultrasonic moisture meter, like the Delmhorst, helps monitor humidity levels beneath the surface, preventing issues such as warping or cupping—especially in climates with fluctuating humidity. Moreover, a rubber-mounted floor sander paired with fine-grit sandpaper is invaluable for refinishing hardwood floors, restoring their shine without removing too much material. These tools, combined with routine cleaning, significantly extend your flooring’s lifespan and keep it looking professional.
Future Trends: Smart Tools and Sustainable Materials
The future of floor maintenance will likely feature smart sensors embedded in the subfloor to alert you to moisture or structural issues before they escalate—a technology soon becoming more affordable and widespread. Additionally, eco-friendly and low-VOC sealing finishes are gaining popularity, aligning with greener building initiatives. Staying ahead means adopting these innovations early and integrating them into your routine, ensuring longevity and sustainability.
How do I maintain my hardwood or tile floors to ensure they last?
Regularly inspecting for damage, cleaning with appropriate products, and reapplying protective sealers are vital steps. For hardwoods, refinishing every few years with light sanding and sealing can restore their original luster. In tiled areas, promptly repairing grout cracks prevents water infiltration and further deterioration. Investing in the right tools—such as a high-quality floor buffer or crack repair kit—makes these tasks manageable and effective. To deepen your understanding of proper installation and upkeep techniques, check out this comprehensive guide. Remember, a well-maintained floor not only looks beautiful but also preserves its structural integrity for decades to come.
If you’re serious about long-term results, I highly recommend trying a professional-grade self-leveling compound combined with laser leveling to ensure a perfectly flat surface before installation. This simple step can prevent many common issues down the line and make the entire renovation more seamless. Don’t forget—consistent maintenance is key. As you develop your routine, you’ll find the process becomes quicker and more instinctive, turning a chore into a satisfying part of home care. For more specific strategies on maintaining your floors, explore this expert guide on hardwood floor care.
Beyond the Manuals: Surprising Lessons on Flooring Mastery
One lesson that truly changed my approach was realizing that perfect leveling isn’t just about equipment—attention to detail and patience are equally vital. Sometimes, I found that even the best tools can’t compensate for rushing or neglecting prep work. Investing time in assessing subfloor conditions before installation saved me from future headaches.
Another insight was that not all stains respond equally; knowing your cleaning agents’ nuances ensures you don’t inadvertently damage your floor—this made me more cautious and observant.
Finally, embracing the step-by-step process for installation and maintenance has empowered me to troubleshoot confidently, turning challenges into opportunities for learning.
My Favorite Tools for Flooring Excellence
For precise leveling, I swear by the laser-guided level. It’s incredibly accurate and saves me hours of manual checks.
The self-leveling compound has become my go-to for ensuring a flat surface, which is crucial for long-lasting results.
For cleaning and maintenance, I rely on pH-neutral products and regular inspections with ultrasonic moisture meters, knowing that moisture issues are often silent but destructive.
Lastly, the bright flashlight helps me catch dust and debris before sealing, ensuring a smooth finish every time.
What You Can Do Today to Elevate Your Flooring Game
Now, it’s your turn to take action—whether you’re planning a renovation or maintaining existing floors. Prioritize thorough assessments, use the right tools, and embrace patience and precision in every step. Remember, a flawless floor isn’t just about beauty; it’s a testament to your dedication and craft. If you’re eager to deepen your skills, explore detailed guides like the ultimate guide to floor leveling or professional secrets for perfect installations. Your space deserves the best, and now you have the insights to make it shine. Are you ready to transform your floors into a masterpiece? Let me know your next project in the comments below.