
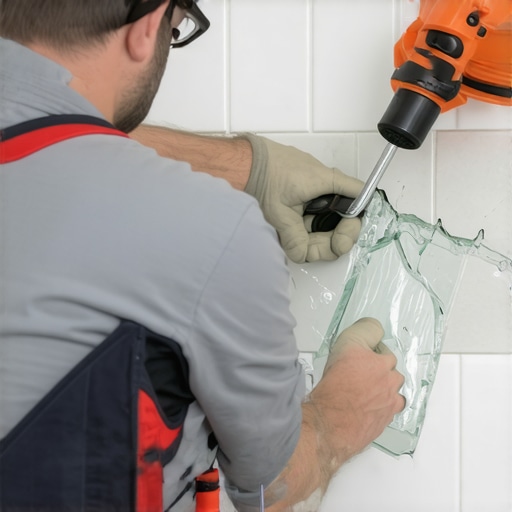
One evening, I was staring at a cracked tile in my kitchen, feeling that familiar pang of frustration. It wasn’t just about the ugly crack—it was the hassle of replacing it without disturbing the surrounding tiles. I remembered a tip I once overheard from a seasoned installer—using a simple suction cup to lift and replace individual tiles. That moment was a lightbulb.
Why Strange Tricks Like the Suction Cup Can Save Your Day
Many homeowners and even pros underestimate the power of clever tools in tackling tile repairs. The suction cup move isn’t just a gimmick; it’s a game-changer for replacing a single broken tile efficiently and cleanly. When I first tried it, I avoided traditional methods—no chipping away grout or risking damage to surrounding tiles. Instead, I used a suction cup to gently lift the damaged tile, replacing it with a fresh piece. It felt almost magical.
Will a Suction Cup Really Make a Difference for My Tile Repair?
I understand the skepticism. It sounds too simple to work, right? Early on, I made the mistake of rushing into the repair with a grout removal tool, which left me with more damage and extra work. It turned out that patience and the right techniques matter, especially if you want a seamless repair. Reliable methods, like the suction cup move, reduce the risk of harming adjacent tiles, saving you time and frustration. For more expert tips, check out this guide on mastering flooring techniques.
Understanding why this method works and how to do it right will empower you to handle repairs confidently. Ready to learn the step-by-step process that can make your tile project feel less daunting? Let’s dive in.
Preparing Your Workspace and Tools
Before diving into the replacement process, clear the area around the damaged tile to create ample space. Gather a few essential tools: a durable suction cup designed for tiles, a replacement tile that matches your existing flooring, a utility knife, and adhesive suited for your tile type. Remember, a well-prepared workspace minimizes surprises and streamlines your project.
Loosen the Damaged Tile with Precision
Apply the Suction Cup Correctly
Position the suction cup firmly onto the center of the cracked tile, ensuring a tight seal. Think of it like using a plunger—your goal is to create a vacuum that can lift the tile without damaging adjacent pieces. Gently press down and pull upward with steady, controlled force. During my first attempt, I hovered over the process, slowly increasing pressure until the tile slightly flexed and lifted. The suction cup’s grip allowed me to lift without cracking neighboring tiles, saving me hours of repair work.
Removing the Broken Piece
Once the tile is loosened, carefully slide a putty knife or thin pry bar underneath to lift it free completely. Be cautious to avoid exerting too much force, which can crack other tiles or disturb the surface beneath. If the tile is stubborn, reapply the suction cup and repeat the gentle pulling motion. This method is akin to lifting a stubborn lid—patience and gentle leverage are key.
Preparing and Installing the Replacement Tile
Clean and Prepare the Substrate
Remove any residual adhesive or grout from the exposed substrate using a utility knife and a damp cloth. A clean surface ensures better adhesion and a seamless finish. During my last project, a quick scrape with the knife and a thorough wipe resulted in a perfect bond, preventing future cracks.
Apply Fresh Adhesive
Spread a layer of adhesive evenly with a notched trowel, matching the size and shape suitable for your tile’s thickness. Think of this step as laying the foundation—firm, even, and precise. Make sure to press the tile firmly into place, aligning it with the surrounding tiles for a smooth transition. I used the notched side of the trowel to create ridges that helped the adhesive spread uniformly, ensuring a durable bond.
Press and Set the Tile
Apply steady pressure on the tile for about 10-15 seconds, ensuring full contact with the adhesive. Use a level or straightedge to verify the tile sits flush with neighboring pieces. If needed, make tiny adjustments before the adhesive sets. During one experience, I used a level to double-check the alignment, preventing uneven surfaces that could cause tripping hazards later.
Finishing Touches and Curing
Allow the adhesive to cure as recommended by the manufacturer, typically 24 hours, before walking or placing any weight on the tile. During curing, avoid any pressure to prevent movement or bonding issues. Finally, reapply grout if necessary, sealing the edges to prevent water infiltration. Remember, patience here ensures your repair blends seamlessly with the existing floor, giving it a like-new appearance.
Replacing a cracked tile with a suction cup isn’t just effective; it’s a game-changing technique that minimizes damage and maximizes control. When done carefully, it can restore your floor’s beauty with minimal mess and cost. For more detailed insights on tile installations, explore this guide on tile installation tips or consult the experts through our contact page.
While many believe that following basic instructions guarantees perfect results, experts know that nuanced pitfalls often derail projects. A common misconception is that subfloor preparation is a minor step; in truth, neglecting it can cause long-term issues like cracks or uneven surfaces. For example, improper floor leveling can lead to tile cracking or hollow spots, which might not be immediately visible but compromise durability. This is why mastering precise floor leveling techniques is vital—it’s not just about smoothing surfaces but ensuring longevity, as highlighted in this comprehensive guide. Many installers fall into the trap of rushing the process, believing that quick fixes save time, but this often results in rework and increased costs. A specific mistake involves ignoring expansion joints; they are essential to accommodate movement. Without them, tiles and hardwood floors are prone to buckling, especially in areas with temperature fluctuations. Moreover, common myths, such as the idea that self-leveling compounds are foolproof, can be misleading. If not applied correctly, they may fail to adhere or settle unevenly, creating hazards later. This highlights the importance of understanding the chemistry and application nuances of leveling products, as discussed in this expert resource. For advanced practitioners, considering the compatibility between flooring types is crucial. For instance, installing tile over hardwood without proper underlayment can cause instability; the flooring’s expansion properties can interfere with tile adhesion, creating gaps or cracks. As the design experts suggest, integrating materials thoughtfully enhances both aesthetics and function. Do you know the hidden nuances that could make or break your project? The key lies in meticulous planning, thorough knowledge, and avoiding shortcuts that seem tempting but can lead to costly mistakes. Remember, every step, from subfloor prep to material selection, influences the final outcome. If you want to elevate your skills, exploring flooring installation tips provided by industry veterans can provide actionable insights. Have you ever fallen into this trap? Let me know in the comments.
Keeping It Working: Essential Tools and Maintenance Strategies
Maintaining your floors over time requires not just routine cleaning but the right tools for occasional repair and upkeep. I personally swear by a few dedicated items that make long-term maintenance easier and more effective. For starters, a high-quality microfiber mop is indispensable for daily cleaning, as it traps dust and debris without scratching delicate surfaces. When it comes to deeper cleaning, especially on hardwood, I recommend using a pH-neutral floor cleaner—it preserves the finish and prevents premature wear. Hardwood floor care secrets emphasize the importance of gentle, appropriate products for longevity.
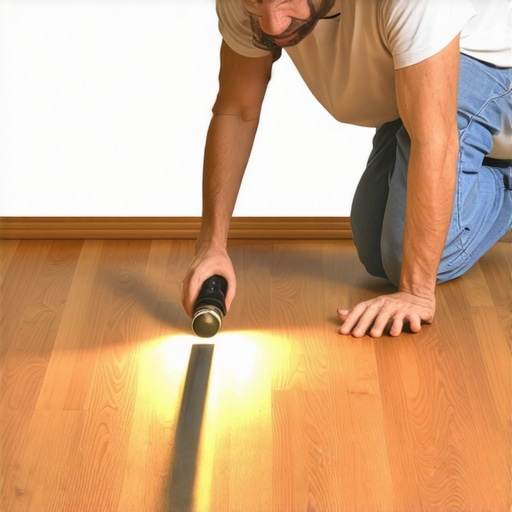
For periodic inspections and minor repairs, a good LED flashlight is invaluable. It helps identify hidden issues like subfloor ridges or uneven grout lines that can compromise your flooring. I prefer models with adjustable brightness and a focused beam—these give me precise visibility when assessing problem spots. Complement this with a 4-foot straightedge to check for any dips or humps in the surface. Regularly catching and addressing these issues can save you costly repairs down the line.
When it comes to fixing uneven floors, having a reliable floor leveler is a must. I recommend a polymer-modified self-leveling compound, which offers superior adhesion and flexibility, allowing for better long-term results. Always follow the manufacturer’s instructions meticulously; for example, kneeling the mixture thoroughly and pouring it slowly from a container with a spout can help prevent air bubbles and ensure a smooth finish. For tips on achieving flawless surface preparation, consult this comprehensive floor leveling guide.
How do I maintain tile and hardwood floors over time?
Consistent care is key. Sweep or vacuum regularly to remove dirt that can scratch surfaces, and mop with suitable cleaners as needed. Protect high-traffic areas with rugs or pads to minimize wear. For hardwoods, I recommend applying a quality floor polish every 6-12 months—this helps maintain luster and forms a barrier against dirt and moisture. Remember, addressing small issues immediately prevents the need for major repairs later. Keep an eye out for signs of wear or damage, and use appropriate repair tools promptly.
Predicting future trends, I believe automated floor maintenance devices, like robotic vacuums with mopping capabilities, will become more sophisticated. They could soon handle detailed cleaning routines, preserving the aesthetic and longevity of your floors with minimal manual intervention.
If you want to elevate your maintenance routine, try using a high-quality LED flashlight combined with a straightedge to regularly inspect critical areas. Spotting and fixing issues early can extend your floors’ life significantly. Need expert advice for specific challenges? Reach out through our contact page.
What I Wish I Knew When I Started
Lesson one is that patience is your best ally. Rushing through floor leveling or tile replacement almost always leads to mistakes. The second lesson is investing in quality tools—those few extra dollars save hours of frustration later. Lastly, understanding the subtle differences between materials, like the expansion properties of hardwood versus tile, helps prevent long-term issues. These insights came through trial, error, and reading expert guides, emphasizing that mastery comes with experience and humility.
Tools and Resources That Changed My Approach
I highly recommend the professional floor leveling guide—it demystifies complex processes and boosts confidence. For tile projects, installation tips from industry veterans have saved me from common pitfalls. Additionally, I trust quality tools like a laser level and a good notched trowel, which can dramatically improve the precision of your work. Finally, engaging with community forums and expert tutorials continues to broaden my skills and keep me updated on best practices.
Harnessing Passion to Keep Floors Beautiful
Your dedication to perfecting your flooring can transform your living space into a sanctuary. Remember, every chip, crack, or uneven surface is an opportunity to learn and improve. Embrace the process, and don’t shy away from seeking expert advice when needed. With patience, the right tools, and a willingness to learn, you can achieve flooring that not only lasts but elevates the entire aesthetic of your home. The journey toward flawless floors is ongoing, and your commitment makes all the difference.
What has been your biggest challenge in tile or hardwood flooring projects? Share your experiences below—I’d love to hear your story!