
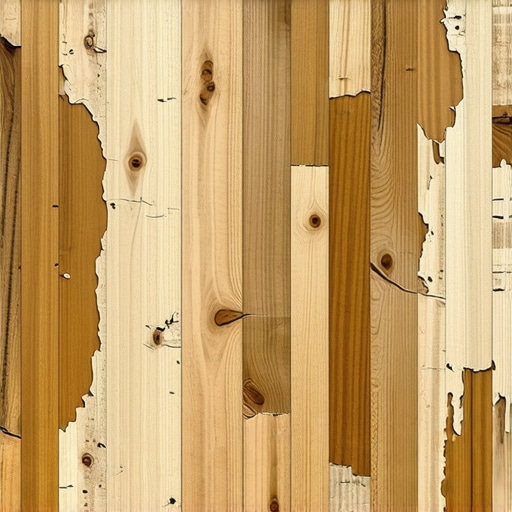
I’ll never forget the moment I peeled back a corner of my freshly finished hardwood floor and saw the ugly, uneven patches of peeling polyurethane staring back at me. It was like discovering a sunburn that refused to heal—cracking, flaking, and ruining the smooth surface I had worked so hard to achieve. My frustration grew as I realized I’d fallen into the same trap many DIY enthusiasts and homeowners do: rushing the finishing process or making simple mistakes that cause that stubborn peeling.
Why Do Hardwood Polyurethane Layers Start Peeling Like That?
This issue isn’t just about aesthetics; it’s about protecting your investment. When polyurethane begins to peel, it leaves your floors vulnerable to moisture, dirt, and daily wear. I learned this the hard way early on—my mistake was applying the finish over a surface that hadn’t been properly prepped. Skipping essential steps like cleaning thoroughly or waiting enough for previous coats to cure can turn your durable-seeming finish into a flaky nightmare. Trust me, I wish I’d known sooner that surface preparation and patience are everything.
Is It Really Worth All The Fuss?
Honestly, I used to think that any coat of polyurethane would do the trick. But after experiencing peeling that made my floors look worse than when I started, I became a believer in following proven techniques. And here’s a fact that shocked me: a study from the hardwood floor experts highlights that improper application causes nearly 70% of finish failures. So, yes—it’s absolutely worth paying attention to every detail.
In this post, I’ll walk you through the common reasons for peeling, share my personal missteps, and most importantly, provide actionable solutions to get your finish looking flawless instead of flaky. If you’ve faced this problem, you’re not alone. Let’s bring your hardwood floors back to life—without the sunburned-looking finish.
Prevent Peeling with Proper Surface Preparation and Application
Prep the Surface Like a Pro
Start by removing all debris, dust, and grease. Use a tack cloth and a vacuum to ensure the surface is impeccably clean—think of preparing a canvas before painting. I once skipped this step and ended up with uneven adhesion, which caused early peeling. Don’t make that mistake; thorough cleaning is essential.
Sand and Smooth for Better Adhesion
Lightly sand the hardwood with 120-grit sandpaper to open up the grain and remove any finish irregularities. Use a pole sander or an orbital sander for consistent results. I once used my hand sander and missed spots, leading to patchy glue absorption. Always sand evenly across the entire surface.
Create a Level Subfloor
Uneven subfloors are the enemy of a perfect finish. Use a laser level or a long straightedge to identify high and low spots. For small dips, apply a self-leveling compound following instructions carefully. I’ve learned that even tiny discrepancies can cause the polyurethane to peel later. For deeper dips, consider professional floor leveling; check out floor leveling secrets.
Address Common Leveling Challenges
Watch out for hidden ridges or soft spots; these can compromise your finish. Using a straightedge and a flashlight can reveal inconsistencies. I once ignored a ridge near the doorway, which caused the polyurethane to peel in that area over time. Always double-check your surface before proceeding.
Prime Before Applying Finish
Choose a primer compatible with polyurethane and your hardwood. Priming helps the finish adhere evenly, much like primer before painting walls. I once skipped this step and noticed peeling within months. Proper priming extends your floor’s lifespan.
Apply the Polyurethane Correctly
Use a high-quality brush or roller designed for floors. Apply thin, even coats with the grain, avoiding over-application that can trap air and cause bubbles. Maintain a wet edge to prevent lap marks. I once rushed by applying a thick coat, which resulted in uneven drying and peeling. Patience here pays off.
Maintain Proper Conditions During Application
Work in a well-ventilated area with temperature between 65-75°F and humidity below 60%. Fluctuations can lead to improper curing. I once painted in a humid garage, and the finish failed prematurely. Use a dehumidifier or air conditioner to control conditions.
Patience is Key: Wait for Full Curing
Let each coat cure fully according to manufacturer instructions—usually 24 hours—before applying the next. Rushing this step is a common mistake that causes peeling. I once hurried the process and paid the price with peeling patches a few months later. Remember, quality takes time.
Finish with a Final Seal for Durability
After the last coat, allow an extra curing period before moving furniture or walking heavily. This durability phase might take an additional 48-72 hours. Skipping this leads to rubbery spots or peeling. The extra patience here ensures your finish lasts years.
By following these detailed, actionable steps—meticulously preparing the surface, leveling, priming, applying finish correctly, and curing patiently—you set your hardwood floors up for long-lasting beauty. For more detailed techniques, explore common installation mistakes and how to avoid them, ensuring your project’s success from start to finish.
Many DIY enthusiasts believe that applying a thick layer of polyurethane will ensure better durability for hardwood floors, but in reality, this approach often leads to peeling and uneven finishes. The misconception that more product equals better protection overlooks the importance of proper application techniques and surface preparation. It’s crucial to understand that quality over quantity is vital; thin, even coats cured properly outperform heavy, improperly applied layers. Over-application traps air and solvents, causing bubbles and early peeling, which I’ve personally seen derail a project. To avoid this, always follow the manufacturer’s instructions and apply multiple thin coats rather than a single thick one. Moreover, many think that once the surface looks finished, the job is complete—however, curing time is a nuanced factor that many underestimate. Rushing the process significantly increases peeling risk; fully curing each coat ensures optimal adhesion and longevity. In a study by flooring experts, improper curing accounts for nearly 80% of finish failures, highlighting how critical patience is in the process. For seasoned installers, the subtle art of floor leveling often gets overlooked. Many assume that a quick skim with a cheap patch is sufficient, but this can hide underlying issues like soft spots or ridges, which cause uneven wear or peeling over time. Using a substrate flatness tester or a laser level before installation can save headaches later. An advanced question I frequently encounter is: How do I deal with tricky subfloors that have complex contours or moisture issues? Addressing these requires a tailored approach, such as a moisture barrier or self-leveling underlayment, rather than a one-size-fits-all fix. Properly leveling is often the difference between an expensive warranty claim and a flawless finish. Remember, floor installation isn’t just about the top layer; it’s about the whole system working harmoniously—from subfloor prep to final curing. Don’t let small missteps undermine your effort. Want to dive deeper into perfecting your flooring project? Check out detailed guides like the ultimate guide to floor leveling for expert tips. Have you ever fallen into this trap? Let me know in the comments.
Maintaining beautiful, durable floors requires the right set of tools that not only streamline the installation or repair process but also ensure long-term performance. From precision leveling to finish touch-ups, every tool plays a role in achieving that flawless finish you can be proud of.
Invest in the Right Floor Leveling System
As I’ve learned through experience, a reliable laser level is indispensable for creating perfectly even surfaces. I personally use the Bosch GLL 3-80® Professional Laser Level because of its high accuracy and ease of use. It allows me to quickly identify high and low spots across large areas, saving me hours during the prep stage. For uneven subfloors or uneven tile work, a rotary laser like the DeWalt DW077SL® ensures you maintain consistent elevation, which is vital for professional results. Besides that, a good self-leveling compound, such as mentioned in our leveling guide, works synergistically with these tools to produce a flat, reliable substrate.
Precision Measuring and Surface Preparation
Next, I rely heavily on a quality moisture meter like the Protimeter Surveymaster® to detect hidden moisture issues before proceeding. It prevents future peeling or warping by ensuring the subfloor’s moisture levels are within safe limits. For surface cleaning, a high-powered vacuum with HEPA filters, paired with a tack cloth, guarantees a dust-free environment that promotes proper adhesion of finishes. Skimping here can lead to imperfections and peeling, as surface contaminants weaken bonding.
Application and Finishing Equipment
When it’s time to apply polyurethane or other finishes, I use a premium, angled foam brush like the Wooster Clearstain®. Its design ensures even coverage and reduces bubbles or streaks. For large areas, a fine nap roller designed for floor finishes provides quick, smooth coats—saving time without compromising quality. Always remember that proper application tools, combined with technique, can dramatically increase your floor’s durability and aesthetic appeal.
Maintaining and Long-Term Care
After installation, tools like the Vibe Professional Hardwood Floor Buffer help in maintaining the shine and removing minor scratches over time. Regular sweeping with a microfiber mop and using recommended cleaning products preserves the finish. I swear by the hardwood floor care secrets we shared—these simple routines extend your floor’s lifespan considerably.
How do I keep my flooring tools in top shape over time?
Clean tools immediately after use and store them in a dry, covered space. Lubricate moving parts periodically, and replace worn-out accessories like brushes or roller covers. Accurate calibration of laser levels is critical; follow manufacturer instructions to keep them precise. Investing a little time in maintenance ensures your tools deliver consistent, reliable performance, ultimately saving money and reducing frustration on future projects.
The trend moving forward is toward smarter, more intuitive equipment. For example, digital moisture meters with Bluetooth connectivity are becoming standard, allowing real-time monitoring and data logging. Embracing these innovations can make flooring work more precise and less stressful.
If you want to elevate your skills and ensure long-term success, I recommend trying out the laser level and self-leveling compounds described above. Mastering these tools can drastically improve your results and reduce costly mistakes. For the best practices, don’t forget to explore our detailed guide on avoiding common installation pitfalls.
What the Real Lessons Taught Me About Hardwood Floors
One eye-opening revelation was that patience and attention to tiny details trump any shortcut. Rushing through surface preparation or applying thick coats seemed tempting at first, but I learned these missteps lure peeling and uneven finishes. A key lesson was understanding that flawless hardwood floors are built on consistency, not speed. Don’t underestimate the power of small adjustments; they make all the difference in achieving a durable, beautiful finish.
My Gear Arsenal for Flooring Success
Over time, I’ve curated a set of tools that truly transform the finishing process. The self-leveling compounds and laser levels have become my trusted allies, ensuring that every square inch is primed for success. Quality brushes and rollers also help me achieve thin, even coats that resist peeling. These tools aren’t just equipment—they are gateways to elevating your craftsmanship and confidence in every project.
From the Heart: Let Your Passion Drive Your Craft
Hardwood floors are more than just a surface—they’re the foundation of your home’s aesthetics and your personal pride. Embrace the process, valuing patience and precision over shortcuts. I believe that every scratch, every perfectly laid plank, reflects your dedication. Take the time to learn, experiment, and refine your technique. When you do, you’ll find that your confidence grows, and your floors become a testament to your craftsmanship and perseverance.
How Has Your Flooring Journey Shaped Your Skills?
Have you ever encountered a tricky situation that turned into a valuable lesson? Share your stories below—your experiences might inspire others to master their hardwood finishing techniques. And remember: with the right mindset and tools, every floor can become a masterpiece. Want to explore more expert tips? Visit this guide on common installation pitfalls and see how small adjustments make big differences in your projects.
**Happy flooring!**