

Ever stepped into a room and noticed your beautiful bamboo flooring suddenly developing unsightly gaps? I sure have. One morning, I walked across my living room and was greeted by a startling click-clack of loose planks. Confused and a little worried, I realized my once snug-floor had become a patchwork of tiny spaces. That lightbulb moment made me wonder: why is this happening?
Understanding the Why Behind Your Bamboo Floor’s Gaps
Is Shrinking Normal or a Sign of Trouble?
At first, I thought I had mismeasured or installed the flooring incorrectly. Turns out, bamboo, like many hardwood floors, reacts to changes in moisture and temperature. When the environment shifts, bamboo can shrink, leading to gaps. My early mistake was ignoring the importance of acclimating the bamboo properly before installation — a tip I learned after some research and a few mistakes. Did you know that bamboo can absorb and lose moisture rapidly, especially if not properly conditioned? According to the Hardwood Information Center, moisture imbalance is a leading cause of flooring gaps and warps (source: Flooring Installation Mistakes). So, in essence, your floor’s shrinking is often a natural response but can be exacerbated by installation errors or climate swings. The good news? Once we understand the cause, it’s easier to fix and prevent.
Recognizing this fragility made me delve deeper into proper installation techniques and environmental controls. I realized that gaps aren’t just cosmetic issues—they can compromise floor integrity over time. The key is to tackle the root causes by ensuring your environment stays within recommended humidity ranges and that the flooring is properly acclimated before laying down. Intrigued? Stay with me; we’re getting into practical steps soon. For now, take a moment: have you noticed gaps forming suddenly, or did they appear after seasonal changes? Let’s figure out how to fix this once and for all.
Start with Proper Environment Control
Monitor Humidity and Temperature
Maintaining stable humidity levels between 40-60% prevents bamboo from shrinking or swelling. Use a hygrometer to keep track and a humidifier or dehumidifier as needed. During seasonal changes, especially winter and summer, adjust climate controls to avoid rapid shifts that cause gaps.
Allow Your Bamboo to Acclimate
Before installation, store your bamboo planks in the room where they’ll be laid for at least 72 hours. This allows the material to reach ambient moisture levels, reducing post-installation shrinkage or expansion. I once left my flooring in the garage for five days, and it significantly minimized gaps after installation.
Prepare the Subfloor for Stability
Level the Surface Thoroughly
A uneven subfloor is like trying to walk on wavy water — it causes your bamboo to shift and develop gaps. Use a self-leveling compound to smooth out high and low spots. I used a floor leveler, following detailed instructions from this guide, which resulted in a flawless base and tight planks.
Check for Ridges and Bumps
Inspect with a flashlight or straightedge to find subfloor ridges. Use a trowel or sander to smooth these imperfections. A flat surface ensures even contact and reduces gaps caused by uneven support beneath the bamboo. This step is essential before any install, especially on older concrete slabs.
Secure and Level the Flooring
Use Correct Adhesives and Spacers
Apply a high-quality adhesive suited for bamboo, spreading it evenly with a notched trowel. Leave expansion gaps around the perimeter and use spacers to maintain uniform spacing during installation. I prefer a V-notch trowel for large planks, which ensures consistent coverage.
Implement a Tapping Routine
Gently tap each plank into place with a tapping block, ensuring tight contact and minimizing gaps. I learned this trick during a project; it helped to seat each board firmly into the adhesive, preventing future separation or gaps.
Fill Existing Gaps Correctly
Choose the Right Filler
Use a flexible, color-matched filler specifically designed for bamboo floors or wood. Avoid rigid fillers that crack over time. I recommend a wax crayon for small gaps, which can be melted into the space for a seamless look.
Apply with Precision
Insert filler into the gap with a putty knife, pressing firmly to fill completely. Wipe off excess immediately. For larger gaps, consider using a wood putty or epoxy resin for durability. Post-filling, sand lightly to level the surface with the surrounding board. This meticulous approach restores the smooth appearance and prevents debris accumulation in gaps.
Maintain and Prevent Future Issues
Control Indoor Climate
Continuously monitor humidity and temperature, especially during extreme weather. Use humidifiers or dehumidifiers to keep conditions stable, ensuring your bamboo flooring remains snug and gap-free.
Stay Consistent with Flooring Care
Clean with damp mop, avoiding excessive water that can cause swelling. Use protective pads on furniture to prevent indentations that might lead to misalignment and gaps eventually.
Many DIY enthusiasts and even seasoned contractors fall prey to misconceptions about tile, floor leveling, and hardwood installation. A prevalent myth is that leveling floors is a straightforward process—simply apply self-leveling compounds and you’re done. However, the real challenge lies in understanding the subtle interactions between substrate moisture, material expansion, and curing times. Ignoring these nuances can lead to uneven surfaces, cracking, or future structural issues. For instance, the misconception that more leveling compound yields a perfectly flat surface can backfire, as excess material might shrink unevenly or cause adhesion problems. Advanced installers focus on meticulous prep, including checking for subfloor ridges with a flashlight, and using specific tools like laser levels to ensure precision, as detailed in this comprehensive guide.
A common trap is underestimating the importance of environmental conditions. Many overlook that humidity fluctuations significantly impact hardwood and tile installations. Maintaining a stable indoor climate isn’t just about comfort; it’s essential for preventing gaps, buckling, or joint cracking. Experts recommend monitoring humidity with a hygrometer and using controlled climate systems during and after installation, as backed by studies in flooring science literature.
Let’s answer a question that often stumps even experienced installers: How can subtle subfloor imperfections impact high-end tile or wood floors? The answer is profound. Tiny ridges or bumps, if uncorrected, can cause stress points that lead to uneven wear, cracking, or bubbling. This is why advanced techniques, like using a laser level and consistent surface testing, are invaluable. Properly addressing these issues ensures a long-lasting, visually appealing finish.
Sometimes, the biggest mistake is assuming a one-size-fits-all approach. Every project demands tailored solutions, whether it’s selecting the right adhesive for porcelain tiles or understanding the specific expansion joints needed for large-format installations. Most importantly, taking time to curate your materials and environment—rather than rushing—can save hundreds of dollars in repairs down the line.
In short, the hidden key to flawless flooring is mastering the subtleties: environmental control, precise substrate preparation, and tailored solutions. For deeper insights, explore expert-level techniques at this resource or learn about innovative tile design strategies here.
Have you ever fallen into this trap? Let me know in the comments and share your experience with hidden pitfalls in flooring projects.
Once your floors are installed and looking pristine, the key to long-term beauty and functionality lies in proper maintenance and the right tools. Investing in quality equipment isn’t just about making your job easier—it’s about ensuring your floors stay level, durable, and visually appealing for years to come. For beginners and seasoned pros alike, understanding which tools are essential can make a significant difference in achieving that flawless finish and simplifying upkeep.
Prioritize Precision with Laser Levels
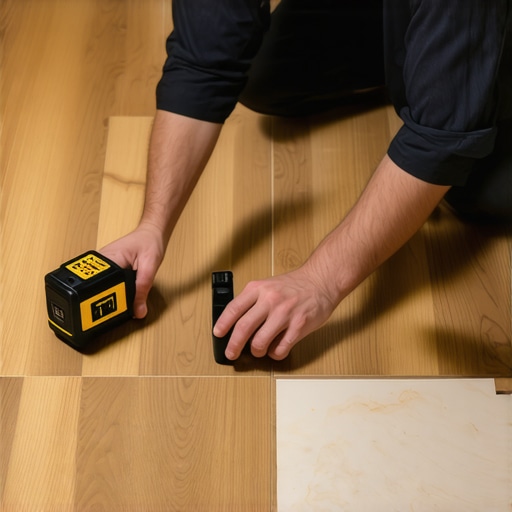
In my experience, a laser level is indispensable for maintaining perfectly straight tile lines and ensuring even hardwood planks. Unlike traditional bubble levels, laser levels project a straight line across large surfaces, making it easier to spot deviations early. Regularly checking your floor’s levelness helps prevent future issues such as uneven wear or cracks.
Utilize a High-Quality Trowel and Notched Spatula
When applying adhesive or thinset, precision tools like a notched trowel are non-negotiable. The size of the notch affects coverage and adhesion; I prefer a V-notch trowel for large format tiles to maximize contact area without excessive thinset. Proper application reduces the risk of voids that can cause tiles to shift or crack over time.
Embrace Moisture Monitoring Devices
Given how sensitive bamboo and hardwood can be to moisture fluctuations, a reliable hygrometer is an essential maintenance tool. Keeping humidity within 40-60% prevents shrinkage in bamboo floors and swelling in hardwood. I personally use a digital hygrometer with remote monitoring to track environmental changes regularly, especially during seasonal shifts that can cause gaps or buckling.
Schedule Regular Cleaning with Suitable Equipment
Maintaining your floors’ appearance also involves proper cleaning tools. Use a damp microfiber mop paired with vacuums fitted with soft brushes—this combo lifts debris without scratching. For hardwoods, avoid excessive water; instead, I recommend a microfiber damp mop for routine cleaning, while deep cleaning sessions employ steam mops cautiously, ensuring they are suitable for your specific flooring type.
Plan for Long-Term Success by Including Floor Levelers
Sometimes, maintaining a level surface over time requires minor adjustments. Self-leveling compounds or floor patching products are invaluable for correcting minor dips or unevenness. I recommend familiarizing yourself with precision leveling techniques—a detailed approach that ensures your floors stay flat and safe during everyday wear.
Looking Ahead: The Future of Floor Maintenance
Technologies like smart environmental sensors connected to home automation systems promise a future where moisture and temperature fluctuations can be addressed proactively. Staying informed about these innovations can grant homeowners and installers alike the advantage of preemptive care, minimizing costly repairs and extending your floors’ lifespan. As trendsetter in flooring, I believe that integrating these smart tools early will become the new standard in floor care.
How do I keep my floors working beautifully over time?
The secret lies in routine checks with precise tools, like laser levels and hygrometers, combined with proper cleaning techniques. Regularly inspecting the floor’s levelness and environmental conditions ensures issues are caught early. Don’t forget to learn advanced methods, such as using the latest leveling compounds, to keep your floors flawless and functional. Give these tips a try—your floors will thank you for it!
What I Wish I Knew Before Laying Bamboo Floors
- Never underestimate the power of environmental stability. I learned the hard way that a humidifier in winter and dehumidifier in summer can save you from unsightly gaps and warping. It’s a small investment with great returns in long-term durability.
- Acclimating your bamboo planks isn’t just a suggestion—it’s a necessity. I once installed flooring straight out of the box, only to watch gaps form as it adjusted to room humidity. Planning for this step is a game-changer.
- Floor preparation is everything. Uneven subfloors may seem minor but can cause significant issues down the line. Using a laser level helped me catch dips and ridges early, leading to a flawless finish.
- Choosing the right adhesives and tools takes your project from mediocre to professional. High-quality adhesives and proper notched trowels ensure tight, gap-free planks that stand the test of time.
- Fill gaps meticulously—small details make all the difference. I found that matching the filler color and pressing firmly results in a seamless look that mimics the original bamboo surface.
Tools and Resources That Elevated My Flooring Experience
- Investing in a dependable true laser level transformed my ability to install straight, even lines. I trust this guide for mastering levelness, critical for high-quality flooring.
- A quality hygrometer was invaluable. Keeping indoor humidity within 40-60% prevents unexpected shrinking or swelling. I personally use this device for reliable readings.
- For precise mixing of leveling compounds, I rely on this paddle. It ensures smooth, bubble-free pours every time, essential for a level surface.
- Learning from experts has dramatically improved my outcomes. The comprehensive insights at this resource helped me understand subtle nuances that make a big difference.
Your Next Step in Flooring Confidence
Diving into flooring installation can be daunting, but with the right knowledge and tools, you’ll unlock results that last and look stunning. Don’t shy away from experimentation—every project teaches you something new. Remember, perfect floors aren’t an accident; they’re the result of precision, patience, and good choices. Ready to give your bamboo floors the attention they deserve? Share your thoughts or questions below—your experience can inspire the next homeowner to do their best!
}