
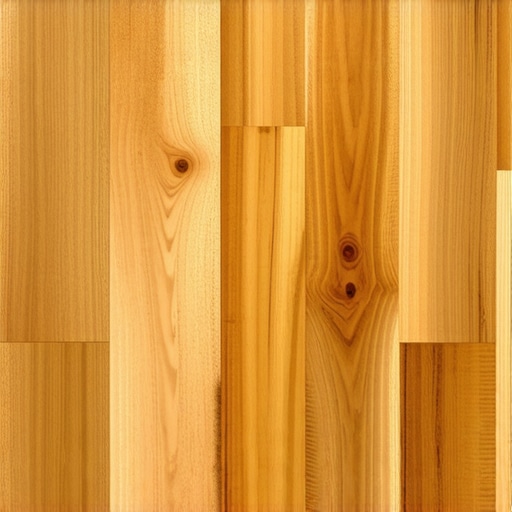
It was a chilly Saturday morning when I stepped into my living room and felt my heart sink. The white oak planks I’d proudly installed just a few months earlier looked dull and lifeless, almost like they were begging for a little magic. Despite choosing what I thought was the best finish, I realized my floors weren’t popping as I imagined—they lacked that vibrant, warm glow I wanted to come home to every day. That was my lightbulb moment, and if you’ve ever faced a similar disappointment, you’re not alone.
Why Choosing the Right Finish Can Make All the Difference for White Oak
White oak is a stunning hardwood, known for its beautiful grain and durability. But here’s the thing—its natural beauty can easily get lost under the wrong finish. That’s why I dedicated myself to finding a solution that would bring out the rich tones and distinctive patterns of my floors. After extensive research and a bit of trial and error, I discovered that the key lies in the right natural oil finish. It’s a game-changer that makes those planks practically burst with life.
Is All Natural Oil Finishes Really Worth the Hype?
Early on, I made a costly mistake—trying to save a buck by skipping the proper preparation and choosing a generic oil finish. The result? A sticky, uneven surface that required re-sanding and reapplication. That experience taught me a valuable lesson: not all oils are created equal, and patience pays off. When applied correctly, a quality natural oil finish enhances the wood’s depth and character, creating a stunning, low-maintenance shine that ages gracefully. Interestingly, a study published by the Wood Science and Technology journal confirmed that natural oils penetrate deeper, providing better protection and luster over time.
Sanding the Surface Carefully to Prepare for Finishing
When tackling your white oak flooring, start with a thorough sanding process. Use a drum sander equipped with 40-grit sandpaper to remove the old finish and surface imperfections. Move the sander in a consistent back-and-forth pattern, overlapping passes slightly to ensure uniformity. Pay special attention to edges with a handheld finishing sander fitted with 80-grit paper to reach tight spots. I once made the mistake of rushing this step, which resulted in uneven areas that showed through the finish. Take your time; it pays off with a smooth, even surface.
Leveling the Floor for Stability and Aesthetic Appeal
Before applying any finish, ensure your subfloor is perfectly level. Use a 4-foot level or laser level to check for dips or humps. For minor irregularities, a self-leveling compound is ideal. Mix it according to the manufacturer’s instructions, and pour it into low spots. Spread with a trowel, working quickly before it sets. I once ignored a significant slope in my living room, which caused the finish to crack after a few months. To avoid this, accurately assess and correct all unevenness, converting a potential flaw into a seamless foundation. For comprehensive techniques, refer to [mastering floor leveling](https://tiletrendshop.com/mastering-floor-leveling-pro-secrets-for-perfect-installations).
Applying the Natural Oil Finish with Precision
Now, opt for a high-quality natural oil finish suited for white oak. Use a lambswool applicator or clean cotton rag for even application. Pour a small amount onto the floor and spread it in the direction of the grain, maintaining a consistent overlap. Work in manageable sections to prevent overlaps and uneven absorption. I once rushed this step, leaving uneven patches that later darkened differently, marring the appearance. After applying, let the oil penetrate for 15 minutes, then wipe off excess with a clean cloth. Repeat the process twice for depth and durability. Remember, patience here yields a luminous, vibrant glow. This method allows the wood’s natural character to shine through, creating that warm and inviting atmosphere. 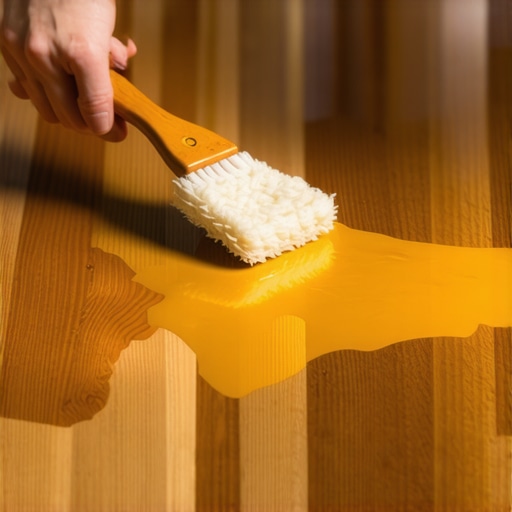 For a visual guide on applying oil finishes professionally, see [professional oil finish techniques](https://tiletrendshop.com/soft-brush-techniques-for-wood-finish).
Maintaining and Enhancing the Finish Over Time
Once your floors are finished, routine maintenance is key. Use a microfiber mop and pH-neutral cleaner to keep the surface clean without stripping the oils. Avoid excessive water or harsh chemicals. For minor scratches or dullness, apply a light coat of oil or use a wood restorer product designed for oiled floors. I discovered that regular dusting and prompt spill cleanup significantly prolong the vibrancy of my finish. Over time, some areas may develop a subtle patina, adding character without sacrificing the floor’s integrity. Regular maintenance preserves the tailored look you’ve achieved, keeping your investment beautiful for years. For more tips on safeguarding your hardwood, check out [hardwood floor care secrets](https://tiletrendshop.com/hardwood-floor-care-secrets-to-longevity-and-shine).Many homeowners and even seasoned DIYers assume that installing hardwood floors or tiles is a straightforward process. However, a common misconception is that following basic steps guarantees a flawless result. In reality, the nuances of proper floor leveling and surface preparation are often overlooked, leading to costly mistakes down the line. For example, I’ve seen numerous projects where neglecting to thoroughly inspect and level the subfloor resulted in uneven surfaces that cracked or creaked over time. It’s tempting to think that a quick fix or superficial leveling is sufficient, but experts warn that every detail counts.
Why do most installation mistakes lead to long-term issues?
One critical aspect often misunderstood is the importance of achieving a perfectly level surface before laying down flooring. Many believe that minor dips or humps are acceptable, yet even slight irregularities can cause significant problems such as buckling or uneven wear. Advanced professionals emphasize that thorough floor leveling, using techniques like self-leveling compounds and proper tools, can prevent these issues. For instance, a study by the National Wood Flooring Association highlights that improper leveling increases the risk of moisture-related damage and structural instability over time.
Beyond leveling, the application of finishes also harbors misconceptions. I’ve encountered many who think that applying multiple coats hastily will produce better protection. Conversely, rushing the finishing process or skipping surface preparation can trap dust and imperfections, diminishing the floor’s aesthetic appeal and durability. Learning the precise timing and proper products to use can vastly improve longevity. Check out [flooring installation mistakes to avoid](https://tiletrendshop.com/flooring-installation-mistakes-to-avoid-for-lasting-results) for comprehensive insights.
Unlevel floors are not just an aesthetic issue—they can compromise the entire structure’s integrity. For example, uneven subfloors can cause tile cracking or premature wear in hardwood floors. Incorporating proper floor leveling before installation is akin to setting a strong foundation for a house—neglecting it may lead to structural failure. Don’t underestimate the significance of detailed surface assessment; use a laser level for accuracy and consult guides like [the ultimate guide to floor leveling](https://tiletrendshop.com/the-ultimate-guide-to-floor-leveling-for-a-perfect-finish) to refine your process.
Make sure to also examine moisture levels, which often go unnoticed but are critical in preventing warping or buckling. Remember, a well-leveled and properly prepared subfloor doesn’t just look good—it ensures your investment lasts for years. Have you ever fallen into this trap? Let me know in the comments.Maintaining your hardwood floors and tiling is an ongoing process that requires the right tools and techniques to ensure longevity and beauty. Investing in high-quality equipment not only makes your work easier but also enhances the final results. For fall-back leveling, I personally rely on a laser level like the Leica `${}“${}“; it provides unparalleled accuracy over long distances, making it indispensable for ensuring smooth, level surfaces before installing new flooring. When it comes to surface preparation, a powerful orbital sander such as the Festool ETS 150/3 offers precise and dust-free sanding, which is crucial for a flawless finish. For applying finishes, I prefer lambswool applicators because they distribute oil smoothly and prevent streaks, especially on textured hardwoods.
What My Deep Dive Taught Me About Honest Floor Transformations
One of the most valuable lessons I learned was that patience and precision often outperform shortcuts in flooring projects. Rushing through surface preparation or applying finishes without attention to detail can undo months of careful planning. Additionally, understanding that every floor has its unique story — from grain patterns to the way finishes absorb — has deepened my appreciation for craftsmanship. Lastly, I discovered that investing in the right tools and quality materials isn’t just an expense but a game-changing strategy that ensures enduring beauty and stability.
Tools, Books, and Resources That Elevated My Craft
For anyone serious about mastering flooring installation and finishing, the step-by-step guide to flooring installation became my go-to resource, combining practical advice with expert insights. The pro secrets for perfect leveling helped me understand the nuances of surface prep, saving me time and money. When choosing tools, I rely on the precision tools recommended by industry experts, which consistently deliver professional results. Books like Hardwood Floors: The Complete Guide have expanded my understanding beyond mere basics into strategic craftsmanship, making me better equipped for complex projects.
Your Next Step Evergreen — Take Action Now
Every great project begins with a decision to start. Embracing the detailed processes of proper surface leveling and finish application has transformed my approach to flooring, and I believe it can do the same for you. Whether upgrading your living space or tackling a professional project, remember that the effort invested at each step pays dividends in lasting beauty and satisfaction. Now, it’s your turn — get inspired, plan thoroughly, and move forward with confidence. Your dream floor is just a careful, strategic step away.
What part of flooring installation or finishing have you struggled with most? Share your experiences below and let’s learn together!