
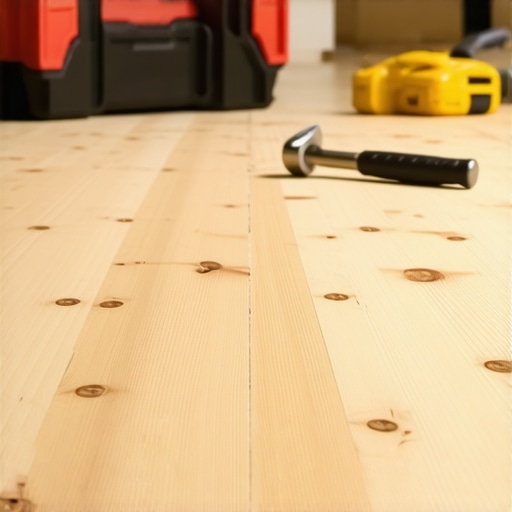
I remember the exact moment I realized my flooring project was heading south—the screws holding down my subfloor kept backing out, causing those annoying squeaks and uneven spots I dreaded. At first, I thought I was just missing a step or using the wrong screws, but it turned out to be a bigger issue: the foundation beneath the surface wasn’t stable enough to support my efforts. That lightbulb moment taught me a lot about the importance of proper subfloor preparation and fastener choices.
Don’t Let Loose Screws Ruin Your Dream Floor
Understanding why your subfloor screws back out is crucial because it directly impacts the longevity and safety of your flooring. Loose screws can lead to squeaking, shifting, and even structural problems over time. Today, I promise to share the actual reasons behind this frustrating issue and the proven solutions I’ve discovered through personal trial, error, and expert advice. Whether you’re laying hardwood, tile, or laminate, proper fastener installation is vital for a flawless finish.
Is the Wrong Screws or Technique to Blame? Busting the Biggest Skepticism
Initially, I blamed my screws—thinking I just picked the wrong type or applied too little torque. But I made the mistake of ignoring the condition of my subfloor and the preparation process, which are often overlooked yet critical factors. Did you know that assuming all screws are created equal could be leading you straight to trouble? As I learned early on, a mistake as simple as using the wrong fasteners can cause your screws to back out prematurely. Curious about the right fasteners and techniques? Check out some expert tips on [flooring installation fundamentals](https://tiletrendshop.com/flooring-installation-fundamentals-leveling-for-a-seamless-look) to make sure you’re set up for success.
Stay tuned as I walk you through how to diagnose the root cause of backing-out screws and what steps to take to ensure your subfloor remains secure for years to come.
Start With a Thorough Inspection
Begin by examining your subfloor for soft spots, creaks, and uneven areas. Use a straightedge or a long level to detect dips or humps. During a project last summer, I personally found a 1/4-inch dip in my plywood subfloor, which caused my hardwood to squeak. Mark these problem areas clearly so you know where to focus your efforts.
Level the Surface Before Fastening
Uneven surfaces lead to screws backing out and squeaks down the line. To level the subfloor, use a self-leveling compound, ensuring you follow the manufacturer’s instructions precisely—like I did when I poured a batch with the right mixing paddle speed. After application, give it ample time to cure; this creates a solid base that prevents movement and screw failure.
Apply Proper Leveling Techniques
For deeper dips, consider using a floor patch or overlay. My experience with flawed leveling was a reminder that a little extra prep pays off. Check out this guide for detailed steps. Remember, the goal is a flat, stable surface—think of it like installing a table top that won’t wobble.
Choose Quality Fasteners and Apply Correctly
Not all screws are created equal. Opt for screws designed for subfloor use—typically, coated or corrosion-resistant screws that are long enough to penetrate both layers securely. During my project, I swapped out cheap screws for high-quality deck screws, resulting in a squeak-free floor. Use an impact driver to apply consistent torque—avoiding over-tightening which can crack the material or under-tightening leading to backing out.
Pre-Drill and Spaced Fastening
Pre-drilling helps prevent splitting, especially in dense subfloor material like hardwood. Space screws approximately every 6 to 8 inches along joists and every 12 inches across panel centers. My mistake initially was installing screws too far apart, which caused movement. Following a proven pattern ensures each screw locks the subfloor tight to the joists underneath.
Confirm the Stability Before Covering Up
Once fastened, test the area by walking over it or applying gentle pressure. You should feel no give or hear squeaks. In my case, a quick walk test revealed lingering movement, prompting me to add more screws precisely where needed. This step is crucial to prevent future issues like shifting or squeaking—think of it as testing a bridge before opening it to traffic.
Maintain and Monitor Over Time
After installation, keep an eye on your floor during the first few months. Small shifts can occur, especially with seasonal humidity changes. I learned the hard way that even a well-done job needs periodic checking. If you notice any new squeaks or unevenness, investigate immediately to reinforce or re-tighten screws before covering the area with finish flooring.
While many DIY enthusiasts and even seasoned pros focus on the obvious aspects like choosing the right floor materials or ensuring proper subfloor support, there’s a less obvious but critical detail that often gets ignored: the subtle nuances that determine long-term success. Many assume that if their initial installation looks good, they’re set, but overlooking these advanced pitfalls can lead to squeaks, uneven surfaces, and costly rework down the line.
Challenging Common Myths
One widespread misconception is that all leveling compounds are created equal. In reality, the type and application technique can drastically influence the stability of your floor. The *incorrect use of self-leveling underlayment*, such as pouring it without proper perimeter seals or ignoring humidity levels, can cause cracking or uneven settling. Experts warn that neglecting these factors might result in a floor that appears level but isn’t truly stable, leading to squeaks or even tile cracks over time. For meticulous guidance, check out this detailed resource.
The Oops You Don’t See Coming
Many installers fall into the trap of overlooking environmental conditions—especially moisture levels. For hardwood floors, unfinished moisture testing can spell disaster; excessive humidity or unanticipated drying shrinkage can cause the wood to warp or split. A common mistake is assuming that the subfloor’s moisture content is negligible once the surface looks dry, but experts stress that subfloor moisture should be meticulously checked using a hygrometer before proceeding. Failing to do so might seem minor initially but can lead to costly refinishing or replacement. Better to invest in proper moisture barriers and monitoring tools early, as recommended by industry specialists.
What Advanced Techniques Can Guarantee Floor Longevity?
In high-end installations or challenging environments, integrating advanced leveling methods, like double-layer self-leveling or strategically placing expansion joints, can make all the difference. These techniques accommodate movement and prevent stress fractures. Additionally, using quality fasteners designed specifically for your material—such as in hardwood or tile—can ensure the fixing remains durable for decades. It’s worth noting that a meticulous approach to subfloor preparation, combined with knowledgeable material selection, often separates amateur results from professional-grade floors.
For those seeking comprehensive insights, this guide provides an in-depth look at leveling fundamentals that underpin resilient, long-lasting floors.
Don’t let these hidden pitfalls trip you up. Remember, the devil is in the details—especially when your goal is a flawless, durable finish. Have you ever fallen into this trap? Let me know in the comments!
Maintaining your flooring over the years requires the right tools and a disciplined approach. One tool I swear by is a high-quality impact driver. Unlike standard drills, impact drivers deliver consistent torque essential for re-tightening loose screws during periodic inspections—I’ve personally saved countless floors from squeaks and shifts by keeping a reliable impact driver on hand. For leveling and surface corrections, I recommend a laser level; its precision surpasses traditional bubble levels, especially over large rooms, ensuring your floor remains even and reduces stress on fasteners. In my own projects, using a laser level helped me identify subtle dips that could cause long-term issues, allowing me to address them proactively.
Looking ahead, I predict that smart tools with integrated sensors will become part of regular flooring maintenance routines. Imagine a future where your toolkit includes devices that alert you to changes in subfloor stability or humidity levels—this would make ongoing maintenance more efficient and less guesswork.
How do I maintain my floors over time?
Proper, consistent check-ups using these advanced tools can extend your flooring’s lifespan significantly. Regular inspections with a moisture meter help detect hidden humidity issues that may cause warping or mold—issues I tackled early in my own home, saving hundreds in repairs. Additionally, applying a quality floor polish with a microfiber applicator keeps hardwood floors looking shiny and protected, delaying the need for refinishing. For detailed recommendations on refinishing techniques, you might find this expert guide invaluable.
Another often overlooked aspect is keeping tools clean and calibrated. Regular calibration of laser levels or moisture meters ensures measurement accuracy, preventing small issues from turning into costly repairs. Invest in a good kit of maintenance supplies, including soft cloths, calibration tools, and a reliable cleaner for your tools to ensure longevity.
By integrating these tools and habits into your routine, you’re not just maintaining your floors—you’re proactively extending their beauty and structural integrity. Don’t underestimate the power of a well-maintained toolset combined with consistent inspections; it’s the key to flooring that stands the test of time. Why not start today by testing the moisture level in a problematic area? Small steps can lead to big savings. For more insights into comprehensive maintenance practices, check out our detailed flooring tips guide.
What I Wish I Knew When I Started Laying Floors
One of the biggest lessons I learned is that prepping the subfloor properly is essential—skimping on leveling or using the wrong fasteners can lead to squeaks and uneven surfaces. Trust me, investing time in thorough inspection and leveling saves you headaches later.
Another insight is that not all screws are created equal; choosing quality, moisture-resistant fasteners and applying them with the right torque makes a noticeable difference in long-term stability. Ignoring this step was a costly mistake I won’t repeat.
Lastly, environmental factors like humidity and moisture levels are subtle killers. Overlooking these can cause warped hardwood or cracked tiles down the line. Regular monitoring with proper tools is a game-changer I highly recommend.