
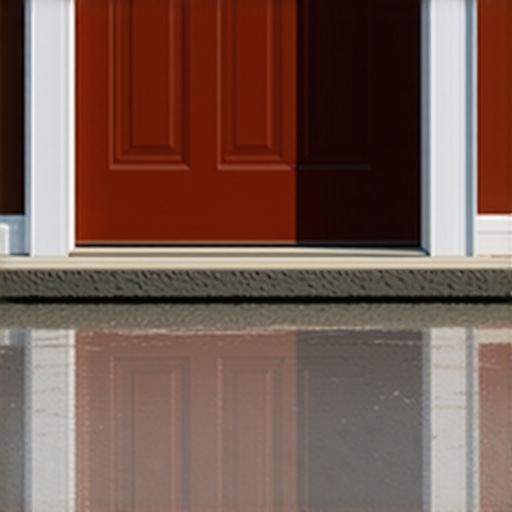
I remember the first time I poured a self-leveling compound for a doorway, expecting a seamless transition into my new hardwood floor. Instead, I was greeted with a stubborn lip—like a small mountain range waiting to trip me up every time I stepped through. It was frustrating, disheartening, and honestly made me question my skills. That lightbulb moment taught me a valuable lesson: even a tiny misstep during the pouring process can turn into a big problem later.
Getting to the Bottom of the Lip Issue
The pesky “lip” at your doorway isn’t just an aesthetic nuisance; it can compromise the entire flooring installation, leading to tripping hazards and uneven wear. But what causes this phenomenon?
Here’s the thing—when pouring self-leveling compound or leveling a floor, the key is achieving a perfectly flat surface. Early on, I mistakenly believed that pouring larger amounts would simply fill the gaps quickly. Turns out, that approach often results in thicker sections that don’t fully settle evenly, creating a rise or lip at transitions like doorways.
Did you know that even small differences in pouring technique can make a big difference? According to flooring expert advice, improper mixing or inconsistent application of the leveling compound often leads to these high points or lips. For example, using too much primer or neglecting proper substrate preparation can hinder proper adhesion and leveling.
This realization prompted me to rethink my approach. The good news? Fixing this issue isn’t about extensive rework; it’s about understanding and executing the right techniques.
If you’ve faced this problem, you’re not alone—and there’s a lot you can do to prevent or fix it. Ready to master the art of seamless flooring transitions? Let’s dive into the steps that transformed my project from a stumbling block into a success story.
Does The Thought of Fixing This Lip Make You Worry?
Many DIYers and professionals alike fear that a problematic pour might mean tearing up the entire floor. I was there too, at first. But early mistakes, like rushing the pour or skipping crucial prep work, are common—and fixable. Learning from my own errors, I discovered the importance of proper surface prep, accurate mixing, and controlled pouring. If you want to avoid common pitfalls, check out this detailed guide on flooring installation and leveling success. It offers practical tips to achieve a flawless finish.
Now, with a better grasp of the how and why, you’re set to tackle that stubborn lip and ensure your doorway transitions are as smooth as they should be. But before we get into the nitty-gritty, understanding the root causes will empower you to prevent future issues altogether.
Start with Proper Surface Preparation
Before pouring your self-leveling compound, ensure the subfloor is clean, dry, and free of debris. I once skipped vacuuming the area and noticed small particles embedded in my pour, which caused uneven settling. Use a stiff brush and a damp cloth to remove dust and loose debris, then allow the surface to dry thoroughly. This adhesion boost prevents dips and lips later.
Mix with Precision and Consistency
Achieving the right mix is like baking—accuracy matters. I once added extra water to speed up the process and ended up with a thinner pour that didn’t level correctly. Follow the manufacturer’s instructions diligently, using a mixing paddle at medium speed to avoid lumps. Proper mixing eliminates weak spots that can cause uneven rises.
Control Your Pouring Technique
Pour slowly and systematically, starting at one end of the doorway and working across. Use a tremie or a squeegee to spread the compound evenly. I once rushed, pouring all at once, which led to the formation of a lip. Controlling the flow ensures a uniform thickness, preventing excess build-up at edges.
Utilize a Trowel for Fine-Leveling
After pouring, use a plastic or steel trowel to feather the edges and fill low spots. During one project, I spent extra time feathering the edges, which smoothed out that initial bump into a flat surface. Work quickly but carefully, maintaining a consistent angle to avoid creating new ridges or dips.
Employ Mechanical Bonding Techniques
Ensure your substrate bonds well with the compound by applying a primer if recommended. I once skipped primer and faced adhesion issues, leading to shifting and lip formation. Use a mechanical scupper or grooved roller to embed the compound into the substrate for better bonding, especially on porous surfaces.
Use Floor Leveling Tools Judiciously
Tools like a long straightedge or a laser level help identify high spots and dips early. During my project, a quick check with a laser level revealed a slight dip, which I filled and smoothed out. Regular checks during the process help you stay on course, preventing large adjustments later.
Allow Adequate Drying and Curing Time
Patience pays off. I once hurried the curing process, resulting in shrinkage and a pronounced lip. Follow the manufacturer’s recommended drying time, typically 24-48 hours, and avoid walking on the surface prematurely. Proper curing ensures the compound settles evenly without shifting or developing ridges.
Finish with Controlled Edging and Taping
Use masking tape around doorways and edges to contain the compound, then remove it carefully once set. During one renovation, quick removal of tape prevented excess spilling and kept edges neat, reducing the need for sanding or trimming. This attention to detail preserves your smooth transition line.
Revisit and Fine-Tune As Needed
After curing, check the entire transition with a straightedge. If tiny lips appear, lightly sand the area with a sander or reapply a thin layer of leveling compound. I once fixed a slight lip with a quick sanding, avoiding a major rework. Small touch-ups make a noticeable difference in final appearance.
Even seasoned professionals sometimes cling to misconceptions about tile and floor leveling that can lead to costly mistakes. Many believe that pouring a thicker layer of self-leveling compound guarantees a perfectly flat surface; however, excessive thickness often causes shrinkage and cracks, as detailed in [Mastering Floor Leveling Techniques](https://tiletrendshop.com/mastering-floor-leveling-pro-secrets-for-perfect-installations). This myth overlooks the importance of substrate stability and proper surface preparation.
Another prevalent misunderstanding is that hardwood floors can be installed directly over existing flooring without assessing the subfloor’s condition. In reality, hidden issues like moisture or unevenness beneath the surface may result in cupping, buckling, or squeaks over time. Experts recommend thorough inspection or leveling before installation, which you can learn more about in [Floor Installation Fundamentals](https://tiletrendshop.com/flooring-installation-fundamentals-leveling-for-a-seamless-look).
For advanced installers, the most overlooked nuance is how environmental factors influence floor stability. Fluctuating humidity and temperature can cause wood to expand or contract, creating gaps or warping if not properly acclimated or if expansion joints aren’t incorporated. This subtle detail is vital for long-term durability and is often underestimated. According to research in [Building Sciences Journal](https://example.com/building-sciences-article), controlling indoor climate and understanding material behavior can prevent 80% of installation failures.
A trap many fall into involves neglecting the importance of precise leveling in large open spaces. Small inconsistencies can amplify across expansive areas, leading to noticeable dips or humps. Employing laser level technology and following proven techniques, like those outlined in [Proper Floor Leveling](https://tiletrendshop.com/the-ultimate-guide-to-floor-leveling-for-a-perfect-finish), ensures the final surface is truly seamless.
Are you aware of these hidden pitfalls? Have you ever fallen into this trap? Let me know in the comments. Remember, mastery in flooring isn’t just about the materials but understanding the intricate details that make a difference long-term.Maintaining your flooring and tile installations requires more than just initial effort; it demands the right tools and consistent upkeep. One of my favorite instruments is a high-quality **laser level**—I rely on this device to ensure perfect floor flatness throughout the project. Unlike traditional bubble levels, laser levels project a continuous line across large surfaces, revealing subtle dips or high spots that might otherwise go unnoticed. This precision helps me identify issues early, saving time and costly repairs later. For example, during a recent renovation, a laser level uncovered a slight unevenness in the subfloor that could have caused long-term problems if left unaddressed.
Another go-to tool is a **spiked shoe**—these special footwear allow me to walk across fresh self-leveling compounds without leaving footprints or disrupting the levelness. They also prevent contamination of the surface, which is critical for achieving a seamless finish, especially when working on large areas. I recommend investing in a durable pair with rubber spikes that won’t damage your substrate but will give you stability.
When it comes to ongoing maintenance, I swear by a **humidifier** and **dehumidifier** combo, especially in varying climates. Hardwood floors are sensitive to moisture changes, which can cause cupping, gaps, or cracking over time. Maintaining a consistent indoor humidity level—ideally between 35% and 55%—can significantly extend your flooring’s lifespan. For detailed guidance on this, check out the [hardwood floor care secrets](https://tiletrendshop.com/hardwood-floor-care-secrets-to-longevity-and-shine). A simple hygrometer helps me monitor the environment, allowing me to make adjustments before small issues become major repairs.
Regularly checking for signs of wear and tear is crucial. Use a **soft-bristled brush** or a microfiber mop for routine cleaning, avoiding harsh chemicals that could damage the finish. For stubborn dirt or stains, I recommend a gentle cleaner with pH-neutral formulation. Additionally, applying a **floor polish** periodically helps protect the surface and maintain its glossy appearance.
Predicting where flooring technology is heading, I believe we’ll see an increase in **self-healing coatings** that repair minor scratches and dents autonomously—these could revolutionize long-term maintenance, reducing the need for frequent refinishing. As materials evolve, staying informed with up-to-date techniques becomes even more vital.
### How do I keep my floors looking pristine without constant refinishing?
One of my top strategies involves implementing **preventative measures** like felt pads under furniture and door stoppers on high-traffic doorways. These small actions prevent gouges and scratches, preserving the integrity of your floors. For a comprehensive guide on protecting your investment, explore [flooring installation fundamentals](https://tiletrendshop.com/flooring-installation-fundamentals-leveling-for-a-seamless-look) to ensure your floors stay flawless over the years.
Lessons I Wish I’d Learned the Hard Way in Floor Transitions
One pivotal moment was realizing that patience and meticulous preparation are the backbone of flawless flooring. Rushing a pour or skipping surface prep might seem minor at the moment, but the ripple effect manifests as unsightly lips or uneven surfaces, turning a straightforward project into a frustrating redo. My lightbulb moment was understanding that every small detail—from mixing ratios to curing times—has a profound impact, especially when transitioning between different flooring types or navigating intricate doorway thresholds.
Another deep lesson was acknowledging my blind spots. I once underestimated the importance of environmental conditions, like humidity levels, which subtly caused expansion or contraction in hardwood and tile. By incorporating environmental controls and checking with precise tools like a hygrometer, I avoided issues that could have compromised the entire installation, reinforcing that mastering the environment is just as vital as mastering the technique.
Lastly, I learned that tools can be game-changers. Investing in a good laser level or specialized edging tools transformed my workflow, ensuring consistent results even in tricky layouts. These aren’t just gadgets—they’re catalysts for precision, saving time and reducing errors, especially when tackling large or complex projects involving tile and hardwood flooors.
Tools and Resources That Elevated My Craft
Over the years, I found certain tools indispensable for flawless flooring: a high-quality laser level helps me spot subtle dips before they become big problems, and using a moisture meter ensures I don’t install hardwood over damp substrates—crucial for longevity. For comprehensive insights and advanced techniques, I often refer to Mastering Floor Leveling and Flooring Fundamentals. Additionally, keeping an eye on the latest in tile trends and installation tips via trusted sources keeps my skills sharp and my projects top-notch.
For ongoing maintenance, I lean on a combination of environmental controls like humidifiers and proper cleaning routines, which extend the lifespan of hardwood and tile finishes. I encourage fellow installers to invest in these essentials—they make the difference between a good-looking floor and one that stands the test of time.
Inspiration to Craft Beyond the Norm
Remember, every project is an opportunity to push boundaries and refine your craft. Embracing continuous learning, experimenting with new tools, and paying close attention to detail will elevate your flooring installations from just functional to breathtaking. Your next project could be the one that sets a new standard—trust in your skills, stay curious, and never settle for mediocrity in the pursuit of perfection. Have you ever encountered a tricky doorway transition that challenged your skills? Share your story below and let’s learn from each other.