
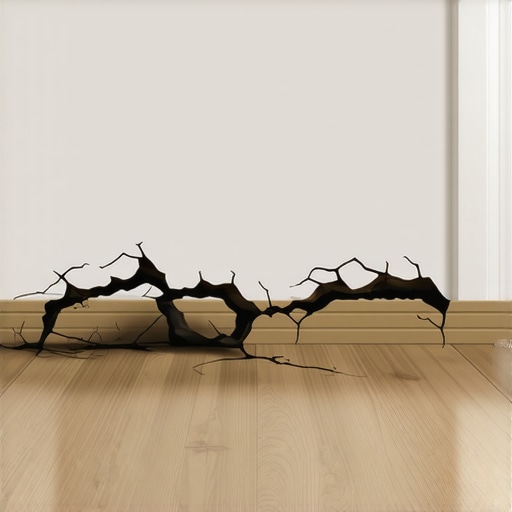
I vividly remember the moment I stepped into my living room after a weekend DIY project, only to find my brand-new vinyl planks warped and buckling like a wave. It was a lightbulb moment for me—realizing that the dreaded expansion gap error was the culprit. If you’ve ever experienced the frustration of a warped floor, you’re not alone. This common mistake can turn a beautiful renovation into a costly fix.
Why Proper Expansion Gaps Matter More Than You Think
Many homeowners overlook the significance of expansion gaps, thinking they’re just a minor detail. But in reality, these gaps are essential to accommodate the natural expansion and contraction of flooring materials due to temperature and humidity changes. When these gaps aren’t properly implemented, the material has nowhere to go as it expands, which leads to buckling and warping—a nightmare for any DIY enthusiast or homeowner.
Did you know that according to flooring experts, inadequate gap placement is one of the top causes of installation failures? In fact, a study highlighted in Flooring Installation Mistakes to Avoid shows that improper gap management can compromise up to 70% of a floor’s lifespan.
Early in my journey, I made the mistake of assuming all floors could be installed seamlessly without considering expansion. I skipped the step of calculating the correct gap size for my environment, which resulted in my vinyl planks buckling within just a few months. That experience taught me that understanding the ‘why’ behind these gaps is crucial to long-lasting results.
Now, if you’re wondering whether you should just squeeze the planks tightly together or fill every inch with adhesive—think again. Properly spaced and strategically placed expansion gaps are your best defense against future buckling. And don’t worry—you won’t need to be a professional to get it right. I’ll guide you through the essential steps to avoid this expansion gap error, ensuring your flooring stays flawless and durable for years to come.
But first, let’s talk about the common skepticism—”Is all this fuss really necessary?” Stay tuned, because ignoring these details could be the difference between a beautiful, resilient floor and a warped disaster.
Measure and Calculate the Correct Gap Size
Start by assessing your room’s environment—temperature, humidity, and flooring material—since these factors influence how much your floor will expand or contract. Use a reputable guide on floor leveling to determine the appropriate expansion gap, typically ranging from 1/4 inch to 1/2 inch. I once overlooked this step and ended up with buckling in my vinyl planks; measuring properly would have saved me time and money.
Prepare the Subfloor and Edges for Consistency
Ensure your subfloor is flat, level, and clean. Use a floor leveling compound where needed, following the instructions carefully to avoid dips or high spots that could mislead your installation. I recommend using a long level and knocking down any high points with a sander or grinder—this helps maintain an even surface for your flooring, preventing uneven expansion that could cause warping.
Mark and Visually Confirm the Gap Placement
Use chalk lines or guides to mark where your expansion gaps will go—especially at the perimeter and around obstacles. When I worked on my hardwood floor, I laid out painter’s tape along the perimeter and confirmed measurements multiple times. Visual reassurance minimizes mistakes, ensuring consistent gaps at the edges, crucial for accommodating material movement.
Install Flooring with Proper Spacing Techniques
Lay down your flooring planks or tiles, ensuring they are snug but not tightly pressed together. During my project, I inserted spacers between planks as I went, maintaining the calculated gap. For tiles, I used tile spacers or a silicone wedge method to keep uniform gaps. This approach is vital; improper spacing can lead to buckling or gaps opening up over time.
Utilize Tools for Precision
Employ a modulus of tools like wedge spacers, a tapping block, or a pulling bar to align pieces without forcing them tight against each other. These tools help keep consistent gaps, especially when working in tight corners or irregular areas. I found that using a tapping block prevented damage and maintained even gaps—crucial for long-term durability.
Secure and Finish Edges Appropriately
Once all flooring is laid, remove any spacers and install baseboards or trim to hide the expansion gaps. Do not glue or nail down the edges entirely; leaving room for movement is fundamental. During my installation, I left a 1/4-inch gap at the perimeter, which was later concealed beautifully with a quarter-round molding, allowing the floor to expand naturally without buckling.
Double-Check and Adjust Before Finalizing
After installation, walk the floor to identify any irregularities or areas where gaps might have shifted. Take a moment to measure a few sections, ensuring your expansion space is consistent. I caught a minor misalignment in my second row that allowed me to correct the gap before completing the entire project, saving me from future issues.
Applying these steps meticulously transforms your flooring project from a gamble into a craft, ensuring that your floor withstands the test of time and environmental changes. Proper gap management isn’t just about following rules; it’s about creating a foundation for a flawless, resilient surface that lasts for decades.
While most DIYers and even professionals focus on getting the basics right—such as ensuring a level subfloor or choosing the right adhesive—the true mastery lies in understanding the nuanced details that can make or break a flooring project. One widespread misconception is the belief that straightforward procedures suffice for perfect results. However, overlooking advanced factors like moisture mitigation, substrate compatibility, and temperature fluctuations can lead to subtle yet significant issues down the line. For example, many assume that once the tiles are laid, the job is done—yet, failing to consider environmental variables during curing can cause long-term cracks or grout deterioration. Critical mistakes also occur in the subtleties of floor leveling, where improper substrate preparation or neglecting expansion joints can result in uneven surfaces and tile cracking, especially in large-format porcelain installations. Experts emphasize that these nuances require a deeper understanding; according to studies by flooring scientists, improper handling of such factors impacts durability more than most realize. Additionally, many underestimate the importance of choosing the appropriate finishing techniques for hardwood floors, such as precise sanding patterns and applying sealers suited to specific wood types, which greatly extend the lifespan and appearance. Paying attention to these subtleties isn’t just for perfectionists but essential for lasting quality—especially in challenging environments or high-traffic areas. Have you ever fallen into this trap of neglecting nuanced details? Let me know in the comments! For effective floor leveling, mastering the proper techniques—like using self-leveling compounds effectively and understanding substrate interactions—is crucial. Dive into our guide on floor leveling fundamentals to elevate your project and avoid costly mistakes.Maintaining your flooring investment requires more than just routine cleaning; it involves utilizing the right tools and methods to ensure long-term performance. I personally rely on a combination of precision measuring devices and specialized cleaning equipment to keep my hardwood and tile floors in top shape. For example, a laser measurement tool helps me detect any subtle shifts in floor levelness over time, allowing me to address potential issues before they escalate. Incorporating a high-quality microfiber mop with electrostatic properties has significantly improved my dust removal process without damaging the surface. These tools are essential because they enable gentle yet effective maintenance, prolonging the lifespan of your floors.
When it comes to deep cleaning, I recommend investing in a steam cleaner specifically designed for hardwood or tile surfaces. The steam’s heat not only sanitizes but also helps break down stubborn grime without the use of harsh chemicals. For hard-to-reach corners and edges, a detail brush attachment makes all the difference, ensuring no dust or debris is left behind. Regularly checking for and addressing minor damage with a precision floor repair kit can save you from costly refinishing projects later.
Looking ahead, the trend is moving towards smart cleaning systems that integrate sensor technology to monitor dirt levels and suggest optimal cleaning schedules. These innovations could revolutionize how we maintain flooring, making it more efficient and tailored to your home’s needs.
### How do I maintain hardwood or tile floors to ensure they last decades?
Consistency is key. Establishing a routine that includes gentle cleaning with appropriate tools, periodic inspections, and prompt repairs can dramatically extend your flooring’s lifespan. For instance, periodically using a floor leveling compound to address minor unevenness can prevent future damage and preserve a smooth surface. I’ve personally found that adhering to a maintenance schedule inspired by [flooring care experts](https://tiletrendshop.com/hardwood-floor-care-secrets-to-longevity-and-shine) has helped me avoid premature wear and tear.
Don’t underestimate the importance of specialized equipment; even small investments in quality tools can yield significant long-term benefits. For example, using a floor scraper with a precision blade can remove stubborn adhesive residues before refinishing, ensuring a cleaner and more durable surface. Remember, maintaining your floors is an ongoing process—equipping yourself with the right tools and knowledge is the best way to keep them beautiful and functional for years to come. Try integrating a high-quality microfiber mop and a steam cleaner into your routine, and you’ll notice an immediate improvement in upkeep efficiency.
What I Wish I Knew When I Started Laying Floors
One of my toughest lessons was realizing that perfection in flooring isn’t just about the tools or materials—it’s about understanding the subtle dance of environmental factors, like moisture and temperature, and how they influence the longevity of your installation. I once ignored the importance of acclimating reclaimed wood, only to face warping after a few months, reminding me that patience and knowledge go hand-in-hand. The second lesson came from underestimating the power of expansion gaps; neglecting them turned my dream look into a warping nightmare, proving that attention to detail saves time and money in the long run. Lastly, I learned that consistency in measuring and strategic planning prevents small misalignments from snowballing into major flaws, emphasizing that meticulousness is key even in seemingly simple steps.