
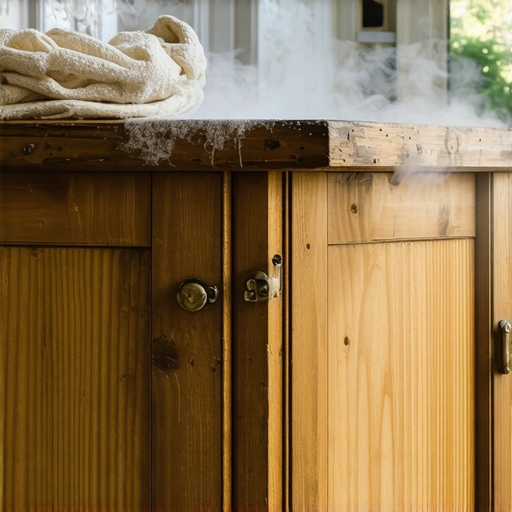
Walking into my workshop one dull morning, I was greeted by a disappointing sight—an old pine floor marred by a stubborn dent, right in the middle of the room. Frustration bubbled up; I had already spent hours trying to level and restore my floors, only to find this unsightly blemish marring the surface. It suddenly hit me — instead of expensive repairs or replacements, there might be a simple, effective solution hiding in plain sight. That “lightbulb moment” led me to discover the Wet Rag Trick, a game-changer for steaming out dents in old pine, and I couldn’t wait to share it with fellow DIY enthusiasts.
Why Old Pine Floors Get Dinged Up—and Why It Matters
Old pine flooring, with its rich character and warmth, is a beloved asset in many homes. But over time, dents, dips, and imperfections creep in—from dropped furniture to heavy footsteps—making the surface less appealing and harder to maintain. If you’re like me, you want a quick fix that preserves the authenticity of the wood without resorting to costly refinishing or refinishing that risks altering its charm.
That’s where understanding the unique properties of pine and how to work with them becomes essential. Pine is softer than many hardwoods, which makes it more susceptible to dents. Interestingly, studies show that gentle steaming can raise wood fibers, reducing the appearance of dents without damaging the finish—provided you do it correctly. But beware: many beginners make the mistake of applying too much heat or moisture, which can worsen the problem instead of fixing it. I learned this the hard way early on, damaging a valuable antique plank because I didn’t know the right technique.
Fortunately, my mistakes paved the way for a better method—enter the Wet Rag Trick. This simple approach uses just a damp cloth and a touch of steam to make dents in old pine wood more manageable. Curious if this method really works? Well, I will walk you through the process step by step, guaranteed to make your floors look years younger. Whether you’re renovating a vintage home or just tackling a few pesky imperfections, this trick could save you a lot of time and money.
Is the Wet Rag Trick Actually Worth the Hype? My Honest Take
Initially, I was skeptical, naturally. It sounds almost too good to be true—steaming out dents with a damp cloth? But my early trials proved otherwise. The key is patience and technique: too much moisture or heat can cause more harm than good. After some trial and error, I mastered the balance, and the results were impressive. You can read about common mistakes to avoid when floor leveling on [this detailed guide](https://tiletrendshop.com/floor-leveling-challenges-common-mistakes-and-how-to-avoid-them) to ensure your project turns out flawlessly.
Have you ever faced stubborn dents in your old pine floors and wondered if there’s a simple fix? If so, stick around. Next, we’ll explore the exact tools and steps needed to apply this trick safely and effectively, turning that frustrating dent into a thing of the past.
Prepare Your Materials and Safety Gear
Start by gathering a clean, damp cloth—preferably cotton or microfiber—and a kettle or steam cleaner if available. Wear safety goggles and gloves to protect your eyes and hands from steam. I once accidentally splashed hot water on my arm during an early attempt, so safety shouldn’t be overlooked.
Identify and Isolate the Dent
Locate the dent and ensure the area is free of dust or debris. Use a flashlight at an angle to highlight the dent’s depth, making it easier to focus your steaming efforts. I remember spending extra time examining deep dents in an antique pine floor, realizing that precise application makes all the difference.
Moisten the Dent with the Cloth
Drench the cloth with clean water, wringing out excess to avoid soaking the wood excessively. Place the damp cloth directly over the dent, ensuring complete coverage. The analogy here is like placing a moist compress on a sprain—gentle, even pressure maximizes effectiveness.
Apply Gentle Steam
Heat your kettle or use a steam cleaner to produce a gentle steam stream. Hold the steam wand or pour steam indirectly over the cloth, maintaining a safe distance to prevent overheating. The key is gradual heat—too much too fast can damage the finish or cause unwanted swelling. I learned this from trial and error, realizing patience is vital.
Hold and Repeat as Needed
Keep the steam flowing for about 10-15 seconds, then lift the cloth carefully. Check the dent; if it remains, repeat the steaming process. The second time I tried, I noticed the dent beginning to rise, almost like a popped bubble—satisfying proof that patience pays off. Be cautious not to over-moisten, as excess water can cause swelling or damage the finish.
Finish and Clean Up
Once satisfied with the dent’s appearance, wipe the area with a dry cloth to remove residual moisture. Allow the floor to air dry completely. Light sanding and refinishing may be necessary if the surface appears uneven. For comprehensive guidance on flooring, review floor leveling techniques.
Many DIY enthusiasts and even seasoned professionals often fall prey to oversimplified beliefs about flooring installation and maintenance. One widespread myth is that applying more grout sealant naturally leads to longer-lasting grout. However, excessive sealant can actually trap moisture, causing grout cracking and discoloration over time. According to industry experts, proper sealing involves applying thin, even coats—more isn’t better—and focusing on quality application rather than quantity. Additionally, there’s a misconception that leveling subfloors is only necessary for large areas; in reality, uneven surfaces as small as a few millimeters can cause tile cracks and unevenness, leading to costly repairs later on. For optimal results, it’s crucial to address even minor imperfections early, following strategies outlined in this detailed guide.
Another common trap involves assuming that hardwood and tile can be installed interchangeably on any subfloor. In truth, each material has specific requirements; hardwood needs stable, moisture-controlled environments, while tile demands a rigid, properly prepared subfloor with minimal movement. Mistakenly installing tile over a wooden subfloor without proper reinforcement can lead to tiles cracking or delaminating. For in-depth insights, consult this professional approach to prevent these pitfalls.
Advanced installers know that a subtle detail often makes the difference between a flawless finish and a costly redo: the choice of tile spacing and grout joint size. Many believe a standard 1/8 inch joint suffices, but larger joints not only accommodate slight surface irregularities but also enhance aesthetic appeal. Conversely, narrow joints can be unforgiving on uneven surfaces and may crack under stress. Expert studies recommend customizing joint width based on tile size, material, and room usage—details that can be found in this resource.
Let me pose a question for the experienced DIYer: How do you ensure your subfloor is adequately prepared to prevent long-term issues? The secret lies in meticulous surface assessment and employing the right tools and techniques—details often overlooked by novices. For example, using a screed and level sensor can reveal subtle dips and ridges that, if left uncorrected, threaten your entire flooring project.
Have you ever fallen into this trap? Let me know in the comments. Remember, mastering these nuances elevates your craftsmanship from average to expert, and it all starts with awareness of these common misconceptions.Maintaining your tile and hardwood floors requires the right tools and consistent care to ensure they stay beautiful and durable over time. One of my go-to instruments is a high-quality pole sander, especially when dealing with refinishing hardwoods. I personally prefer the Dura-Long Pole Sander because its aluminum handle is lightweight yet sturdy, allowing for effortless maneuvering during refinishing projects. Additionally, a digital moisture meter is indispensable for monitoring humidity levels, preventing future warping or cupping of wood floors. I use the Protimeter Surveymaster because it provides instant readings, helping me decide when it’s safe to proceed with installation or sealing. Regularly inspecting subfloors is crucial, and a guided inspection mirror allows me to access tight spaces beneath the flooring, catching issues early before they escalate. For precision leveling, I rely on a laser level because it creates a dependable reference point across large areas, making sure my floor is perfectly flat. The precision of laser-guided leveling drastically reduces the chances of uneven tiles or boards surfacing months later. Always keep a well-stocked toolkit with these essentials, and develop a routine to check for signs of moisture or structural shifts. Proper maintenance isn’t just about reactive fixes—it’s proactive, preventing most problems before they start. For example, addressing minor water leaks beneath the floor promptly with an ultrasonic leak detector can save you from costly repairs down the line. Expect this trend to evolve with smart flooring sensors integrated directly into new surfaces, providing real-time data on moisture, temperature, or stress points—making long-term care more automated and precise. How do I maintain floors over time? I recommend establishing a scheduled inspection plan, using reliable tools like moisture meters and laser levelers for regular checks. Taking early action with simple tweaks, such as tightening loose boards or sealing small cracks, can significantly extend your floor’s lifespan. Do you have a favorite maintenance tool or method? If not, I suggest trying a digital moisture meter combined with a laser level to stay one step ahead of potential issues—these tools have notably improved my project outcomes. Remember, staying proactive with these advanced tools ensures your floors stay stunning and functional for years to come. Want to see how a guided inspection can dramatically improve your results? Visit our contact page to get personalized advice.
Surprising Lessons from My Flooring Journey
One of the most valuable lessons I learned was that patience and attention to detail often outweigh haste, especially when dealing with delicate pine or uneven subfloors. Rushing the process can lead to costly mistakes, like trapping moisture or cracking tiles. Another insight was that understanding the unique properties of materials—whether it’s the softness of pine or the rigidity of porcelain—empowers you to choose the right technique and tools for each job, saving time and preserving beauty. And perhaps most importantly, I realized that continuous learning and tweaking your approach, even mid-project, transforms a good job into a great one.
Tools and Resources That Make a Difference
For every DIY enthusiast aiming for perfection, certain tools become indispensable. I swear by a high-quality laser level to ensure your tiles or hardwoods are perfectly aligned, and a digital moisture meter helps monitor humidity, preventing future issues. When it comes to cleaning and prep, a Durable Sanding Grid smooths out surfaces, and a quality precision screwdriver ensures tight fittings. These tools have been game-changers, allowing me to address problems proactively and achieve lasting results.
Your Floor’s Future Starts Today
Remember, every floor has a story, and with the right knowledge and tools, you’re the author of its next chapter. Don’t shy away from experimenting—your best results come from learning through practice and embracing the small, quality details often overlooked. So, gear up, start that project, and turn your space into a masterpiece of craftsmanship and care. Your floors—and your home—deserve it.