
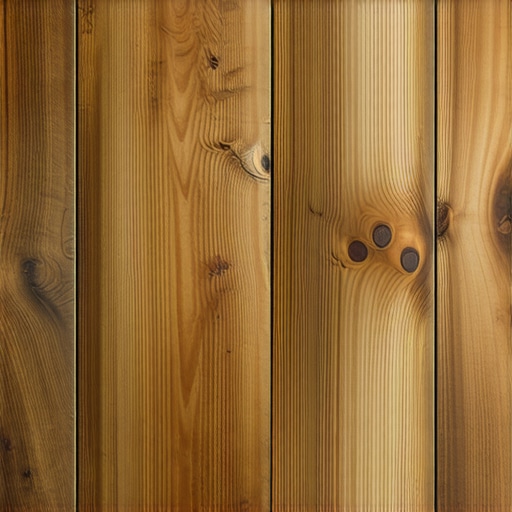
I remember the moment I finally peeled back the protective plastic on my reclaimed Heart Pine flooring and thought, “Wow, this is more beautiful than I imagined.” But then came the realization: it needed quite a bit of sanding—more than I’d initially expected. That lightbulb moment made me question whether investing extra time and effort was really worth it. If you’ve ever felt that tug-of-war between wanting the authentic character of reclaimed wood and the hassle of extra prep, you’re not alone.
The Charm of Reclaimed Heart Pine and Its Hidden Challenges
Reclaimed Heart Pine is celebrated for its rich history and stunning grain, often outshining newer flooring options in character and warmth. However, its aged nature means it often comes with irregularities and surface layers that require more attention during installation. Early in my project, I underestimated how much prep was needed, leading to frustrating delays and a lot of extra sanding. Looking back, I wish I had known precisely why this step was crucial—and how it actually pays off in the end. Want to learn why the extra effort is so often justified? Stay with me.
Does Extra Sanding Really Make a Difference in Heart Pine?
Many homeowners and pros ask: is the extra sanding truly necessary? The truth is, the surface irregularities and residual finishes in reclaimed Heart Pine demand careful attention. Skipping or rushing this process can result in an uneven surface, which affects everything from how the floor looks to how long it lasts. Plus, proper sanding removes old finishes, nails, or splinters that could damage your flooring or cause issues down the line. I’ve learned from experience that investing that additional effort ensures a smooth, polished finish that highlights the wood’s natural beauty.
Interestingly, studies show that well-sanded floors last longer and maintain their appearance better over time, saving you money and headaches later. For instance, learning the right techniques from experts—like those shared in guides on [floor leveling techniques](https://tiletrendshop.com/floor-leveling-challenges-common-mistakes-and-how-to-avoid-them)—can be game-changing.
If you’ve faced the struggle of uneven floors or the fear of spending too much on extra sanding, you’re probably wondering: “Is it really worth it?” I’ll walk through how proper sanding makes a significant difference—and how to do it efficiently.
Now that I’ve set the stage with my personal story and the why behind extra sanding, let’s dive into the practical steps to prepare your Heart Pine flooring for a flawless finish—because that extra effort truly paid off for me, and it can do the same for you.
Start with a Thorough Inspection
Before you begin sanding, examine your reclaimed Heart Pine flooring for nails, staples, or splinters. Use a metal detector and a bright flashlight to spot hidden hazards. Remove any protruding nails with a nail puller, and demarcate problematic areas. This preemptive step prevents damage to your sander and ensures a smoother finish.
Choose the Right Sanding Equipment
Opt for a drum sander for large surface areas and a detail edger for edges and corners. Set your drum sander to a coarse grit, like 36 or 40, to strip old finishes and surface irregularities efficiently—think of it as sanding a rough sculpture before polishing. Equip yourself with dust collection systems to keep the workspace clean and protect your lungs.
Sanding Techniques for a Flawless Finish
Begin with the drum sander, moving in long, overlapping strokes along the grain—this is akin to painting a wall with broad strokes to ensure even coverage. Keep the sander moving steadily to avoid gouging the wood or creating uneven patches. Regularly check your progress, and switch to finer grits, like 80 or 100, for a smoother surface. Remember, patience in this step pays off in the final shine.
Level the Subfloor Contours
Address uneven subfloors beneath the Heart Pine before finishing. Use a laser level or a long spirit level to identify high and low spots. For minor dips, a self-leveling compound, like a high-quality floor leveler, can smooth out imperfections—think of it as a concrete patch for your subfloor, ensuring the surface beneath is as flat as possible. Consult this guide for detailed techniques.
Sanding in Tight Spaces
Edges and corners are tricky. Use a hand-held detail sander or a sanding block with fine-grit paper (like 120) to feather out those areas seamlessly. This step is critical to prevent unevenness when you apply finishes later. A good analogy is painting a wall with a roller and then touching up the edges with a brush for precision.
Final Cleaning and Surface Preparation
Once sanding is complete, vacuum the dust thoroughly and wipe the surface with a tack cloth to remove residual particles. This cleaning ensures that the finish adheres properly and highlights the wood’s natural beauty. Proper surface prep is akin to priming a canvas—that’s where the artwork begins to shine.
Prevent Common Mistakes During Sanding and Leveling
Avoid rushing through sanding, which can create swirl marks or gouges—take your time. Never skip the finer grit stages; each refinement layer results in a smoother final surface. Also, ensure your machinery is well-maintained; dull blades or uneven sanders compromise quality. If you encounter stubborn dips, consider precise leveling techniques to achieve the best results.
While many homeowners believe that choosing a high-quality hardwood or tile is enough for a stunning finish, the real key lies in mastering the nuances of proper installation and preparation. For example, a prevalent myth is that a perfectly level subfloor isn’t crucial—nothing could be further from the truth. Uneven surfaces can lead to squeaks, cracks, and premature failure, but surprisingly, many skip detailed leveling, causing long-term issues that could have been avoided by following expert advice available at https://tiletrendshop.com/floor-leveling-challenges-common-mistakes-and-how-to-avoid-them.
Making assumptions about drywall or subfloor flatness without assessing specific conditions can trap even seasoned professionals. What seems minor at first can evolve into major structural problems, especially with expansive materials like hardwood or large-format tiles.
Don’t fall for the oversimplified idea that surface leveling is just a step for beginners. Advanced techniques, such as using self-leveling compounds or laser-guided assessments, can dramatically improve installation quality. Skipping these may lead to uneven grout lines or warped planks—a costly fix later on. A detailed understanding of the materials and proper tools elevates the process from trial-and-error to expert craftsmanship.
Moreover, many underestimate the importance of acclimating wood or tile materials to the specific environment before installation. Failing to account for humidity fluctuations can cause boards to expand or contract, risking buckling or gaps over time. Professionals recommend measuring moisture levels accurately, using devices like those discussed in https://tiletrendshop.com/precise-floor-leveling-techniques-to-achieve-flawless-surfaces, to prevent these issues.
A critical trap many fall into is assuming that all subfloors can be leveled with a single application of a leveling compound or that surface prep isn’t necessary beneath tiles. This approach often results in tiles that crack or loosen prematurely. Instead, a layered assessment—checking for dips, high spots, and substrate integrity—sets the stage for a durable installation.
How do you ensure your subfloor prep is up to par? Incorporating advanced tools and techniques, like laser levels and proper moisture barriers, can make all the difference. For example, understanding the expansion joint rules and substrate requirements helps prevent unseen problems that might surface years later. Remember, the goal isn’t just aesthetic appeal but creating a resilient surface that lasts.
In the realm of tile, many rely solely on thinset for adhesion, but the actual success hinges on understanding the correct trowel size, mortar properties, and curing conditions—details that are often overlooked. Combining these subtle, expert-level practices transforms a good-looking floor into a long-lasting showcase.
So, what’s the biggest mistake you’ve seen or made during your flooring projects? Have you ever fallen into this trap? Let me know in the comments! And for a comprehensive guide to mastering your installation, visit https://tiletrendshop.com/transform-your-living-area-with-elegant-tile-designs, where expert tips can help elevate your space.Maintaining your hardwood and tile flooring is a vital step in ensuring their longevity and continued beauty. A key part of this process is investing in high-quality tools and adopting effective maintenance routines. One indispensable tool I rely on is a detailed moisture meter, which helps monitor environmental conditions and prevent issues like warping or buckling in wood flooring. Regular use of a moisture meter from brands like Wagner ensures your flooring stays within optimal humidity levels, preventing long-term damage. Additionally, a premium microfiber mop, such as the Bona Microfiber Mop, is excellent for routine cleaning because it traps dust and debris without scratching delicate surfaces—this maintenance step preserves both hardwood and tile finishes over time. For more precise dirt removal, I recommend a flexible grout and tile cleaner, like the Black & Decker Steam Mop, which simplifies deep cleaning in grout lines and textured tile surfaces, ensuring your flooring remains pristine and free of build-up. As trends point towards smart home integrations, future advancements may include IoT-enabled sensors that continuously monitor floor conditions and alert homeowners to potential issues before they escalate, making maintenance more proactive and less time-consuming.
How do I maintain my hardwood and tile floors over time?
Establishing a routine of gentle cleaning with appropriate tools is essential. Regularly inspecting flooring for signs of wear or damage allows for early intervention, such as repairing minor scratches with touch-up kits or resealing tiles to prevent water ingress. Incorporating professional floor assessments, like those offered at https://tiletrendshop.com/floor-leveling-challenges-common-mistakes-and-how-to-avoid-them, ensures your subfloors and surfaces are properly maintained and leveled to prevent uneven wear. I also suggest scheduling periodic deep cleanings using approved cleaning agents designed specifically for your flooring type, which can extend the life of protective finishes and keep surfaces looking vibrant. Remember, the choice of tools and proactive care directly influences how beautiful and functional your floors remain for decades. Don’t hesitate to try out a high-quality microfiber mop or invest in a reliable moisture meter—these small upgrades can significantly impact your long-term results and can save you money on costly repairs later.
The Hardest Lesson I Learned About Hardwood Floors and Floor Leveling
One of my biggest realizations was that rushing the sanding process often leads to more work down the line. I once skipped a meticulous inspection, thinking a quick pass would suffice, only to find uneven patches later. The key takeaway? Patience and thorough preparation before and during sanding save time and frustration later.
Why Superficial Fixes Can Cost You More
I used to believe that a single coat of finish could hide surface imperfections. Now, I understand that the foundation—leveled and sanded perfectly—makes all the difference. Skimping on detailed leveling or neglecting dust removal can cause finishes to peel or look uneven. Investing in expert-level tools and techniques, like those discussed in this comprehensive guide, has transformed my approach.
Patience Is Your Best Ally in Flooring Projects
Rushing through sanding or skipping steps might seem tempting to save time, but in reality, it prolongs the project and diminishes quality. Taking the time to switch grit stages, clean thoroughly, and validate each step ensures the final result is both beautiful and durable. Remember, your floors are an investment that will serve your home for decades.
Curated Gems to Elevate Your Skills
- Variable Speed Sanders: Tools like the Festool RTS 400 EQ allow precise control, reducing the risk of gouges and swirl marks, making your work more professional and less labor-intensive.
- Moisture Meters: The Protimeter Surveymaster gives reliable readings, ensuring your wood acclimates properly, preventing future issues like warping or gaps.
- Leveling Compounds: Trustworthy brands like Mapei or Custom Building Products provide products that adhere well and create truly flat surfaces, as recommended in the ultimate leveling guide.
- Quality Abrasives: Investing in high-grade sandpaper, such as Mirka Abranet, ensures cleaner, faster sanding with less clogging and dust.
Chasing a Vision: Your Flooring Journey
Every floor you perfect is a personal story of patience, learning, and craftsmanship. If you’re ready to elevate your skills and create spaces that last, trust the process and explore expert techniques—your future self will thank you. For an expansive look into perfecting installation and leveling, I recommend this step-by-step guide. Let’s transform your space together!