
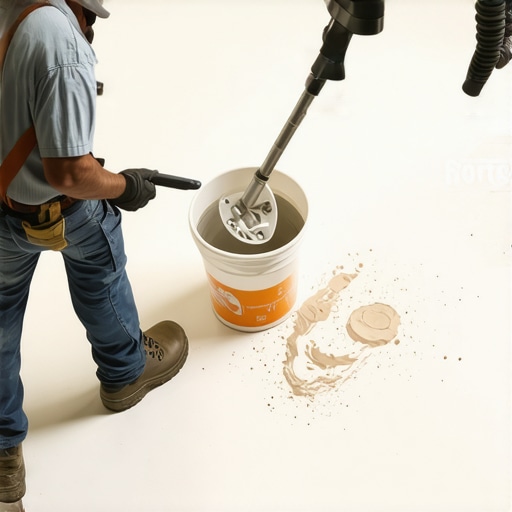
I’ll never forget the day I almost sabotaged my own flooring project. There I was, pouring a fresh batch of leveler into a bucket, eager to smooth out an uneven subfloor. Suddenly, a cloud of dust burst into the air, settling all over my freshly laid tiles. It was a frustrating moment of realization: traditional mixing methods can turn a simple job into a dusty nightmare. If you’ve ever wrestled with dust clouds, uneven mixes, or spendy cleanup, you’re not alone. That’s when I discovered the real game-changer: the Bucket Siphon Trick.
The Hidden Waste in Conventional Mixes
Mixing your floor leveler the usual way often results in more mess than necessary. Dust particles become airborne, settling everywhere and complicating cleanup. Plus, inconsistencies in mixing can lead to weak spots or surface flaws. Early on, I made the mistake of over-mixing with a standard drill, thinking more effort meant better results. Instead, I just created a sticky, air-filled mess that set times two or three longer than it should have. That’s why I started searching for smarter techniques, leading to the bucket siphon approach, which has saved me time, money, and a lot of frustration. If you’re tired of fighting dust and uneven results, this method might be just what you need. For more professional insights into achieving a perfect finish, take a look at this comprehensive guide on floor leveling.
Is the Bucket Siphon Trick Actually Worth the Hype?
Before I tried it, I was skeptical. I thought, “How much difference can a siphon really make?” Spoiler alert: it makes a world of difference. I also learned the hard way that rushing into mixing without proper technique leads to mistakes. Early in my career, I skipped proper surface prep, thinking it was unnecessary — which resulted in a tile job that cracked in months. Building on that, I realized that precision in preparation and mixing is crucial, and the siphon trick emphasizes that. Want to avoid similar pitfalls? You’re not alone; many homeowners and DIY enthusiasts overlook these details, leading to costly errors. To deepen your understanding of common flooring mistakes, check out installation mistakes to avoid.
If you’re ready to tackle leveling with confidence and eliminate the dust, keep reading. Next, we’ll dive into how to set up your own bucket siphon system and get perfect mixes every time.
.
Set Up Your Siphon System Properly
Start by selecting a sturdy, clean 5-gallon bucket with a tight-fitting lid. Drill a small hole near the bottom of the bucket for the siphon tube, ensuring the opening is just large enough for the hose to fit snugly. Attach a 3/8-inch clear vinyl hose, about 4 feet long, securing it with waterproof tape or clamps to prevent leaks. This setup acts like a miniature plumbing system that creates a steady fluid flow, much like a garden hose connected to a spigot. I vividly remember cursing the first time I tried this, spilling leveler everywhere until I realized the importance of airtight connections.
Fill and Prime the Bucket
Pour your self-leveling compound into the bucket, filling it about two-thirds full to avoid spills during mixing. Before sealing the lid, prime the siphon by submerging the hose in the mixture, then squeezing the bucket slightly to force some liquid through the tube. It’s akin to starting a siphon in a science experiment—unclogged and ready to flow. Doing this prevents airlocks, ensuring a smooth, continuous transfer, which I learned after several messy attempts.
Pour and Distribute the Leveler
Position the bucket above your work area using scaffolding or sturdy supports. With the siphon tube on the surface, gently open the valve or remove your hand from the hose’s end to initiate flow. The leveler will pour steadily into your prepared subfloor. Use a trowel or squeegee to spread it evenly, working quickly but carefully. I once had a moment of panic when I accidentally knocked the hose, causing an unexpected burst of liquid—highlighting why secure connections are critical. This method mimics the controlled flow of a controlled irrigation system, saving you time and reducing splashes.
Siphon Maintenance and Troubleshooting
Regularly check for kinks or clogs in the hose, especially when transitioning between mixes. If the flow slows or stops, close the valve, disconnect the hose, and clear any debris. Make sure your mixture’s viscosity isn’t too thick, as this can hinder flow—think of pouring honey versus water. When I faced inconsistent flow, switching to a slightly thinner mix with a specific gravity of about 1.2 made all the difference, as explained in this detailed guide.
Achieve Level Surfaces Quickly
The steady flow from the siphon means less air incorporation, which often causes bubbles and uneven setting. As I transitioned from manual mixing to this setup, I noticed my surfaces became uniformly flat within half the time. This approach is especially beneficial for larger areas, where manual pouring risks creating waves or low spots. Practice makes perfect, but once you’ve nailed the setup, your projects will glide smoothly, much like a well-oiled machine.
Final Touches for a Seamless Finish
After pouring, use a gauge rake or long-handled trowel to feather the leveler into corners and edges. Employ a roller or back of a broom to squegee out any remaining air bubbles—similar to removing air from a bicycle tire. Remember that the self-leveling compound is sensitive to sudden temperature changes; keep the area warm and ventilated. With patience and precision, this technique results in surfaces that require minimal grinding or patching, streamlining your entire installation process. For more advanced tips, explore this expert resource.
When it comes to flooring, many homeowners and even some professionals fall prey to outdated beliefs that can compromise the quality and longevity of the final result. For example, a prevalent myth is that all concrete subfloors are inherently flat enough for tile or hardwood installation. In reality, subtle imperfections often exist and can lead to uneven surfaces if not properly addressed with techniques like precise floor leveling. Believe me, neglecting this step is a shortcut that can cost you dearly in the long run, leading to cracked tiles or squeaky hardwoods; for expert guidance on avoiding these pitfalls, visit this detailed guide.
Why do so many installers get sloppy with surface prep?
The answer often lies in the misconception that roughing up the surface for better adhesion or assuming the subfloor is perfectly level saves time. However, this shortcuts the foundational step that determines the success of the entire project. Skipping proper surface prep or misjudging the levelness can introduce hidden issues, such as uneven wear patterns or early tile failure. Advanced professionals understand that the nuances of subfloor evaluation—like checking for moisture, deformation, or structural integrity—are critical, as outlined in this resource. Fail to do so, and you risk setting yourself up for costly rework and frustration.
Another seductive trap is over-relying on self-leveling underlayment as a catch-all solution. While incredibly useful, it’s not magic in a bucket. Trusting it blindly without assessing the specific issues—like deep dips or major cracks—can result in poor adhesion and surface failures. Expert-level installation involves diagnosing the problem accurately and applying the right product and technique, not just pouring and covering. Consider consulting this in-depth article for mastering floor leveling strategies.
Lastly, many underestimate the importance of moving beyond basic flatness to understand other nuances such as expansion gaps, thermal movement, and moisture barriers. Advanced installers recognize that these details influence not just the appearance but also the durability of the flooring. Sharp attention to these elements is what differentiates a good job from a professional masterpiece. For insights into these technicalities, check this expert advice.
In short, the hidden nuance often overlooked is that flooring installation is more than just laying material; it’s about respecting the intricacies of the subfloor and environment. Failing to do so is a common mistake that can undermine your entire project. Have you ever fallen into this trap? Let me know in the comments.
Keeping It Working: Tools and Maintenance for Your Flooring
Achieving beautiful tile, hardwood, or engineered flooring isn’t a one-and-done task; it requires ongoing care and the right tools to keep your surfaces looking pristine over the years. Using specialized equipment not only extends the lifespan of your floors but also ensures each renovation or repair is done efficiently and professionally. For example, a high-quality moisture meter, like the Tramex CM-01, helps monitor subfloor conditions regularly, preventing moisture-related issues that cause warping or mold growth. I rely on this device before starting any project to assess humidity levels accurately—it’s an investment that pays off by saving time and costly repairs later.
Another tool I hold indispensable is a professional-grade floor sander equipped with dust collection systems. Unlike consumer sanders, these models reduce airborne dust significantly, maintaining a healthier workspace and preventing dust from settling into your newly finished surface. Regular inspections with a revealing flashlight, such as the DeWalt DW9071, help identify hidden damage or wear that might not be immediately obvious. Keeping your floors free from debris and damage extends their beauty and structural integrity—trust me, neglecting minor issues leads to major headaches down the road.
How do I maintain floors over time? Essential upkeep strategies
Maintenance begins with understanding the specific needs of your flooring type. Hardwood floors, for instance, benefit from periodic deep cleaning using pH-neutral solutions, and applying a high-quality polish every few years, like those recommended in hardwood care guides. Tile surfaces, on the other hand, require careful sealing and grout maintenance to prevent staining and cracking. I often use a grout pen to refresh color and a sealant like Laticrete Hydro Ban for long-term protection. The key is consistent cleaning, avoiding harsh chemicals, and promptly addressing damage—this proactive approach keeps your floors looking new despite daily wear.
In the future, technological advancements are shaping how we maintain and monitor floors. Smart sensors connected to home automation systems can alert you to moisture buildup or temperature fluctuations that threaten floor integrity. Imagine getting a notification on your phone that dry rot is developing beneath your tiles or hardwood—this proactive warning enables timely intervention, saving you money and renovation time. As maintenance tools evolve, adopting these innovations can revolutionize how homeowners and professionals extend floor longevity.
Don’t forget these expert tips for long-term results
One value-packed recommendation is to establish a regular schedule for inspecting and cleaning your floors. This means deep-cleaning your tile grout and polishing hardwoods at least twice a year, depending on foot traffic. Additionally, using appropriate protective pads under furniture prevents scratches and gouges that compromise surfaces. My favorite are the M.D. Building Products Felt Pads, which glide smoothly and shield delicate finishes. Also, consider implementing a humidity control system—especially in climates with high moisture—to prevent wood swelling or contraction, as explained thoroughly in this resource.
Lastly, mastering these maintenance routines and investing in the right equipment not only preserves your floors but can also increase their value. Moving forward, integrating smart monitoring devices and scheduling routine care will become standard practices for quality flooring management. So, I challenge you—try setting up a moisture check routine with your digital hygrometer this week. Small steps today lead to stunning, durable floors that stand the test of time, and that’s the ultimate goal for any homeowner or pro.
Lessons That Changed My Flooring Philosophy Forever
- Realizing that surface flatness isn’t enough pushed me to dig deeper into subfloor integrity—skipping this step risks costly failures later on.
- Discovering the bucket siphon trick taught me that innovative solutions often hide in simple ideas, but they demand patience and precision to unlock their full potential.
- Understanding the nuances of moisture control was a game-changer—investing in a quality moisture meter saved me from months of headaches and rework.
Tools That Turn DIY Into Art
- The Tramex CM-01 moisture meter is now my go-to for early detection, helping me make smarter decisions before laying floors.
- My professional-grade sander with dust collection has turned cleanup from a chore into a breeze, maintaining a healthier workspace.
- Transforming my workflow with a laser level has elevated my accuracy, ensuring every project starts on a solid foundation.
Igniting Your Flooring Journey
Every step you take towards mastering flooring installation with advanced techniques like floor leveling and moisture management brings you closer to stunning, durable results. Embrace the learning curve, experiment with new tools, and don’t shy away from seeking professional advice when needed. Your future self will thank you for the commitment to quality and craftsmanship. Ready to elevate your space? Dive into these resources and share your progress with us!
Have you faced challenges with floor leveling or moisture issues in your projects? Let me know below!