
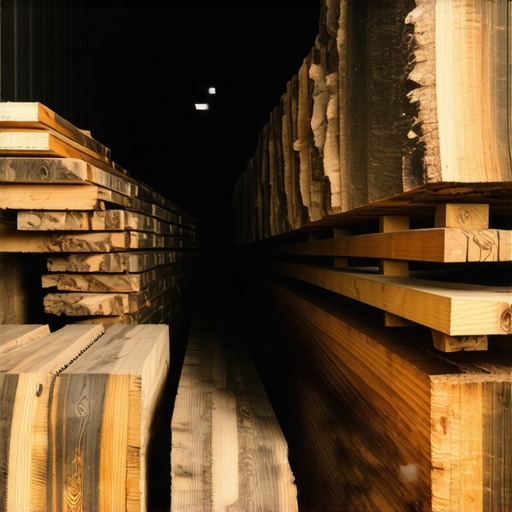
It was a chilly morning when I stepped into my workshop, eager to finally install that beautiful reclaimed barnwood I’ve been so excited about. As I unwrapped the planks, a faint musty smell hit me, and I immediately noticed some warping and twisting. Despite my careful preparations, the boards didn’t behave as expected. That lightbulb moment hit hard—I realized I had overlooked a crucial step: proper kiln drying for reclaimed barnwood.
How a Small Oversight Can Compromise Your Hardwood Project
Reclaimed barnwood has a charm that’s hard to beat, full of character and history. But beneath its rustic beauty lies a complex challenge. Many DIYers and even seasoned pros underestimate the importance of specialized kiln drying procedures for this type of wood. If the moisture content isn’t correctly managed, your beautiful vintage wood can warp, crack, or even develop mold over time. Early on, I made the mistake of assuming that all wood, regardless of its age or origin, could be dried using standard techniques. That oversight cost me extra hours of sanding and refinishing — and a good deal of frustration.
In many cases, reclaimed wood still retains moisture from its previous environment, especially barnwood that was exposed to outdoor conditions. Without proper drying, this residual moisture can cause uneven expansion and contraction once installed. It’s akin to installing a piece of fabric that’s still damp—it just doesn’t settle right.
Fortunately, I’ve since learned the hard way that special kiln drying procedures are essential for reclaimed barnwood to reach stable moisture levels suited for indoor use. These processes involve carefully controlled heat and humidity settings specifically designed to remove excess moisture slowly and uniformly. This approach not only preserves the wood’s rustic appeal but also ensures longevity and stability.
If you’re contemplating a project involving reclaimed barnwood, ask yourself: Have I adequately prepared the wood to prevent future issues? Skipping this step might seem tempting to save time, but it can lead to costly repairs and a compromised finish. Don’t worry— I’m here to guide you through the ins and outs of kiln drying that can safeguard your investment.
For a comprehensive guide on mastering such processes, check out [Mastering Hardwood Floor Refinishing](https://tiletrendshop.com/mastering-hardwood-floor-refinishing-expert-tips-for-2025). Now, let’s dive into why exactly kiln drying is not just a good idea, but a necessity for reclaimed barnwood.
Selecting the Right Equipment for Drying
Ensure you have access to a professional-grade kiln or consult with a hardwood dry kiln specialist. A reliable kiln allows precise control of temperature and humidity, which is critical for achieving even moisture removal. During my project, renting a commercial kiln proved more effective than DIY methods; it eliminated warp risk and shortened drying time significantly.
Preparing the Wood Properly
Before drying, inspect each plank for existing warping or cracks. Stack the wood with spacers to promote uniform airflow, much like layering bread in a bread box for consistent drying. I used plastic sticks between the planks, which prevented uneven moisture pockets and resulted in less warping after drying.
Establishing Optimal Drying Conditions
Set the kiln to a gradual temperature increase—around 10°F per day—to prevent rapid moisture loss. Maintain humidity levels around 40-50%, similar to a comfortable home environment. During my session, I monitored moisture content regularly, aiming for a consistent 6-8%. This slow, controlled process avoids internal stresses that cause twisting or cracking.
Monitoring and Testing Moisture Content
Use a moisture meter to track the wood’s progress, inserting probes into the core of each plank. Consistency across boards indicates uniform drying. I recorded readings daily; when all samples stabilized beneath 8%, I prepared for removal. This step is crucial because uneven moisture levels can lead to future warping, even after installation.
Cooling and Acclimation
Gradually decrease the kiln temperature over several days, mimicking natural cooling. Once cooled, store the wood in a controlled environment—ideally similar to your installation site—for at least two weeks. During my process, I kept the barnwood in a climate-controlled storage to allow moisture equilibration, resulting in minimal movement during installation.
Adding a Drying Log for Future Reference
Document every step, including moisture readings, kiln conditions, and drying duration. This record helps troubleshoot issues later and refines your process for future projects. My detailed log meant I could replicate successful drying cycles, ensuring stability in subsequent uses of reclaimed wood.
Understanding and executing these precise steps ensures your reclaimed barnwood will maintain its rustic charm without unforeseen warping or cracking. Proper kiln drying is an investment of effort upfront that pays back with a durable, beautiful finish. To deepen your drying expertise, consider reviewing the detailed techniques outlined in this expert guide.
Many homeowners and even seasoned contractors assume that flooring installation is a straightforward process, but in reality, there are subtle nuances that can determine the success or failure of your project. One common misconception is that all hardwood floors respond similarly to environmental changes. In truth, different species and finishes react uniquely, making tailored acclimation and installation techniques essential. For example, durable oak may handle humidity fluctuations differently than softer species like pine, impacting long-term stability. Overlooking these differences can lead to warping, gaps, or buckling, especially if moisture content isn’t properly managed.
Why Do Some Floors Fail Despite Proper Installation?
Recent studies show that precise subfloor preparation and understanding material-specific behavior are often overlooked, leading to preventable issues. Many believe that leveling isn’t crucial, but even minor imperfections can cause tiles or planks to crack or lift over time. The importance of verifying moisture levels before installation can’t be overstated—exceeding recommended thresholds increases failure risk significantly. Consulting expert-level guides like this detailed resource can save you costly repairs later. Remember, rushing through the preparation or assuming one-size-fits-all solutions will only set you up for disappointment. The key lies in understanding material behaviors, environmental influences, and meticulous execution. For those tackling tiling projects, aligning your floor leveling approach with proven techniques makes all the difference—check out this expert guide to master the art of perfect leveling. Have you ever fallen into this trap? Let me know in the comments.
Keep It Working: Tools I Recommend for Flooring Mastery
Achieving durable, flawless floors isn’t just about the initial installation; it demands proper maintenance and the right equipment. Over the years, I’ve honed my toolkit to include specific tools that ensure long-term results. For instance, I swear by high-quality infrared moisture meters like the Protimeter Surveymaster, which allows me to continually monitor moisture levels in subfloors and hardwood before and after installation. Maintaining optimal moisture not only prevents warping but extends the lifespan of your floors, aligning with expert practices outlined in this guide.
Another game-changer is a good floor buffer with adjustable pads. I typically use the Bona Scrad Combo, which effectively removes surface scratches and helps keep the finish looking fresh. Regular polishing with such machines prevents buildup and preserves the shine, decreasing the need for costly refinishing down the line. For tile care, I rely on a steam cleaner like the Dupray ONE, which sanitizes and refreshes tiles without harsh chemicals, a method recommended in this article.
How do I keep floors in prime condition over time?
Consistent maintenance starts with routine cleaning and instant attention to spills. Using pH-neutral cleaners and avoiding excessive water prolongs the life of both hardwood and tile surfaces. Additionally, implementing protective measures like felt pads on furniture and welcome mats at entry points reduces scratches and dirt accumulation. A proactive approach, combined with tools like microfiber mops and the advanced moisture meters I mentioned, keeps floors resilient against daily wear.
Looking ahead, I predict that smart sensors integrated with flooring will become a standard feature. These devices will alert homeowners to moisture changes or structural issues before visible damage occurs, much like some predictive diagnostic tools in HVAC systems. To stay ahead, I encourage you to incorporate regular tool checks and adopt innovative maintenance techniques, such as the use of decorative tiles that are easier to maintain.
What’s the best way to prolong your flooring investment?
The most effective strategy is adopting a routine maintenance schedule utilizing specialized tools for cleaning and moisture detection. Regularly checking subfloor conditions with an infrared moisture meter prevents future problems, and using quality buffers for polishing extends refinishing intervals. Take the time to master a DIY moisture testing method—like the pinless moisture meters I recommend—and you’ll set a solid foundation for floors that withstand the test of time. Don’t hesitate to try one of these advanced tips today and see your floors thrive for years to come.
Lessons from the Trenches That Changed My Approach
One of the most eye-opening lessons I encountered was realizing that not all reclaimed barnwood is ready for installation straight out of the kiln. The importance of thorough moisture testing cannot be overstated—waiting for the right readings saved me from future warping and cracking. Additionally, I discovered that controlling the drying environment, especially temperature ramp-up and humidity levels, can make the difference between a stable floor and a costly disaster. Lastly, documenting every step of the kiln drying process provided invaluable insight, enabling me to replicate successful techniques with confidence and consistency in future projects.
Tools and Resources That Elevated My Flooring Craft
For anyone serious about hardwood floor mastery, I recommend investing in a reliable moisture meter like the Protimeter Surveymaster, which allows precise tracking of moisture levels inside the wood. A good-quality infrared moisture meter helps monitor subfloors and finished surfaces, ensuring ongoing stability. To perfect the finishing touch, a versatile floor buffer such as the Bona Scrad Combo keeps the surface shining and minimizes wear over time. I often consult the comprehensive insights found on this expert guide, which has been instrumental in sharpening my skills and understanding the nuances of floor care and installation.
Elevate Your Craft and Embrace the Journey
Remember, the world of hardwood floors and tile installation is rich with learning opportunities. Your commitment to understanding the intricacies of kiln drying, moisture management, and proper installation techniques paves the way for floors that stand the test of time. Each project is a chance to refine your skills, adopt new tools, and build a space that truly reflects your craftsmanship. Don’t shy away from experimenting and learning—great floors are born from perseverance and passion.
What’s been your biggest breakthrough or challenge in flooring installation? Share your story below and let’s grow together on this journey to perfection.