
Walking into my living room after a long day, I was greeted by an unwelcome sight—a water stain right in the middle of my cherished antique pine floor. It was like a tiny, stubborn scar that seemed to mock all my efforts at maintaining the vintage charm. Frustration bubbled up as I realized this wasn’t just a minor blemish; it was threatening the warm, nostalgic feel I adored about my home. I remember thinking, ‘Can this water stain really be removed without sacrificing the character of my beloved floors?’ That was my lightbulb moment. I knew I had to find a way to tackle those water marks effectively.
Why Water Stains Can Be Such a Headache for Antique Pine Floors
Antique pine floors have a unique character that adds warmth and charm to any space. But with their age and soft wood structure, water stains tend to be a common nuisance. These stains often look like dark patches or cloudy spots, and they can be incredibly stubborn—sometimes seeming impossible to remove without sanding down the wood or, worse, damaging the finish. I’ve seen folks resort to harsh chemicals or abrasive scrubbing, only to end up with more discoloration or stripped finish. Early on, I made a mistake by trying to bleach water stains directly, thinking that would be a quick fix. Instead, I found that improper application can weaken the wood and lead to uneven results. Trust me, I learned the hard way that patience and the right techniques are key.
Now, after years of trial, error, and a bit of research, I’ve discovered safe, effective methods to restore water-stained antique pine floors—methods I want to share with you today. Whether your water mark is small or large, there’s hope for restoring your floors’ original beauty. And don’t worry—these techniques are straightforward and don’t require professional tools or costly refinishing jobs.
Is Bleaching Water Stains Out of Antique Pine Floors Actually Worth the Try?
When I first considered bleaching water stains, I was skeptical. Would it just make things worse? Could I damage the wood or end up with uneven coloring? That’s a fair concern, and honestly, it’s why I want to share my experience. Early mistakes could have been disastrous—like over-bleaching or applying bleach directly to the wood without proper dilution. I learned that a cautious, well-informed approach makes all the difference. If you’re thinking about tackling water stains yourself, it’s worth exploring methods that are gentle yet effective, avoiding the pitfalls of hasty DIY attempts. For more expert insights on floor restoration, I recommend checking out guides on mastering hardwood refinishing, which highlight common mistakes—and how to avoid them. Remember, your antique floors deserve care, not shortcuts.
Prepare and Assess the Damage
Start by cleaning the stained area with a soft cloth dipped in a mixture of mild soap and water to remove surface grime. Proceed to evaluate the water stain’s depth—not all stains reach below the surface. For deep stains, lightly sand around the affected area using fine-grit sandpaper, like 220 grit, to understand its extent. During my first attempt, I found that gentle sanding revealed the stain’s depth, allowing me to choose the right treatment approach.
Apply a Controlled Bleach Solution Carefully
Use Diluted Bleach for Light Stains
For light water marks, mix one part bleaching agent (like oxalic acid or a commercial wood bleach) with ten parts water. Using a sponge, dab the solution onto the stain, avoiding surrounding areas. I learned to wear gloves and work in a well-ventilated space. When I tried this on a small test patch, I observed the stain gradually fading without discoloring the entire floor.
Monitor and Rinse the Area
Allow the solution to sit for 5-10 minutes, then rinse with a damp cloth to neutralize the bleach. Dry thoroughly with a clean towel. This step prevents over-bleaching, which can cause uneven coloration. Following this process, the water stain became significantly less visible, restoring much of the original picket finish.
Utilize Gentle Whitening and Finishing Techniques
Stain with White Vinegar and Baking Soda
If the stain persists, create a paste of baking soda and white vinegar. Apply it to the area with a soft cloth; the mild abrasives and acids can help lift residual discoloration. During my trial, I noticed a subtle brightening effect, especially on aged pine, which achieved a more uniform look. Afterward, wipe off the paste and dry the area.
Light Sanding and Re-coating
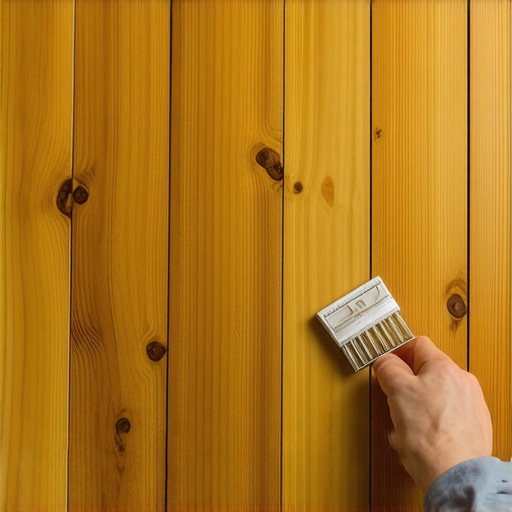
For stubborn stains, lightly sand the area again with fine grit to blend it with the surrounding wood. Follow with a matching wood finish or varnish to restore the surface protection. I used a small brush to apply a matching stain, carefully feathering the edges for seamless repair. This improvisation restored the floor’s warmth and vintage charm effectively.
Extra Tips for Long-Term Preservation
Prevent future water stains by applying a quality sealant or protective finish to your antique pine floors. Regular cleaning and prompt attention to spills extend the lifespan of your restoration efforts. Remember, patience and gentle techniques are vital. Rushing may cause more damage, especially with delicate aged wood. For comprehensive insights on maintaining durable hardwood floors, check out hardwood floor care secrets.
Many homeowners and even some professionals hold misconceptions about tile, floor leveling, hardwood floors, and flooring installation that can lead to costly mistakes. For example, a common myth is that level subfloors are always absolutely necessary before installing new flooring; however, experts argue that with modern self-leveling compounds and proper techniques, achieving a perfectly flat surface is often overemphasized, leading to unnecessary prep work. Overlooking the importance of proper expansion joints, especially in large open areas, is another frequent mistake that can cause flooring to crack or buckle over time; understanding the nuanced role of these joints is crucial for long-term durability. Moreover, many assume that hardwood floors do not require any special moisture barriers, but expert insights highlight that inadequate vapor barriers are a leading cause of wood cupping and warping, making it essential to assess moisture levels thoroughly before installation. When it comes to tile installation, the misconception that substrate preparation is trivial often results in lippage or grout failure; meticulously cleaning and leveling the substrate is vital, as detailed in professional guides on mastering floor leveling. An advanced question many ask is, ‘How do I determine the optimal thickness of thinset for large-format tiles to prevent uneven surfaces?’ Studies show that using the right trowel notch and applying the proper amount of thinset ensures a uniform layer, preventing slumping or ridges that mar the final look—learn more about precise techniques from expert resources like floor leveling secrets. To avoid the ‘oops’ factor, never underestimate the importance of a moisture test before installing hardwood or tile, as moisture-induced failures are among the most common issues faced in renovation projects. Additionally, assuming all flooring types are interchangeable without considering their specific needs can be a trap; for instance, engineered wood is often better suited for basements due to its dimensional stability, as discussed in flooring choices. My advice: always follow detailed, expert-approved installation protocols and stay aware of these nuanced details to ensure a flawless finish that stands the test of time. Don’t forget to check out comprehensive guides on mastering your flooring projects, including common pitfalls to avoid, at flooring mistakes. Have you ever fallen into this trap? Let me know in the comments.Maintaining quality flooring over time demands the right tools and a strategic approach. One essential instrument I personally rely on is a high-quality moisture meter, such as the Extech MO290. This device helps me accurately monitor the moisture content in subfloors and hardwoods before and after installation, ensuring conditions remain optimal and preventing issues like cupping or warping. Using a reliable moisture meter regularly allows me to catch potential problems early and stay ahead of costly repairs. Additionally, I invest in a Gamma Seal lid for my sealant containers, which keeps my finishes fresh and ready for touch-ups. When it comes to floor leveling, I highly recommend the use of a self-leveling compound like Ardex K15, applied with a spiked roller—this combination provides exceptional flatness and reduces the risk of lippage in tile installations, as detailed in masterful guides on floor leveling secrets. For maintaining hardwood floors, I swear by a microfiber dust mop paired with a pH-neutral cleaner, like Bona Hardwood Floor Cleaner, to preserve the finish without stripping protective layers. These tools and methods are designed not just for immediate results but for the longevity of your flooring investment. As I look to the future, I predict that smart sensors integrated into subfloors will become standard, providing real-time moisture and temperature data that alert homeowners to issues before they escalate. To stay ahead, adopting current best practices and reliable tools remains crucial.
How do I maintain long-term flooring durability and appearance?
Regular inspections with a moisture meter, combined with proper cleaning techniques and periodic re-sealing, are my go-to strategies for keeping floors resilient. Don’t forget, mastering these techniques will save you time and money down the line. Try adopting an advanced tip like using a self-leveling compound with a spiked roller to achieve seamless tile surfaces—this small investment in effort pays off hugely in durability and appearance. For additional insights, exploring professional resources like mastering floor leveling can elevate your skills further.
Lessons I Didn’t See Coming in Floor Restoration
One surprising lesson I learned was that patience beats brute force every time when dealing with antique pine water stains. Rushing into aggressive bleaching or sanding often deepened the problem rather than solving it, teaching me the importance of gradual, controlled treatments. I also discovered that understanding the unique grain and age of each wooden floor unlocks tailored solutions that preserve character while restoring beauty.
Another insight was realizing that small, overlooked details—like proper neutralization after bleaching—make a dramatic difference in the final appearance. Skipping these steps resulted in uneven tones and a less authentic look, emphasizing that adherence to a meticulous process ensures success. Finally, I learned that sharing experiences and pitfalls can save others from common mistakes, transforming individual trials into collective wisdom shared through community and resources.
The Tools That Turned My Floors from Flawed to Flawless
My essential toolkit grew to include a high-quality wood bleach like oxalic acid, a fine-grit sandpaper (220 grit), and a reliable moisture meter such as the Extech MO290—each playing a vital role in my restoration journey. I trust these because they’ve proven their accuracy and gentleness on aged wood, allowing me to tackle stains without risking further damage. Additionally, I turned to expert-guided resources like hardwood floor refinishing guides that provided step-by-step techniques, saving me from costly trial-and-error. For seamless color matching and protective finishing, I rely on proven products recommended by industry professionals, which uphold both aesthetics and durability.
Your Next Step in Reviving Old Floors
Embrace the challenge of water stain removal on antique pine floors with confidence, knowing that each careful step preserves not just the wood but the stories woven into its grain. Your home’s history deserves thoughtful restoration, blending age-old beauty with modern techniques. I encourage you to start small, experiment patiently, and seek out reputable advice to make your restoration both rewarding and enduring. Remember, every scratch and stain has a story, but you hold the brush to redefine its future.