
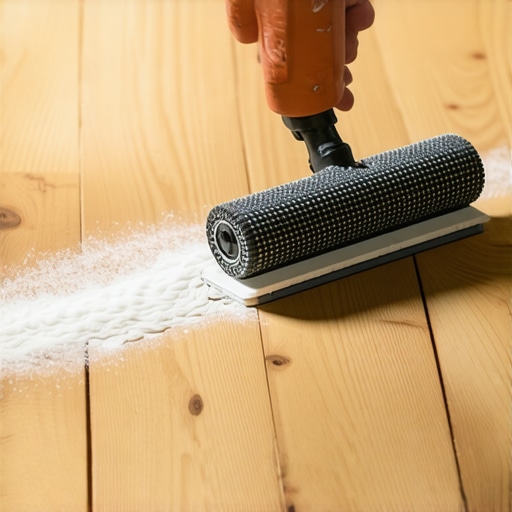
I remember the exact moment I realized I had bitten off more than I could chew with my old oak floor project. There I was, staring at a stubborn, decades-old carpet glue crusted onto my beautiful hardwood, feeling like I was on the verge of giving up. The more I scrubbed and scraped with random tools, the more frustrated I became, watching my pristine wood get dented and scratched. It was a lightbulb moment—this wasn’t just about stubborn adhesive; it was about choosing the right tools for the job.
The Secret Weapon in Carpet Glue Removal: The Sanding Grid
Getting old carpet glue off oak floors can be a nightmare. I used to think that brute force and heavy-duty chemicals were the way to go, but I quickly learned that approach was more damaging than helpful. Then I discovered the sanding grid—an innovative abrasive tool designed specifically for delicate surfaces like oak—that made the entire process feel like a breeze instead of a battle.
The sanding grid’s unique design distributes abrasive action evenly across the surface, minimizing deep scratches and ensuring a smooth finish. Unlike traditional sandpaper or aggressive scrapers, it offers controlled removal, which is especially crucial when dealing with hardwoods that can be easily gouged.
But why is choosing the right sanding grid so essential? Well, I learned this lesson the hard way early on. My first attempt involved using a coarse grit paper that gouged my oak, leaving scars that took months to fix. That mistake taught me that not every abrasive tool is suitable for removing old adhesives without risking damage. If you’re contemplating your own project, I highly recommend exploring options like the precise floor leveling techniques that include the right abrasive tools.
So, if you’ve ever wrestled with stubborn carpet glue and wondered how some professionals seem to get flawless results without wrecking their floors, you’re in luck. We’ll walk through the specific steps to select and use the perfect sanding grid, helping you save time, money, and your precious oak finish.
**Feeling overwhelmed or worried about damaging your floor?** Trust me, I’ve been there. But with the right approach and tools, you can achieve a smooth, adhesive-free surface that’s ready for refinishing or new flooring installation. Let’s dive into the practical strategies that will turn your glue nightmare into a clean slate for stunning results.
Select the Right Sanding Grid for Gentle Adhesive Removal
During my project, I first chose a medium-grit sanding grid, similar to a 120-grit, which I pressed gently against the stubborn glue spots. I clamped my oak flooring securely to prevent movement and started with light, circular motions. This controlled approach prevented gouges and smoothed out the residue. If you’re unsure about the grit size, check out our detailed floor leveling guide for tool selection tips.
Apply Light Pressure and Maintain Consistency
Remember, pressure is your enemy here. Just like polishing a delicate gemstone, let the abrasive do the work. I moved continuously, avoiding excessive pressure that could scratch the wood. This process might generate dust, so wearing a mask is advisable. I found that this gentle, consistent motion significantly reduced the adhesive without damaging the wood surface.
Use a Razor Knife for Stubborn Adhesive Patches
For particularly thick glue patches, I employed a sharp razor blade to carefully score and lift the residue. I laid a protective layer over the wood to avoid accidental scratches and worked slowly, peeling away layers of adhesive. This step is crucial because it minimizes the amount of abrasive work needed and preserves the wood’s integrity. For more precise tips, consider reading about primer mistakes causing delamination.
Follow Up with Fine-Grit Sanding for a Smooth Finish
After removing the bulk of the glue, I switched to a finer grit, like 220, to refine the surface. I carefully sanded along the grain, which made the transition seamless. This step ensures no residual adhesive is left and prepares the floor for refinishing or overlaying. Remember, a meticulously prepared surface reduces the risk of problems down the line. For advanced techniques, check out our floor leveling techniques.
Clean Thoroughly to Reveal Your True Hardwood
Finally, I vacuumed the floor using a HEPA filter to remove dust and fine particles, then wiped it with a damp cloth. This cleaning is vital to prevent debris from interfering with adhesive or finish application later. During my experience, skipping this step led to uneven finishes and adhesion issues. Proper cleaning is simple but often overlooked; for complete cleaning strategies, see our tile installation success tips.
Many homeowners and DIY enthusiasts assume they understand the nuances of flooring installation, but in my experience, several widespread beliefs actually hinder success. One such myth is that ‘more adhesive always means better bonding.’ On the contrary, using excessive thinset or glue can create uneven surfaces, leading to lippage or cracks over time. Proper substrate preparation and adhesive application tailored to the specific material are critical for durability and a flawless finish. Rushing the process with a heavy hand often results in trapped air pockets or uneven drying, increasing the risk of future problems.
Another common mistake involves thinking that floor leveling can be overlooked or rushed. Uneven subfloors are the root cause of many issues, including tile cracking and squeaky hardwood. While self-leveling compounds are a valuable tool, improper mixing or application can cause puddling or stickiness, defeating their purpose. To avoid this, understanding the correct mix ratios and applying the compound gradually, ensuring proper spiked roller use, are essential. For detailed guidance, check out our floor leveling techniques.
Many believe that hardwood floors are more forgiving in high-moisture areas. In reality, moisture intrusion is a leading cause of hardwood failure, warping, and cupping. Proper acclimation of wood during installation and the use of moisture barriers are often underestimated. Skipping these critical steps can result in costly repairs and refinishing. Advanced installers measure subfloor moisture and use appropriate underlayments, which are vital for long-term performance.
A frequently overlooked aspect is the importance of substrate analysis. Some assume that all concrete slabs and wood subfloors are suitable without testing. However, unrecognized moisture, cracks, or debris can compromise adhesion and stability. Conducting thorough inspections and tests before installation isn’t just a precaution; it’s a necessity for professional results.
Finally, many get caught up in the idea that choosing the most expensive materials guarantees quality. But, in my experience, proper installation techniques and preparation matter far more than price tags. An affordable tile or hardwood, installed correctly, can outperform high-end material poorly laid.
The key takeaway? Achieving a perfect floor demands a detailed understanding of materials, substrate conditions, and installation techniques. Do not fall for oversimplified beliefs; instead, invest in education and preparation. For comprehensive advice, explore our installation fundamentals.
**Have you ever fallen into this trap? Let me know in the comments.**
Tools That Keep Your Floors in Top Shape
Maintaining beautiful, durable floors requires more than just initial installation; it hinges on using the right tools regularly. I personally rely on a high-quality oscillating multi-tool, such as the Fein MultiMaster, for precise sanding and detail work around edges and tight spaces. Its variable speed and versatile attachments allow me to tackle everything from re-sanding worn spots to removing old finishes without damaging the wood or tile.
For cleaning, I swear by a microfiber mop paired with a pH-neutral cleaner designed for hardwood and tile surfaces. This combo prevents buildup and preserves your floors’ finish. Regularly checking your equipment and replacing worn pads or blades helps prevent scratches or uneven wear, keeping your floors looking newly installed for years.
Long-Term Maintenance Methods
Consistent care isn’t just about periodic deep cleaning; it involves preventive measures. Applying a quality floor protector, like a polyurethane finishing sealant, once every few years creates a barrier against dirt, moisture, and scratches. I recommend choosing finishes with UV resistance if your space has a lot of sunlight, to prevent fading or discoloration.
Scheduling routine inspections allows you to spot minor issues—like loose tiles or creaking hardwood—before they escalate. Using tools such as a moisture meter can be essential, especially in basements or showers, to ensure subfloor moisture levels stay within safe ranges, which supports the longevity of hardwood and tile installations.
Scaling Your Flooring Efforts Effectively
As your space grows, so does your need for efficiency. For large projects, I advocate investing in a flatbed tile cutter with adjustable angles, which speeds up precise cuts and reduces waste. For hardwood, a pneumatic nailer ensures even, secure fastenings, saving hours compared to manual nailing. %IMAGE_PLACEHOLDER_D%
Looking ahead, technology trends like smart moisture sensors and automated cleaning systems are poised to revolutionize long-term flooring maintenance, making it easier than ever to keep your floors pristine and problem-free.
How do I maintain my floors over time?
Developing a regular maintenance routine—combining proper cleaning, protective coatings, and timely repairs—is the key. Also, staying informed about new tools and materials can help you adapt your approach for lasting results. For instance, integrating a self-floor leveling system during installation can prevent future unevenness or cracks, especially in areas prone to shifting, which you can learn about in our guide on floor leveling techniques.
Try implementing a scheduled inspection and cleaning plan using a moisture meter, and see how it preserves your investment. For expert advice tailored to your specific flooring type, reach out via our contact page.
Lessons That Changed My Flooring Game
One of the most surprising truths I uncovered was that patience can be your strongest ally. Rushing through adhesive removal often leads to costly mistakes like gouges or uneven surfaces. I’ve learned that taking the time to select the appropriate grit size for my sanding grid and applying gentle, consistent pressure results in a flawless finish.
Another lesson was understanding the importance of substrate quality—skipping a thorough inspection can cause long-term issues like tile cracking or hardwood warping. Investing in a good moisture meter and ensuring the subfloor is perfectly prepared has saved me headaches down the line.
Finally, I realized that no matter how advanced your tools are, technique matters most. Gentle scoring with a razor blade and refined sanding can make all the difference in a smooth, adhesive-free surface that’s ready for finishing. Trust that mastering these nuances elevates your flooring projects from average to professional-grade.
Tools and Resources That Elevate My Craft
My go-to toolkit includes a high-quality oscillating multi-tool, such as the Fein MultiMaster, which provides precision in tight spots and delicate areas. Its versatility helps me handle everything from scraping stubborn glue to sanding edges without damaging the wood. For measuring moisture levels accurately, I rely on a trustworthy moisture meter, ensuring my subfloor is within optimal parameters before installation.
When it comes to learning, I always recommend diving into comprehensive guides like the ultimate floor leveling techniques. They provide invaluable insights that can prevent common mistakes and improve your skills.
For wrenching DIY challenges, online communities and expert forums have been vital. Sharing experiences and asking questions can open your eyes to shortcuts and methods you might not discover on your own. Remember, continuous learning and investing in good tools are the backbone of successful flooring projects.
Your Next Step Starts Today—Keep Moving Forward
Transforming your floors is more than a task—it’s an opportunity to craft something beautiful and lasting. Every improvement, big or small, adds character and value to your home. Whether you’re just starting or refining your skills, remember that patience, proper tools, and continuous education are your best allies.
Don’t hesitate to take that first step or try a new technique today; each effort will bring your vision closer to reality. The future of flooring is in your hands—embrace it, learn from your experiences, and keep pushing your boundaries. Your dream floor is within reach, and with consistent effort, you’ll achieve results that truly stand the test of time.
What’s been the most eye-opening lesson in your flooring journey? Share your story below—I’d love to hear how you overcame challenges or discovered new techniques!