
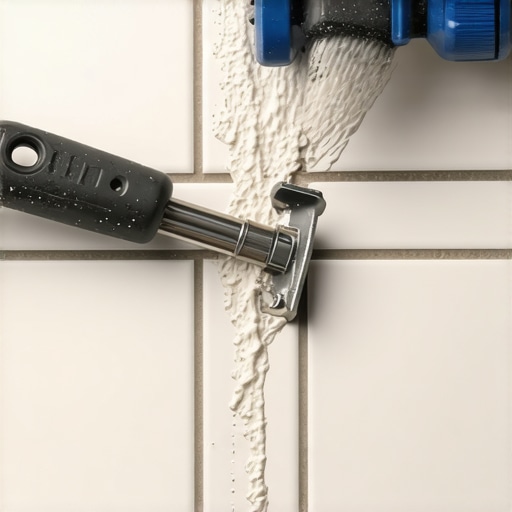
Have you ever laid a beautiful new tile floor only to find that your thinset has stubbornly oozed between the tiles, creating uneven joints and a mess to clean up? I remember my first attempt like it was yesterday. I had carefully selected the perfect tiles, envisioned a flawless finish, and diligently spread the thinset. But as I pressed the tiles into place, I noticed that it was squeezing out between the cracks like lava. That moment was a real eye-opener—turns out, oozing thinset can ruin the appearance of even the most well-planned tiling project.
If you’ve ever dealt with this frustrating issue, you’re not alone. It’s a common problem among DIY enthusiasts and even seasoned pros. But here’s the good news: with some simple adjustments and techniques, you can prevent thinset from oozing excessively and achieve those sleek, professional-looking joints you desire.
Mastering the Art of Thinset Application for a Neat Finish
Before we dive into the solutions, I want to talk about why this happens in the first place. Thinset, the adhesive used to stick tiles to surfaces, is designed to be spread in a controlled manner. However, when applied improperly, it can squeeze out unevenly or in excess. One of the biggest mistakes I made early on was using too much thinset and pressing tiles down with too much force—a surefire way to cause oozing. Believe me, I learned the hard way that a little less goes a long way.
To avoid this, I recommend starting with the right trowel size and working in small sections. For large tiles, a 1/4-inch notch trowel typically provides enough adhesive coverage without excess. Also, it’s crucial to gently press tiles into the thinset instead of stomping or pressing too hard. This helps the thinset spread evenly, preventing it from squeezing out excessively.
For a detailed step-by-step on proper tile installation and levelness, check out this comprehensive guide [here](https://tiletrendshop.com/installing-tiles-like-a-pro-step-by-step-strategies-for-2025). Learning the nuances of spreading thinset and pressing tiles correctly can make a huge difference in your results.
Have you faced the dilemma of thinset oozing unexpectedly? If so, stick around, because the next sections will walk you through proven techniques to keep your grout lines clean and your tiles perfectly aligned. Achieving a professional finish isn’t just about aesthetics—it also ensures the longevity and durability of your tiled surface. Let’s get started on making your next tiling project a true success.
Use the Right Trowel and Apply Consistently
During my first tiling project, I used a too-large trowel and pressed tiles with excessive force, which led to significant thinset squeeze-out. To avoid this, select a trowel with a notch size appropriate for your tile dimensions—like a 1/4-inch notch for large-format tiles—and apply consistent pressure. Think of the trowel as a spreader of adhesive, not a paintbrush—more is not better. Practice spreading thinset evenly in small sections to prevent over-application.
Manage Thinset Bedding for Better Control
When applying thinset, work in smaller sections—roughly 3×3 feet—to maintain control and prevent it from setting before tiles are set. Spread the thinset in a consistent, ridged pattern, similar to how you might spread frosting on a cake, ensuring an even layer. This technique reduces excess material that can ooze out and makes pressing tiles smoother and cleaner.
Press Tiles Gently and Use Spacers
Press each tile into the thinset with gentle, even pressure—imagine placing a delicate piece of paper onto glue—enough to seat the tile without forcing it. Use tile spacers to maintain uniform joints, which also prevents the tiles from pressing down too hard and squeezing out too much thinset. This controlled approach helps keep joints neat and prevents thinset from seeping into grout lines excessively.
Adjust Thinset As You Work
Monitor the amount of thinset that squeezes out as you press each tile. If you notice too much, scrape some off with a margin trowel or margin float before it hardens. I once had a muddy mess because I didn’t check frequently; taking a moment to adjust saved a lot of cleanup later. Think of it as trimming excess early, rather than cleaning a disaster afterward.
Clean Up Excess Immediately
As you lay tiles, keep a damp sponge nearby for quick cleanup of squeeze-out. Remove excess thinset before it hardens—it’s much easier to wipe wet than to chisel dried material. This proactive step keeps your joints clean and saves time on scraping and grinding afterward.
Check Your Subfloor and Surface Level
A flat surface promotes controlled thinset application. If the subfloor or substrate is uneven, thinset may ooze unpredictably. Prior to tiling, inspect and level the surface using a laser level or straightedge. An even substrate acts like a well-poured concrete mold, guiding the thinset to behave uniformly. For detailed leveling techniques, see this guide [here](https://tiletrendshop.com/how-to-achieve-flawless-floor-leveling-before-tile-laying).
Practice on a Test Section
Before starting your main project, lay down a small test area. This helps you gauge the right pressure, amount of thinset, and timing. During my first attempt, I experimented on a scrap piece, which allowed me to refine my technique and significantly reduce thinset squeeze-out on the real project.
While many DIY enthusiasts and even seasoned pros believe they understand flooring installation, several common misconceptions can lead to costly mistakes. One prevailing myth is that using the thickest or most aggressive adhesive guarantees better bonding, but in reality, over-application can cause excessive squeeze-out and uneven surfaces. Instead, mastering the right thinset consistency and application techniques ensures a durable, professional finish. Additionally, many assume that a perfectly flat subfloor isn’t crucial; however, even minor imperfections can lead to lippage issues and tile cracking over time. Proper subfloor preparation, including leveling and addressing moisture issues, is essential for long-term success. Never underestimate the importance of proper acclimation of hardwood flooring—some believe in installing immediately after delivery, but inadequate acclimation can cause warping, gapping, or buckling. Always allow hardwood to reach equilibrium with indoor humidity levels before installation. A frequent oversight is misjudging the impact of climate on flooring materials, especially with engineered wood and luxury vinyl planks; understanding spectral hygrometry and using moisture barriers can mitigate expansion or contraction. Be aware that many rely solely on visual checks for levelness, but using professional tools like laser levels provides much more accurate results, preventing future issues. Recognize that each flooring type has unique nuances—what works for tile may not suit hardwood, and vice versa. For example, hardwood floors require specific subfloor conditions and expansion gaps that are often overlooked. Advanced practitioners know that combining complementary materials—like integrating tile with hardwood through floating floor techniques—can add both aesthetic appeal and functional durability, but only if expertly planned. This showcases the importance of detailed planning and knowledge of material interactions. Want to elevate your skills? Dive into expert guides such as [installing tiles like a pro](https://tiletrendshop.com/installing-tiles-like-a-pro-step-by-step-strategies-for-2025) or [hardwood refinishing tips](https://tiletrendshop.com/mastering-hardwood-floor-refinishing-expert-tips-for-2025) to avoid these pitfalls. Remember, superficial solutions might seem quick but can lead to long-term damage. Have you ever fallen into this trap? Let me know in the comments or your next project—future you will thank you for paying attention now.Achieving a stunning floor is just the beginning; keeping it in top shape over time requires the right tools and consistent maintenance. One essential item I personally swear by is a high-quality grout float. Unlike standard options, my preferred grout float has an ergonomic handle and a flexible rubber blade, which allows me to apply and smooth grout evenly without pulling it out of joints. Regularly inspecting and cleaning this tool ensures that grout lines remain clean and durable, preventing cracks and discoloration that can develop with neglect.
Maintaining Your Floors: Tools I Recommend
Beyond the basics, using a laser distance meter helps me check for subtle unevenness in subfloors after installation. This precision tool ensures the floor’s surface remains flat, which is crucial for seamless tile installation and long-term durability. For hardwood floors, I recommend investing in a dust mop with microfiber pads—they trap dirt effectively without scratching delicate surfaces, and regular use preserves the wood’s finish, prolonging its beauty.
Predicting the Future of Floor Maintenance
Looking ahead, advancements in smart sensors and IoT technology may revolutionize how homeowners monitor floor conditions. Imagine sensors embedded in the subfloor that alert you about moisture levels or structural shifts in real-time, allowing preventive actions before damage occurs. Staying updated on these innovations can save significant repair costs and extend your flooring’s lifespan.
How do I keep my flooring installation performing over time?
Incorporating proactive upkeep routines—like applying a breathable sealant every few years for tile grout, or adjusting humidity levels for hardwood—can mitigate common issues such as warping or cracking. Additionally, routine inspections with specialized tools like a moisture meter or a straightedge help identify potential problems early. For detailed guidance, check out [flooring installation fundamentals](https://tiletrendshop.com/flooring-installation-fundamentals-leveling-for-a-seamless-look). Starting with these advanced maintenance tips, like using a laser level for surface checks or employing a microfiber dust mop regularly, will set your floors up for long-term success. Remember, investing in quality tools and consistent care is the secret to preserving the beauty and function of your flooring for years to come. Why not try calibrating your surface measurements with a laser level today? It’ll give you peace of mind knowing your floor remains perfectly flat and ready for years of enjoyment.
The Hardest Lesson I Learned About tile,flooring installation,floor leveling,hardwood floors
One of the most valuable lessons I discovered was that patience and precision outweigh haste and heavy-handedness. Rushing through thinset application or pressing tiles with excessive force often leads to oozing and uneven joints. I realized that taking the time to master the right amount of thinset and pressing gently results in a durable, professional-looking floor that stands the test of time.
3 Myths About tile,flooring installation,floor leveling,hardwood floors That Held Me Back
- More Thinset Means Better Bond: Believing thicker layers improve adhesion actually causes excess squeeze-out and uneven surfaces. Less is more when applying thinset correctly.
- Subfloor Levelness Isn’t Critical: Underestimating the importance of a flat surface leads to tiles cracking or lippage issues. Proper leveling paves the way for flawless installation.
- Tools Don’t Make a Difference: Skipping quality tools like a laser level or proper trowels might save money initially but results in more work and re-dos later. Investing in the right gear pays off.
What Experts Won’t Tell You About tile,flooring installation,floor leveling,hardwood floors
Many professionals know that the key to long-lasting floors lies in meticulous preparation and technique rather than just the materials used. For example, understanding the specific requirements for different flooring types—like engineered hardwood versus solid hardwood—can prevent costly mistakes, such as warping or separation. Additionally, integrating proper moisture barriers and acclimation techniques ensures your hardwood floors stay beautiful and stable over time. Don’t overlook the value of small details like consistent joint spacing and surface preparation; these are often the difference between average and extraordinary results. Dive deeper into these practices with guides such as installing tiles like a pro or hardwood refinishing tips to elevate your craftsmanship.