
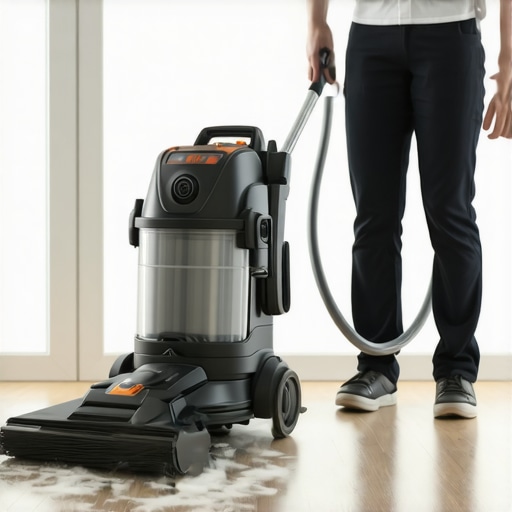
Have you ever finished a massive hardwood floor sanding project, only to realize that the dust lingering in every corner feels like a cruel joke? I remember the first time I went through this mess—standing in the middle of my newly sanded floor, coughing and sneezing, thinking, “There has to be a better way.” That lightbulb moment led me on a quest to find the most effective methods for cleaning up dust after floor sanding. If you’ve faced this frustrating scenario, you’re not alone; many homeowners and contractors struggle with this very problem.
Conquering Dust Chaos: Making Your Floors Shine Bright Without the Mess
In this post, I’ll share proven strategies that really work. From practical tips to foolproof tools, we’ll explore how to effectively remove that stubborn dust, ensuring your floors not only look beautiful but are also safe and clean. Cleaning up after sanding can be a tedious task, but with the right approach, you can turn this chaos into a triumph. Ready to transform your space? Let’s dive into the secrets of dust-free perfection.
Is It Really Possible to Get Rid of All Dust Without Hiring Pros?
Early in my project, I made the mistake of assuming a few sweeping motions would do the trick. Spoiler alert: it didn’t. That false start taught me that thorough dust removal requires specific techniques and tools, not just elbow grease. According to industry experts, proper dust collection and cleaning methods are essential for achieving a professional finish and avoiding future issues—like scratches on your newly finished floors or dust settling into your fresh coat of finish. Want to know how I finally mastered the cleanup? Keep reading, and I’ll guide you through step-by-step strategies to make dust a thing of the past.
Are you ready to discover the most efficient ways to leave your floors spotless? Let’s get started!
,
Start with Wet Wipes and Vacuuming
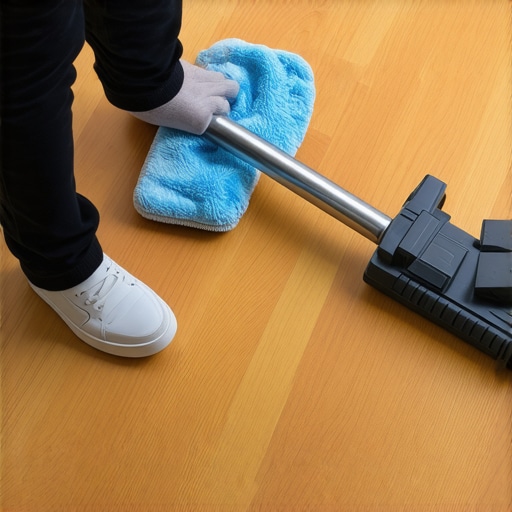
My first real breakthrough came when I used damp microfiber cloths to wipe down the entire floor surface immediately after sanding. This trapped fine dust particles before they settled into the wood. Simultaneously, I ran a high-powered vacuum with a soft brush attachment across the surface, paying close attention to edges and corners. This method is akin to sweeping a dusty floor and then mopping—together, they drastically reduce airborne dust and surface debris, making subsequent cleaning easier and more effective.
Employ Dust Collection Systems During Resanding
When I decided to resand my hardwood, I invested in a dustless sander attached to a HEPA dust collection system. This setup acts like a vacuum, trapping most airborne dust right at the source—much like how a brewery’s vent hood captures brewing vapors. The difference was eye-opening; with minimal dust in the air, cleanup became a matter of wiping surfaces rather than battling a cloud of particles. For similar projects, consider tools that feature integrated dust collection; they save time and protect your lungs during the process.
Use a Tack Cloth Before Final Cleaning
A trick I learned from pros involved wiping every inch of the floor with a tack cloth after vacuuming and initial wiping. This sticky cloth picks up the tiniest dust residues left behind—think of it as a magnet for microscopic debris. I found this step vital, especially before applying finish coats, to ensure a smooth, dust-free surface and prevent imperfections like bumps or specks appearing later. For thorough cleaning, tackle every surface, including baseboards and adjoining walls.
Seal the Surface for Dust Prevention
Once the floor was cleaned, I applied a dust barrier primer or sealant if possible—this prevents dust from settling into the finish. It’s similar to laying plastic sheeting over furniture to protect it from dust during renovation. This extra step is particularly useful in busy areas or when working over an extended period. A well-sealed surface keeps your finish pristine and reduces the need for touch-ups or sanding rework.
Stay Consistent Throughout the Process
Throughout my project, I kept tools and work areas meticulously cleaned, changing cloths frequently, and avoiding the temptation to give up. Like a craftsman sharpening their tools regularly, maintaining cleanliness ensures dust doesn’t compromise the quality of your work. This disciplined approach, combined with the techniques above, creates a near-zero dust environment, leading to a professional-looking, long-lasting finish. For detailed tips on cleaning and maintenance, explore hardwood floor care secrets.
< >Many DIY enthusiasts and even professionals often operate under assumptions about hardwood floors, leveling, and tile installation that can lead to costly mistakes. Contrary to popular belief, mastering these crafts requires more than just the basic tools and steps; understanding nuanced details can greatly improve the quality and longevity of your work. For instance, the myth that flooring can be installed directly over any subfloor without proper preparation is widespread but dangerously misleading. Subfloor conditioning, moisture checks, and proper leveling are critical steps that often go overlooked, leading to uneven surfaces and future damage. According to flooring expert Bob Vila, neglecting these details can result in unevenness that causes squeaks or even warped floors over time. Dive into advanced strategies, like incorporating self-leveling compounds with spiked rollers or precise moisture barriers, to elevate your installation quality. One common trap is underestimating the importance of expansion gaps and temperature controls, which can lead to buckling or gaps during seasonal changes. An often unseen nuance is the impact of subfloor imperfections on tile adhesion; subtle humps or depressions, if unaddressed, create lippage and crack risks. Don’t assume that the initial surface is perfectly flat; many successful installers use laser levels and chalk-line techniques to identify and correct these issues beforehand. Additionally, when choosing between different tile types or hardwood species, consider not just aesthetics but environmental factors like humidity, which influence expansion and contraction. Professionals emphasize that understanding the underlying science, such as moisture content and material rigidity, can prevent many common problems. For example, a study published in the Journal of Building Engineering highlights the significance of proper subfloor preparation in reducing tile delamination and hardwood cupping. By challenging the misconception that installation is mostly about following steps, and instead focusing on the subtle details—like tailored expansion joints, temperature constraints, and moisture management—you can achieve a seamless, durable finish. Want to ensure your project stands the test of time? Invest time in mastering these nuanced techniques, and you’ll be rewarded with impeccable results. Have you ever fallen into this trap? Let me know in the comments.
Keep It Working: Essential Tools for Flooring Durability
Maintaining the longevity and beauty of your flooring requires the right set of tools tailored to each stage of the process. For ongoing care, I personally swear by a high-quality microfiber mop combined with a pH-neutral cleaner, which preserves finishes without stripping away protective layers. Investing in a moisture meter is equally crucial; consistent moisture checks, especially in basements or climates with fluctuating humidity, prevent warping and cupping in hardwoods. For floor leveling projects, a laser level stands out as an indispensable device—I’ve found that manual methods often miss subtle imperfections that could cause uneven tile or hardwood surfaces down the line. Using a self-leveling underlayment spiked with a spiked roller ensures the surface is truly flat, reducing lippage in tiles or gaps in hardwood installations, as highlighted in this guide on perfect leveling. For finishing touches, a quality edge sander helps smooth transitions, particularly around door jambs and baseboards, delivering a professional look without the hassle of tearing up adjacent materials.
Future Trends in Flooring Maintenance and Installation
Looking ahead, automation and smart tools are poised to revolutionize flooring care and installation. Imagine laser-guided robots guiding your sander or an app that monitors humidity and moisture levels in real time, alerting you before issues escalate. Additionally, eco-friendly, low-VOC sealants and adhesives are becoming standard, aligning with growing environmental awareness and health considerations. Professionals are increasingly adopting digital design platforms that integrate laser measurements, allowing for precise project planning and visualization before physical work begins, significantly reducing errors and rework. Staying ahead of these trends means embracing technology that increases efficiency while safeguarding your investment. For example, mastering the latest in self-leveling compounds and understanding their interaction with different substrates can dramatically improve long-term outcomes, as detailed in this expert resource. Don’t overlook the importance of proper maintenance; regularly deep-cleaning and sealing your floors can double their lifespan. I challenge you to implement one advanced tip today: try spiking your self-leveling underlayment with a spiked roller and observe how it enhances flatness and bonding. Consistent, deliberate care combined with modern tools ensures your floors remain stunning and functional for years to come. Need personalized advice? Contact us today and let’s discuss bespoke strategies tailored to your space.
What I Wish I Knew When I Started
The most valuable lesson I learned from my hardwood floor project wasn’t just about the techniques but the mindset shift needed for perfection. Early on, I underestimated the importance of meticulous cleaning—thinking a quick sweep was enough—only to find dust settling into my finish. That wake-up call made me realize that every tiny grain has the potential to ruin a beautifully refinished floor. Another lightbulb moment was understanding that integrating dust collection tools during sanding isn’t just a luxury but a necessity, especially if you want a truly dust-free environment. It changed my approach from reactive cleaning to proactive prevention, which saves time and effort in the long run. Lastly, I discovered the power of attention to detail—using tack cloths and sealing surfaces with dust barriers—these small steps transform a good project into a professional-quality finish. These lessons revealed that patience, precise tools, and an understanding of dust behavior are the secret ingredients for durable, pristine floors.
Tools and Resources That Made the Difference
Over the years, I’ve come to rely on specific tools and resources that elevate my flooring projects. The spiked roller became indispensable in achieving flawless self-leveling underlayment, ensuring that my surfaces remained perfectly flat before tile installation. Investing in a high-quality HEPA dust collection system made dust management virtually effortless, and a set of damp microfiber cloths always proved essential for initial dust wipe-downs. I also swear by publications like “Hardwood Floor Care Secrets” for ongoing maintenance tips, helping me extend the life of my finishes and keep surfaces looking beautiful. These tools and trusted guides form the backbone of my approach, allowing me to tackle both big and small jobs with confidence and precision.
Embrace the Challenge and Elevate Your Craft
Taking on hardwood floors or tile installation can seem daunting, but remember—each project is a chance to refine your skills and achieve something truly rewarding. Don’t shy away from embracing the complexities of dust management or subfloor preparation; these are the secrets that set professionals apart from amateurs. With the right techniques and a proactive mindset, you’ll not only enhance your home’s beauty but also foster a genuine sense of pride. Every finished floor is a testament to your craftsmanship and dedication. So, why wait to get started on that next project? The more you learn and practice, the more confident and capable you’ll become. Ready to turn dust chaos into a flawless finish? Your perfect floor awaits, and I believe you have what it takes to make it happen.
What’s been your biggest challenge during a flooring project, and how did you overcome it? Share your story below!
,