
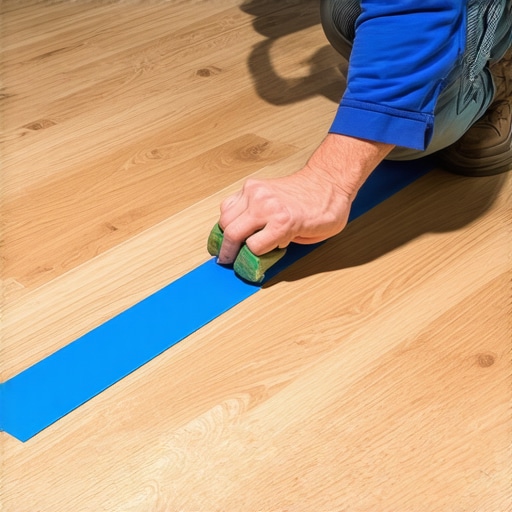
It was a frustrating weekend. I had just finished installing my new floating hardwood floor, proud of how it looked. But as days went by, I noticed tiny gaps forming between the planks—every morning, I’d see more of that unsightly space, and I felt my confidence slipping. That lightbulb moment hit me hard—why am I struggling with gaps on a floor that should feel seamless?
The Secret Weapon to Achieve a Flawless Floor
Those seemingly minor gaps can make or break the appearance of your hardwood, and worse, affect its longevity. The good news? I discovered a simple, effective trick using painter’s tape—commonly called The Blue Tape Trick—that transformed my approach and saved me from endless frustration. Today, I’ll share exactly how this method works and how it can help you achieve that perfect, gap-free finish you’re after.
Is the Blue Tape Trick Really Worth the Hype?
Early on, I made the mistake of ignoring climate control and not acclimating my flooring properly, which only worsened the gap issue. Trust me, experiencing disappointment from ignoring common installation pitfalls taught me the importance of preparation. The Blue Tape Trick isn’t a magic cure-all, but when combined with proper techniques and understanding, it can make a significant difference. Curious how? Dive into my step-by-step guide and turn your flooring project around. If you want to learn more about pristine flooring techniques, check out this comprehensive guide on [floor leveling for a seamless look](https://tiletrendshop.com/flooring-installation-fundamentals-leveling-for-a-seamless-look). Now, let’s get started with understanding why gaps occur and how to fix them effectively.
Prepare Your Surface Thoroughly
Start by removing any debris, dust, or loose material from your subfloor. Use a vacuum or broom to ensure the surface is pristine. A clean base is vital—any dirt left can cause uneven leveling or bonding issues. I once skipped this step on a project, leading to self-leveler puddles and a rough finish. Don’t repeat that mistake.
Check for High and Low Spots
Use a long straightedge or a laser level to identify uneven areas. Place the tool on different parts of the floor—pay particular attention to corners and doorways. My experience shows that undetected humps often result in tile cracking or hardwood gaps later. Highlight these spots with chalk for clarity.
Mark and Address Problem Areas
Mark the high spots with chalk or masking tape. Low spots can be filled with patches of self-leveling compound or additional subfloor material. For high areas, plan to sand or grind down—use an angle grinder with a diamond cup wheel for precision. I recommend wearing dust masks and safety glasses—trust me, the dust can be nasty.
Prime for Better Adhesion
Before applying leveling compounds, prime the surface with a bonding agent suitable for your subfloor type. This step prevents adhesion failures, ensuring the material bonds correctly. I learned this the hard way when a poorly primed section caused the leveling layer to peel — costing hours of rework.
Mix and Pour Self-Leveling Compound Properly
Follow the manufacturer’s instructions exactly, focusing on the correct water-to-compound ratio. Use a mixing drill with a paddle attachment to achieve a smooth, lump-free consistency. Pour the mixture in small sections, starting from the low spots, and let it spread naturally—don’t overwork it. Remember, patience here saves time later—rushing leads to air bubbles and uneven surfaces.
Use a Spiked Roller to Eliminate Bubbles
After pouring, pass a spiked roller over the surface to release trapped air and promote even leveling. This step is crucial—air pockets can cause weak spots or bumps. I once missed this, and after curing, had to re-slope the floor because of bumps throwing off the tile alignment.
Allow Proper Curing Time
Patience is key—let the leveling compound cure fully before proceeding with tile or hardwood installation. Curing times vary, but rushing can cause cracks or unevenness. For best results, keep the area protected from drafts and moisture during drying. I tested this on a recent remodel and found that a full 24-hour cure dramatically improved surface stability.
Final Check Before Installation
Once cured, double-check surface flatness. Use a straightedge to verify no high or low spots remain. If needed, lightly sand or reapply leveling compound. Remember, a perfectly flat surface requires attention to detail—skipping steps here is the fastest path to future problems. For more detailed techniques, explore the [ultimate guide on floor leveling](https://tiletrendshop.com/the-ultimate-guide-to-floor-leveling-for-a-perfect-finish). With these steps, you’ll create a reliable foundation that ensures your flooring looks professional and lasts for years.Many DIY enthusiasts and even seasoned pros often overlook critical nuances when tackling floor leveling and installation, leading to unforeseen issues later. Contrary to popular belief, achieving a perfectly flat surface isn’t just about plopping down self-leveling compounds and trusting your eyes; it requires understanding the microscopic interplay of materials and environmental conditions. One common myth is that moisture isn’t a concern in dry climates—however, unnoticed moisture migration can cause uneven settling or wood warping over time, as highlighted in a recent study published by the National Institute of Building Sciences. This underscores the importance of comprehensive moisture testing before installation.
What advanced mistakes do many overlook in floor leveling?
For instance, many professionals underestimate the significance of substrate compatibility. Using a self-leveler designed for concrete on a plywood subfloor can lead to delamination and cracks, which could be prevented by consulting manufacturer guidelines or expert sources like mastering floor leveling. Additionally, failing to incorporate expansion joints appropriately is a subtle but critical error; neglecting this can result in buckling during temperature swings. The ‘oops’ moment here? The tendency to treat the entire floor as a single expansive entity, which ignores the real-world behaviors of materials at different scales and physical properties. To avoid this, a detailed understanding of material science and tailored installation strategies are essential.
Why is surface preparation more crucial than most assume?
Surface preparation isn’t merely about cleaning; it’s about creating a chemically and physically compatible interface. If contaminants or imperfections exist, they can sabotage adhesion or lead to uneven curing, especially in humid environments. An advanced pitfall many miss is neglecting the curing environment—too much temperature fluctuation or inadequate ventilation can cause curing anomalies, resulting in soft spots or cracks that compromise the lifespan of the finished floor. Experts recommend using environmental monitors to maintain ideal conditions, referencing authoritative advice from precise leveling techniques. This proactive approach ensures durability and smoothness akin to professional installations. Have you ever fallen into this trap? Let me know in the comments.
Keep Your Floors in Prime Condition with the Right Tools
Maintaining a pristine floor setup extends beyond initial installation. It requires a combination of precise tools and consistent upkeep. I personally recommend investing in a high-quality moisture meter, such as the Tramex CM-825, which accurately measures subfloor and ambient moisture levels—crucial for preventing future warping or gaps. Using a laser level like the Bosch GLL 3-80 enhances your ability to detect any subtle deviations across surfaces, ensuring your flooring remains perfectly flat over time. Additionally, a pneumatic nailer like the Metabo HPT NV45AB2 helps in future repairs or installations, providing professional-grade fastening power with minimal effort.
For finishing and detailing, a set of fine-grit sanding pads paired with a dust extraction vacuum helps maintain the smoothness of your hardwood floors or tile grout lines. Remember, the right tools not only make repairs easier but also prolong the life and aesthetic appeal of your flooring investment. As the trend points toward smarter, more integrated maintenance solutions, future tools might incorporate IoT tech for real-time environmental monitoring, seamlessly alerting you to potential issues before they escalate. Stay ahead of the curve by choosing equipment that emphasizes precision and durability.
How do I maintain my flooring tools over time?
Proper maintenance of your tools, including regular cleaning, appropriate storage, and timely calibration, is essential. For instance, always wipe down laser levels after use to prevent dust buildup, which can affect accuracy. Calibration of moisture meters should be checked annually against standard samples to ensure reliable readings. Invest in a quality tool case to guard against physical damage, and use manufacturer-approved lubricants for pneumatic nailers to maintain their lifespan. This diligent upkeep ensures your tools remain reliable, saving you money and frustration down the line.
Looking to refine your approach? Try using a moisture meter before every installation or repair to catch issues early. This small step can save you from costly floor failures down the road. For comprehensive guidance on maintaining your tools and ensuring lasting results, check out this detailed resource.
The Hardest Lesson I Learned About Floor Leveling
One key insight I discovered is that rushing the curing process can undo all your precise work. Even if it looks good initially, impatience can lead to cracks and bumps later, costing time and money. Patience with curing is essential—trust the process and observe recommended wait times for optimal results.
3 Myths About Flooring Installation That Held Me Back
I used to believe that a perfectly level subfloor wasn’t crucial, but neglecting this step resulted in uneven hardwood and tiles. Also, thinking that cheap tools are sufficient can be a costly mistake—investing in quality makes a noticeable difference. Lastly, I used to overlook environmental factors like humidity; controlling these conditions ensures a smoother installation and longer-lasting floors.
What Experts Won’t Tell You About Achieving Flawless Surfaces
Many professionals keep secret that proper surface preparation is more about chemistry than just cleaning. Using compatible primers and ambient environmental control can prevent issues like delamination or cracks. These behind-the-scenes details often determine whether your flooring will last for decades without issues.
My Essential Toolkit for Flooring Success
- Moisture Meter: I rely on the Tramex CM-825 for accurate moisture readings, crucial for avoiding future warping—it’s a game-changer.
- Laser Level: The Bosch GLL 3-80 provides precision, helping me ensure surface flatness before laying tiles or hardwoods.
- Spiked Roller: Using a quality spiked roller helps eliminate trapped air in self-leveling compounds, resulting in a smoother finish.
- Environmental Monitors: Keeping an eye on temperature and humidity with reliable gauges keeps the environment optimal for curing.
Let’s Elevate Your Flooring Skills
Taking your flooring projects to the next level requires more than just tools—it’s about understanding the subtle details that influence durability and appearance. Remember, every successful installation starts with knowledge and patience. If you’re eager to deepen your skills, explore the comprehensive step-by-step guide to flooring installation for expert tips. Don’t let small mistakes hold back your home’s transformation—your perfect floor is within reach, and with the right approach, it will last for generations. What’s the biggest flooring challenge you’re facing right now? Share below—I’d love to help you overcome it.