
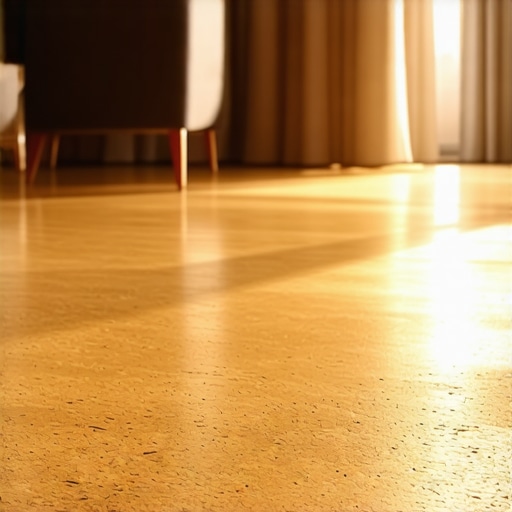
I’ll never forget the moment I finished my cork flooring project and stepped back to admire my work. The room looked stunning—except for that one searing detail. The seams. Those tiny lines where the planks met, visible enough to ruin the sleek, natural look I was craving. Frustration bubbled up as I realized I had overlooked an essential step: installation without visible seams. It was a lightbulb moment for me—if I could master this, my floors would finally look professionally done, not slapped together.
Why Seeing Seams on Cork Floors Is a Common Woe—and Ruins the Look
Here’s the truth: cork flooring, with its natural pores and warmth, can make any room feel inviting. But those seams—ah, those tiny, unavoidable lines—are often what sabotage the overall aesthetic. When seams aren’t installed carefully, they stand out, disrupting the uniformity of the floor. This can be especially disappointing in open-concept spaces where you want the entire surface to whisper seamless elegance. Moreover, poor installation techniques early on can lead to gaps, shifting, or even damage over time, making your investment look amateurish.
Fortunately, there’s a way to avoid this visual pitfall—I’ve learned it through trial, error, and plenty of research, including insights from seasoned flooring pros. One important fact I discovered is that proper preparation and installation techniques are the secret to invisibility—something I wish I knew from the get-go. For example, ensuring the subfloor is perfectly level and smooth is critical, a detail I initially ignored, which caused uneven seams and gaps. To truly achieve a seamless look, you’ll want to pay close attention to both surface prep and meticulous installation practices.
So, if you’ve ever laid cork floors only to be disappointed by the visible seams, know that you’re not alone. And more importantly, you don’t have to settle for visible imperfections. In the upcoming sections, I’ll guide you through practical, step-by-step strategies rooted in real-world experience to install your cork flooring so seamlessly that the seams become invisible to all but the most meticulous observer. Before we dive into the technicalities, ask yourself: Have I properly prepared my subfloor? If not, [this guide on floor leveling](https://tiletrendshop.com/the-ultimate-guide-to-floor-leveling-for-a-perfect-finish) might be just what you need to get started.
Prepare Your Subfloor With Precision
Start by inspecting your subfloor. Use a laser level or a long straightedge and a carpenter’s level to identify humps, dips, or uneven areas. I once ignored this step and proceeded, only to find my seams accentuated by tiny undulations. Fix that by applying a self-leveling compound, following the instructions meticulously. For best results, check out this comprehensive guide on floor leveling techniques. Ensuring a perfectly flat surface prevents gaps and visible seams in your cork.
Choose Your Cork Flooring Carefully
Select planks that have consistent color and grain pattern. When I picked my cork from a local supplier, I opted for planks with minimal color variation—this decision made future seam hiding easier. Use tile selection tips for guidance. Remember, a high-quality product with tight tolerances reduces the chances of noticeable seams over time.
Allow Material to Acclimate Properly
Before installation, store your cork planks in the room where they will be installed for at least 48 hours. This acclimation period allows expansion or contraction due to temperature and humidity changes. I once hurried this step and faced gaps popping up a few months later. For best practice, follow this acclimation guideline for your specific flooring material.
Implement Accurate Measurement and Layout
Measure your room carefully, marking the center point to establish a balanced layout. Use a chalk line to mark guidelines, ensuring straight rows. When I did my first layout, I mismeasured by a few inches and had to adjust on the fly, which unfortunately led to some crooked seams. To prevent this, double-check measurements and consider snapping a few test lines before laying planks. Visualize how seams will align with room features, and plan for minimal cuts near focal points. This preparation sets the stage for seamless installation.
Use Proper Installation Techniques
Follow the correct methods: apply a generous and consistent layer of adhesive or follow click-lock installation best practices, depending on your cork type. For adhesive installation, spread adhesive with a trowel of the right notch size—usually 1/16″ or 1/8″, but check manufacturer specs. I once used a too-small notch, causing thin or uneven bonding, which affected seam appearance. For click-lock floors, ensure the planks are fully engaged and use spacers to maintain expansion gaps. A mistake I often see is failing to leave the recommended gaps at the walls, leading to buckling. Use this resource for detailed installation pointers.
Manage Seams During Installation
Stagger seams by at least 6 inches, creating a more natural look and reducing the risk of long continuous seams. When I installed my cork in a small room, I kept seams aligned, which made them more visible. To avoid this, shift seams in neighboring rows, much like bricklaying. Use a tapping block and a rubber mallet to snug planks together tightly, minimizing gaps. For visible improvements, periodically pull back and inspect alignment and seams, making adjustments as needed before the adhesive sets. Remember, patience during this step ensures a flawless finish.
Finish and Seal for a Seamless Look
After laying all planks, install baseboards or moldings over the expansion gaps to hide any minor imperfections. Finish with a high-quality sealant or a matte topcoat if your cork manufacturer recommends it. When I applied my finishing coat, I took care to avoid excess, which can highlight seams or create uneven surfaces. For smooth, invisible seams, avoid over-applying finish and use a fine foam roller or brush. Regular maintenance with a soft cloth and gentle cleaners maintains the seamless appearance over time.
Integrating these meticulous steps elevates your cork flooring from amateurish to professional-grade. Remember, attention to detail during each phase—work with patience, double-check measurements, and follow recommended practices—will make visible seams a thing of the past. For more advanced techniques, consider consulting expert installation secrets.
Many DIY enthusiasts and even seasoned contractors often believe that achieving perfectly level floors or seamless tile installations is straightforward, but the reality is more intricate than it seems. One widespread myth is that leveling compounds alone can compensate for major subfloor imperfections. While self-levelers are powerful, they have limitations and won’t fix structural issues like significant hollows or expansive cracks. Relying solely on them can lead to future problems such as uneven tiles or squeaky floors. For comprehensive success, it’s crucial to assess subfloor integrity thoroughly and address underlying issues before pouring leveling compounds, as detailed in this guide on precise floor leveling techniques.
Essential Tools for a Professional Finish
Achieving durable and flawless flooring requires more than just good technique; it hinges on having the right tools at your disposal. I personally swear by a high-quality laser level, like the Bosch GLL 3-50, because it ensures perfectly flat surfaces—crucial for tile and hardwood installations. Unlike traditional bubble levels, laser tools project a continuous line, making it easier to identify subtle unevenness on large floors. For precision measuring, I rely on a digital caliper, which provides exact dimensions down to thousandths of an inch, preventing misalignments during layout. These tools have consistently helped me avoid issues like uneven seams or gaps that could compromise long-term integrity.
Another must-have is a spiked roller, especially when applying self-leveling compounds. Its purpose is to eliminate air bubbles and encourage a smoother, more uniform surface. I use the QEP 1000TER, because its ergonomic design reduces fatigue during extended use, and the spikes penetrate deeper than cheaper alternatives, ensuring better leveling. For cutting materials indoors, I prefer a wet saw with a diamond blade—particularly the MK-100, which I chose for its precision and minimal dust creation. Accurate cuts reduce waste and ensure tight seams, which are vital for a seamless look and long-lasting results.
Prioritizing Maintenance for Longevity
Once your flooring is installed, ongoing maintenance is key to preserving its appearance and structural integrity. Regular cleaning with pH-neutral solutions, like the hardwood-specific cleaner from Bona, prevents buildup that can scratch or dull surfaces. Avoid harsh chemicals that may degrade finishes over time. Routine inspections help catch issues early; for instance, checking for loose tiles or hardwood gaps before they escalate saves you substantial repair costs. Additionally, implementing protective measures such as felt pads under furniture and area rugs can drastically reduce wear and tear, extending the life of your floors.
The importance of proper implementation and maintenance is echoed in the pros’ advice—accurate installation paired with diligent upkeep offers the best investment return. Don’t forget to revisit your sealing and finishing procedures periodically—consulting detailed guides like this resource can help you identify when resealing is necessary to maintain a seamless, protected surface.
How do I maintain my flooring over time?
Establishing a regular cleaning routine with gentle products, inspecting for and addressing minor damages promptly, and reapplying protective finishes when needed are vital steps. Investing in quality tools and following manufacturer recommendations will ensure your floors stand the test of time, whether it’s hardwood, cork, or tile. As trends point toward smarter, more sustainable materials, I predict that tools incorporating IoT—the Internet of Things—will soon provide real-time monitoring for moisture levels or structural shifts, further safeguarding your investment.
For starters, try upgrading your cleaning toolkit with an oscillating floor cleaner, which I’ve found effective at removing deep-seated dirt without harming finishes. And if you’re serious about perfecting your installation, test out a flatting stone—such as the Rubi DS-UD-L—to smooth out minor imperfections in your surface before laying flooring materials. This small step can dramatically improve long-term results, making your project not just aesthetically pleasing but also built to last.
Remember, the foundation for durable flooring lies in using high-quality, specific tools like the precise floor leveling techniques that experts recommend. Take the time to invest in the right equipment and maintenance routines—your floors will thank you for decades to come.
Lessons Only Pros Usually Learn the Hard Way
- My biggest mistake was rushing the subfloor prep, which led to visible seams that haunted me for years. Proper surface leveling is more than a step—it’s the foundation for an invisible finish. Remember, you can’t fix a bad subfloor with filler or adhesive; addressing it early saves headaches later.
- I used to believe that matching planks perfectly was enough. Turns out, consistent color and grain are just part of the story—acclimation and precise measurement ensure seams stay hidden over time. Skipping acclimation meant shrinkage or expansion, revealing seams I didn’t want noticed.
- My shortcuting on measurement resulted in crooked seams that made my entire project look DIY. Double-checking measurements and visualizing layout before installing turned a good job into an art form. Small details like this are what separate amateurs from professionals.
- Trying to save time by skipping the recommended expansion gaps caused buckling and gaps. Following the manufacturer’s guidelines on gaps and using quality spacers made all the difference. Patience in these small steps ensures long-term beauty and durability.
- Lastly, sealing and finishing correctly prevented seams from collecting dirt and moisture, maintaining that seamless look. Over-application can ruin the aesthetic, so I learned to finish with finesse, keeping the look natural and smooth.
Tools and Resources That Made a Difference
- Laser Level like the Bosch GLL 3-50: Precise leveling is key, and a laser level offers accuracy that bubble levels can’t match. Investing in good tools pays off in flawless seams.
- Self-leveling Compound: When applied with a spiked roller, it creates a perfect base—crucial for seamless flooring.
- High-Quality Spacers: They ensure consistent expansion gaps, preventing buckles and unsightly seams over time.
- Measurement Tools: Digital calipers and chalk lines helped me visualize precise layouts, saving me from crooked seams and adjustments after installation.
Your Blueprint for Flooring Success Starts Today
Embarking on your flooring project with attention to detail and patience will elevate your space to a new level of elegance. Remember, seamless floors aren’t just about aesthetics—they ensure longevity and peace of mind. Whether you’re tackling cork, hardwood, or tile, the right approach transforms a DIY mishap into a masterpiece. Don’t wait—start planning, preparing, and perfecting your installer skills today. Your future self will thank you for the flawless finish that will become the centerpiece of your home.
What’s been your biggest challenge in flooring installation? Share below—I’d love to hear your story!
,