
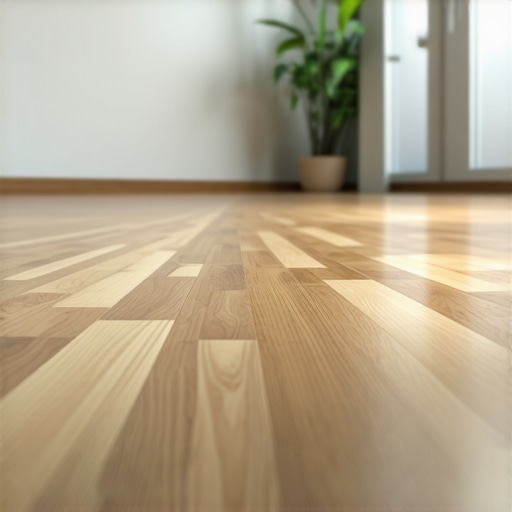
It was a quiet Sunday afternoon when I first heard that unmistakable popping sound from my brand-new hardwood floor. At first, I thought it was just the house settling, a common myth I had heard many times. But as the noises persisted, I felt a sinking suspicion: something was off. I had just finished installing the floor myself, eager to see my transformation complete, only to be greeted by these tiny, annoying pops every time I stepped onto it. It didn’t take long before I realized I wasn’t alone—many homeowners face this perplexing issue right after installation.
The Unexpected Sound of a New Floor
Popping noises in a freshly installed hardwood floor are more common than you’d think. They often catch homeowners off guard, especially when everything seems perfect during the installation process. These sounds are typically caused by the natural movement of wood as it acclimates to the environment. But why does it happen so quickly? And more importantly, is it something to worry about?
In my case, I discovered early on that improper acclimation and uneven subfloors were the culprits. Hardwood flooring is sensitive to humidity and temperature changes; if the wood doesn’t get enough time to adjust before installation, it can contract or expand, causing those unsettling pops. Additionally, if the subfloor isn’t perfectly level, it can create tiny gaps where the wood moves when stepped on.
Understanding these factors is crucial because, without the right preparation, the noises could become worse over time or even lead to future damage. The good news? These issues can often be addressed or prevented with some basic knowledge and careful planning. That’s what I set out to learn, and I want to share what I found so you can avoid the same pitfalls.
Curious if your new hardwood floor’s popping sounds are just part of the process or signaling something more serious? It’s a question I asked myself repeatedly during the early days of my home renovation. To get the full picture, I delved into expert tips and common mistakes, ensuring my future installations would be quieter and more durable.
And let’s be honest—nobody wants to deal with squeaks, clicks, or pops every time they walk across their floor. It’s disruptive, irritating, and can make your beautiful investment seem flawed. But knowing the root causes and solutions can turn this frustration into simply a part of the home’s natural adjustment.
If you’ve experienced similar issues with your new floors, I’ll walk you through the key steps you can take to diagnose and fix the problem. From ensuring proper acclimation to leveling your subfloor correctly, there’s a lot you can do to silence those noises and enjoy your hardwoods without distraction.
Ready to learn? Let’s dive into the details to help your floor settle quietly and beautifully.
Ensure Proper Acclimation Before Installation
Start by verifying that your wood has acclimated to your home’s humidity and temperature. I remember placing my planks in the room and letting them sit for a full week, stacking them to promote even moisture absorption. This prevents future expansion or contraction causing pop sounds. Use a hygrometer to maintain indoor humidity between 35-55%, especially during dry seasons. Proper acclimation minimizes the risk of noise and warping over time.
Level and Prepare the Subfloor Precisely
A common cause of popping is an uneven subfloor. To level it effectively, borrow a laser level or a long straightedge. During my project, I found several high and low spots. I marked these areas, then used a self-leveling compound (see detailed leveling techniques here) to fill the gaps. Pour the compound while it’s still wet and spread it smoothly with a trowel, ensuring the surface remains flush. This gives your hardwood a solid foundation, reducing movement and noise.
Identify and Correct Floor Irregularities
After leveling, check for any residual bumps using a straightedge or a bouncing ball. For stubborn humps, sand down high spots carefully, taking care not to create new unevenness. Remember, a perfectly flat subfloor is key to quiet flooring. This process is akin to adjusting the tension in a musical instrument; even slight irregularities can cause discordant sounds, in this case, creaks and pops.
Install with Precision and Care
When laying your hardwood, lay the planks parallel to the main source of light for visual appeal. Use high-quality flooring nails or adhesive recommended by the manufacturer. During my installation, I made sure to leave an expansion gap of about 1/4 inch around the perimeter to allow for movement. Using a tapping block and pull bar helps seat the planks tightly together, preventing gaps that can cause movement noise. For nailed installations, ensure nails are embedded below the surface to avoid protrusions that might cause squeaks later.
Control Humidity and Temperature After Installation
Maintaining consistent indoor conditions is crucial. After installing my hardwood, I used a humidifier and dehumidifier to keep the environment steady. Fluctuating humidity causes wood to expand and contract, making pop and squeak sounds more likely. Use a hygrometer to monitor levels regularly and adjust your HVAC system accordingly. This step preserves your floor’s stability and silence over time.
Address Existing Noise and Prevent Future Issues
If pops persist, pinpoint the problem spots by walking slowly and listening carefully. Often, squeaks are due to nails or tongue joints loosening over time. Applying a joint sealer or special adhesive in those areas can lock the planks together, reducing movement. For stubborn noises, consider consulting a flooring professional or reviewing detailed techniques at this resource to prevent recurring problems. Consistent maintenance and periodic re-tightening can keep your hardwood floor quiet and durable for years to come.Many homeowners believe that perfect floor leveling is simply about applying self-leveling compound and hoping for the best. But in my experience, this approach overlooks critical nuances that can make or break your flooring project. For instance, trusting the ‘one-size-fits-all’ rule for leveling thickness can lead to issues, as different types of subfloors—concrete, plywood, or existing tiles—require tailored techniques, as explained in [floor leveling challenges](https://tiletrendshop.com/floor-leveling-challenges-common-mistakes-and-how-to-avoid-them). A common mistake is underestimating moisture content, which can cause the leveling compound to peel or crack over time, especially if you skip verifying the humidity levels beforehand. This is why I always recommend thorough moisture testing before starting, aligning with expert advice on [perfecting surface preparation](https://tiletrendshop.com/how-to-achieve-flawless-floor-leveling-before-tile-laying). There’s also a widespread misconception that leveling compounds alone can compensate for uneven subfloors. In reality, if you neglect proper subfloor prep—such as sanding high spots or filling gaps—you’ll end up with a surface that looks level but still causes squeaks and cracks. Advanced installers know that combining mechanical grinding with chemical leveling yields the best results, a proven technique detailed in [mastering floor-leveling secrets](https://tiletrendshop.com/mastering-floor-leveling-pro-secrets-for-perfect-installations). Here’s a critical nuance often missed: curing time significantly impacts the effectiveness of your leveling work. Rushing the process or walking on the surface prematurely can create uneven spots and cracks, undermining your entire effort. Always follow manufacturer guidelines and allow adequate cure time, as emphasized in [proper curing techniques](https://tiletrendshop.com/how-to-achieve-flawless-floor-leveling-before-tile-laying). Also, don’t mistake visual flatness with true levelness; use precise tools like laser levels for verification, to avoid the trap of illusion—your eyes can be deceiving. Remember, a flawless installation hinges on meticulous, detail-oriented preparation rather than relying solely on hardware store shortcuts. Benefits of mastering these nuances include a quieter, more durable hardwood floor that maintains its beauty for decades. So, next time you approach leveling, consider these advanced tips to avoid costly rework and ensure lasting results. If you’ve ever fallen into the trap of oversimplifying floor leveling, share your experience in the comments! Want to see your hardwoods stay beautiful and sound? Dive deeper into [the essentials of professional leveling](https://tiletrendshop.com/precise-floor-leveling-techniques-to-achieve-flawless-surfaces) to upgrade your skills.
Keeping Your Floors in Top Shape with the Right Tools
Once your flooring is installed, maintenance becomes crucial to ensure durability and silence over time. Personally, I rely on a combination of specialized tools and consistent routines to keep hardwood and tile floors looking pristine. For hardwood, I swear by a microfiber dust mop, which gently lifts debris without scratching the surface. Regular sweeping prevents grit from creating tiny abrasions, especially important in high-traffic areas. For deeper cleaning, a pH-neutral wood floor cleaner applied with a damp (not wet) microfiber pad ensures thorough yet gentle maintenance.
When it comes to tile, the key is keeping grout lines clean and sealed. I use a grout cleaning brush with stiff bristles for scrubbing and an ultrasonic tile cleaner periodically to remove embedded dirt. Sealing grout annually (or as recommended) prevents staining and deterioration, extending the life of your installation. Trust me, investing in quality cleaning tools like the grout brush and a high-quality sealant makes a noticeable difference.
Advanced Equipment for Superior Results
For professional-grade maintenance, I recommend a weighted floor buffer with a soft pad. This machine can restore shine and remove fine surface scratches without damaging the finish. Using it every few months helps sustain the luster and prevent the need for refinishing. Additionally, for any significant repairs or refinishing, dustless sanders with HEPA filtration are invaluable. They minimize mess and health hazards, making routine upkeep more manageable.
In the era of smart homes, integrating sensor-based humidity controllers is a game-changer. Humidity fluctuations cause wood to expand and contract, leading to squeaks and gaps. I installed a smart hygrometer that syncs with my HVAC system, maintaining stable moisture levels. This proactive approach drastically reduces maintenance needs and ensures long-term stability, aligning with the trend towards “smart flooring maintenance solutions” forecasted by industry experts.
Anticipating Future Needs with Modern Solutions
The trend in flooring care is moving towards automation and IoT integration. Future tools might include AI-powered sensors that alert you of humidity spikes or structural issues before they cause damage. I expect advancements like self-cleaning surfaces with embedded antimicrobial properties to become standard, reducing the need for manual cleaning and increasing lifespan. Staying ahead involves embracing these technologies now, helping your floors not just last longer but also stay healthier and more attractive. If you want to experience the benefits firsthand, try installing a smart humidity controller—it’s easier than you think and can save you significant future repairs.
How do I maintain my floors over time?
Consistency is key. Establish a routine that includes regular cleaning with appropriate tools, minimizing moisture exposure, and addressing issues as soon as they arise. For hardwood, periodic buffing with a soft pad preserves the finish, while tile floors benefit from sealant checks. Remember, the right tools—like a good microfiber mop or grout sealer—are investments that pay off by extending your floors’ lifespan and keeping them whisper-quiet. To ensure your installations remain flawless, review our tips for lasting results and incorporate the suggested maintenance practices today.
Lessons That Changed My Perspective on Flooring Mastery
- Counting on quick fixes can backfire—taking the time to properly level and acclimate can save you from future headaches and costly repairs. I learned this the hard way when rushing through initial prep led to persistent popping in my hardwood floors.
- Never underestimate the nuances of moisture testing—skipping this step may seem minor but often results in uneven settling and squeaks over time. Personal experience taught me that investing in a reliable hygrometer is a game-changer.
- Real finesse lies in combining mechanical leveling with chemical solutions—relying solely on self-leveling compounds might seem easier but can be insufficient, especially on complex subfloors. Combining techniques has profoundly improved my results.
- Small details make a significant difference—using the correct tools like laser levels and specialized primers ensures a seamless finish, turning a good job into a great one. These tools made my installations look professionally done.
- Patience and planning overshadow shortcuts—waiting the recommended curing times and double-checking work prevented future issues, reinforcing the value of a measured, deliberate approach to flooring projects.
Tools, Resources, and Wisdom That Elevate Flooring Projects
- Mastering Floor Leveling Fundamentals: The resource Mastering Floor Leveling provided insights that transformed my approach, highlighting techniques that ensure a perfect, noise-free surface.
- Precision Tools: A laser level became my best friend, offering accuracy that visual checks can’t match. The precision level ensured my floors were perfectly flat, reducing future squeals.
- Moisture Testing Devices: Reliable hygrometers from trusted brands helped me monitor indoor humidity effectively, preventing moisture-related issues early on. These inexpensive tools saved me from extensive repairs down the line.
- Educational Content: Regularly reading expert articles, like flooring installation mistakes to avoid, kept me updated on best practices and innovative solutions for long-lasting, quiet floors.
Sealing Your Commitment to Quiet, Stunning Floors
As you wrap up your flooring journey, remember that excellence isn’t about perfection overnight but consistent dedication to detail. Your floors will reflect your patience, preparation, and passion—turning a simple room into a sanctuary of beauty and tranquility. Embrace the learning curve, leverage trusted resources, and don’t shy away from investing in the right tools. With every step, you’re building not just a floor, but confidence and mastery in your craft. Ready to make your floors whisper quiet and look flawless? Share your experiences or questions below—let’s grow together as flooring enthusiasts!