
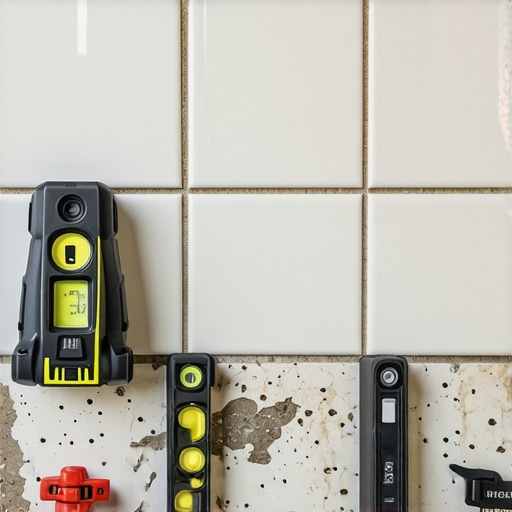
It was a frustrating Sunday morning when I finally decided to tackle my bathroom renovation. As I climbed into the space, staring at the uneven walls and the crooked layout, I felt that sinking feeling—how could I install beautiful new tiles in a room that wasn’t square? I knew I wasn’t alone in facing this challenge; many homeowners are surprised to discover their bathrooms aren’t perfectly aligned, yet they still want flawless tile results. That lightbulb moment hit me: understanding the secrets of installing tile in an out-of-square bathroom is crucial for a professional-looking finish.
Tackling a Room That Doesn’t Play by the Rules
In my early projects, I made the mistake of assuming that the walls and floors were perfectly plumb and level. Spoiler alert: that’s rarely the case. Out-of-square bathrooms are more common than you’d think, especially in older homes with shifting structures or imperfect construction. Without knowing the right techniques, this can lead to crooked tiles, uneven grout lines, and a finish that looks amateurish. But here’s the good news: with a few insider strategies, you can turn this challenge into an opportunity for a stunning, error-proof installation.
Have you ever faced a bathroom where the walls seem to slope or the corners aren’t quite right? If so, you’re not alone—and there’s a way to approach this without tearing everything out. Today, I’ll share the core principles I wish I had known when I first started, and how you can use them to achieve a professional look despite irregularities.
Is It Really Worth the Extra Effort to Fix Out-of-Square Issues?
When I first encountered my crooked bathroom, I wondered if I should just cut corners and hope for the best. Luckily, I realized that proper preparation and strategic planning can save time and money in the long run. Installing tiles in a room that isn’t perfectly square requires a different mindset—more patience, attention to detail, and some smart techniques. For example, I learned that using a reference line from the focal point, rather than the walls, helps create a balanced pattern. Also, taking the time to level the floor and address subfloor irregularities can make a significant difference.
Early on, I mistakenly skipped the step of checking the subfloor for levelness—that was a costly oversight. It caused my tiles to look uneven and grout lines to be inconsistent. A simple step like [floor leveling](https://tiletrendshop.com/the-ultimate-guide-to-floor-leveling-for-a-perfect-finish) can make all the difference, transforming a complicated layout into a straightforward process.
Understanding these nuances has allowed me to confidently approach out-of-square bathrooms. Whether you’re renovating the entire space or doing a partial upgrade, recognizing the room’s imperfections and adapting your approach is key. So, if you’ve ever been frustrated by crooked walls or uneven floors, stay with me. The upcoming sections will walk you through actionable tips and tricks to achieve a flawless tile installation—regardless of the room’s shape or myriads of imperfections. And trust me, once you master these techniques, you’ll see your space in a new light, and your confidence will soar.
Establish a Working Reference Point
Start by choosing a focal point in your bathroom, such as the main door or a centerpiece, to align your tiles. Instead of relying solely on uneven walls, draw a chalk line or use a laser level from this point, ensuring your pattern’s foundation is consistent. I once used this method in my own crooked bathroom, and it prevented my tiles from looking skewed, even though the walls tilted. This reference ensures your layout remains balanced and visually appealing.
Use the Floor as Your Guide
Since walls are often irregular, establishing a level base on the floor is essential. Check for dips or humps with a long level or straightedge. If irregularities exist, prepare to level the subfloor before laying tiles. I applied a self-leveling compound in my narrow bathroom when I found dips that threatened to throw off my pattern. Proper floor leveling creates a stable surface, making your tiles sit evenly and grout lines line up properly. For detailed steps, see this guide to floor leveling.
Mitigate Wall Irregularities with Flexible Layouts
If walls are uneven, avoid trying to make tiles match perfectly to each surface. Instead, plan a layout that balances out imperfections. For instance, offset the tiles or adjust grout lines where necessary. I had a wall that sank inward slightly; by shifting the first row and incorporating slight offsets, I prevented crooked grout lines. This approach creates a more forgiving design that disguises irregularities and achieves a professional look.
Adjust Tile Cuts for a Seamless Finish
Use precise measurements and strategic cuts to hide irregularities. Measure from your reference points rather than the walls. When trimming tiles near crooked walls, cut them to fit tightly against the surface instead of forcing them into a pattern that emphasizes the uneven edges. I once used a wet saw with a diamond blade to make delicate cuts that conformed to unique wall contours, resulting in a seamless appearance. Take your time with these adjustments; they make a big difference in the overall look.
Ensure Uniform Grout Lines
Discrepancies in tile positioning can cause inconsistent grout lines, which are highly noticeable. Use spacers consistently and verify spacing with a tape measure frequently. If grout lines end up uneven, consider visual corrections like slightly adjusting neighboring tiles to create the illusion of harmony. In my project, I used a rubber mallet to gently nudge stubborn tiles into alignment, ensuring grout lines remained even and clean. For tips on achieving perfect grout lines, check this grout finishing guide.
Final Checks Before Grouting
Once tiles are set, step back and assess the overall pattern. Look for any misalignments or uneven gaps and make minor adjustments while the adhesive is still pliable. In my last tile job, I used a flashlight at low angle to reveal lippage and unevenness, then pressed tiles more firmly or shaved off excess thinset. These final tweaks ensure your installation looks perfectly flat and professional. For detailed fixes, visit this self-leveling guide.
While many believe they know the basics of tile and hardwood flooring, a deeper understanding reveals common misconceptions that can sabotage even seasoned professionals. For example, a widespread myth is that floor leveling is always a matter of applying self-leveling compounds to create a perfectly flat surface. In reality, over-reliance on quick fixes often leads to long-term problems, such as adhesive failure or tile lippage. Proper assessment of subfloor conditions is crucial, and sometimes grinding or replacing sections yields better results than patching. Additionally, many installers overlook the impact of moisture migration, which can cause tiles to crack or hardwood floors to warp years later. Expert tips involve comprehensive moisture testing and selecting appropriate underlayments, as detailed in this guide on floor leveling nuances. \n\nAnother misconception is the assumption that larger tiles are easier to install because fewer cuts are needed. On the contrary, large-format tiles require precise substrate preparation and advanced setting techniques, like back-buttering, to prevent lippage. Misunderstanding these nuances often results in uneven surfaces and increased installation costs. Advanced installers know that mastering the art of substrate smoothing and using spiked trowels can make the difference. For detailed strategies, this resource offers expert insights. \n\nThe ‘oops’ factor here lies in neglecting the room’s environmental conditions during installation. Variations in temperature and humidity affect material expansion and contraction, which can lead to future cracks or gaps. Recognizing these factors, experienced professionals often take time to acclimate materials and install during ideal conditions, as outlined in this critical pre-installation step.\n\nFinally, advanced practitioners understand that the choice of adhesive and grout can significantly influence long-term success. Using mismatched products can result in joint failure or aesthetic issues. For example, flexible thinsets are recommended for large tiles or areas prone to movement, ensuring durability. Choosing the right installation products isn’t just about adhering to labels but understanding the specific demands of each project, a concept I explore in this guide on product selection.\n\nBy appreciating these nuances, you can elevate your flooring projects from average to professional-grade. Recognizing common myths and avoiding costly mistakes makes all the difference. Have you ever fallen into this trap? Let me know in the comments, and let’s discuss how mastering these details can transform your space.When it comes to maintaining beautiful tile and hardwood floors, having the right tools and a solid routine can make all the difference in preserving their appearance and functionality over the years. Regular upkeep isn’t just about aesthetics; it also prevents issues like grout deterioration, surface scratches, and uneven wear, saving you time and money in the long run.
Invest in Quality Cleaning Equipment
A microfiber mop paired with a high-quality, pH-neutral floor cleaner is essential for daily maintenance. I personally swear by a microfiber flat mop because it traps dust and debris without scratching surfaces, which is crucial for delicate hardwood and polished tiles. For stubborn grime, a soft-bristled scrub brush can be effective, especially around grout lines. Avoid harsh chemicals or abrasive pads that can damage your floors. In my experience, consistent use of gentle cleaning tools extends the lifespan of both tile and hardwood finishes.
Protective Measures and Gentle Tools
Place felt pads under furniture legs to prevent scratches when moving items. I recommend periodically checking these pads, especially after cleaning or rearranging, since they can wear out and leave marks. For high-traffic areas, setting up entry mats helps trap dirt and grit—these tiny particles can act like sandpaper, accelerating surface wear. An often-overlooked device is a floor-safe vacuum with soft wheels or a brush bar designed for hard floors. I use a vacuum specifically made for hardwood and tile, which reduces dirt buildup and prolongs the intervals between deep cleans.
Long-Term Preservation and Scaling Up
As your floors age, consider professional maintenance like refinishing or re-grouting when necessary. Applying sealers periodically can restore luster and protect against stains. For tile, sealing the grout every couple of years is crucial to prevent water and dirt infiltration—a technique detailed in the mastering floor leveling guide I highly recommend. Hardwood floors benefit from refinishing or recoating; I suggest consulting a flooring expert if you notice dull spots or scratches that regular cleaning can’t address.
Predicting the Future of Floor Maintenance
The trend towards eco-friendly cleaning products and smart cleaning devices is poised to grow. In the near future, I anticipate more floors will be equipped with integrated sensors that monitor wear or humidity levels, alerting homeowners to potential issues before they become severe. Staying updated on these innovations can help you keep your floors in top shape for decades to come.
How do I keep my hardwood and tile looking pristine over the years?
Start by establishing a routine that includes gentle daily cleaning with the right tools; regularly inspect for signs of wear or damage; and don’t wait too long to seek professional refinishing or sealing. An example of a small but impactful technique is using a damp microfiber cloth for quick wipe-downs, which prevents dirt from embedding into the surface. I learned that from the expert advice on maintaining mixed flooring materials. Trying this simple maintenance tip can significantly extend the life and beauty of your floors—so give it a shot today!
Lessons I Wish I Learned About Tile and Hardwood Floors Early On
One of the most eye-opening realizations I had was that no space is perfectly aligned, and fighting against this natural irregularity often leads to more problems than solutions. I once spent hours attempting to make tiles match wall edges that were crooked beyond correction, only to end up with uneven grout lines and a frustrated mind. The lightbulb moment was understanding that embracing room imperfections with strategic layout adjustments results in a professional finish that looks intentional rather than forced. Additionally, I learned that investing time in thorough subfloor assessment and proper leveling can save countless headaches later, as rushing these steps often results in lippage or cracked tiles. Finally, choosing flexible grout and adhesive products tailored to irregular surfaces can dramatically improve durability and appearance, turning a challenging project into an opportunity for mastery.