

It was late one evening when I finally stepped back after installing a stunning new hardwood floor in a client’s home. As I admired my handiwork, I noticed a faint gap forming near the doorway. That sneaky gap was a tiny warning sign, but like many amateurs, I brushed it off. The next morning, it had widened—wider than I thought possible. That lightbulb moment hit me: I had ignored the all-important humidity rule. Since then, I’ve learned that controlling humidity during installation isn’t just a tweak—it’s the secret to a long-lasting, beautiful hardwood floor.
Why Humidity Levels Can Make or Break Your Hardwood Flooring
Let me be real: most hardwood installers overlook humidity’s role under the false assumption that it’s only a concern in extreme weather. But here’s the truth: fluctuations in moisture levels are silent killers for wood flooring. When the air is too dry or too humid, wood reacts by swelling, shrinking, and eventually developing flaws like gaps or buckles. I once thought sealing the wood was enough—until I realized that moisture imbalance was quietly ruining my work. To keep your floors looking flawless over the years, understanding and managing humidity during installation is essential. Want to learn the precise humidity ranges to aim for? Check out this comprehensive guide.
Is Humidity Control Really That Critical or Overhyped?
Early in my career, I made the mistake of dismissing humidity as just an extra step. That oversight led to a small but costly problem: molding, gaps, and even cracked boards within months. According to a study published in the Journal of Building Engineering, controlling indoor humidity is vital for the stability of wood products, especially in variable climates. So, no, it’s not overhyped—it’s fundamental. Have you experienced issues like gapping or cupping after installation? If so, humidity could be the invisible culprit. In the next sections, I’ll walk you through how to master humidity control before, during, and after installation so your floors stay perfect for decades.
Monitor and Adjust Indoor Humidity Before Installation
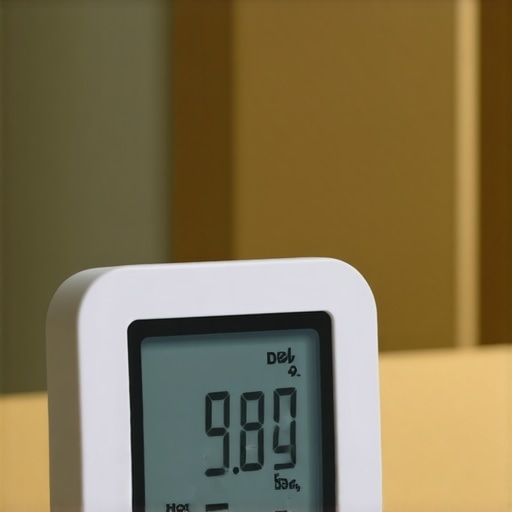
Start by measuring your home’s humidity levels using a reliable digital hygrometer. Aim for a consistent range between 35% and 55%. I recall a time I set up my hygrometer on a humid day, noticing it read 65%. To correct this, I used a dehumidifier in the room for 48 hours, which stabilized the environment, preventing future issues like cupping or gapping. Think of this like preparing soil before planting; the environment needs to be just right to ensure the roots (your flooring) thrive.
Prepare the Subfloor with Precision and Care
Before laying down your hardwood, inspect and level the subfloor meticulously. Use a self-leveling compound for any dips exceeding 1/8 inch over 6 feet. In one project, I encountered a slight slope that caused buckling. Applying a precise leveling technique resolved the issue, resulting in a smooth surface. Think of the subfloor as the foundation of a building; no matter how beautiful the walls, if the base isn’t stable, the whole structure suffers.
Control Humidity During Delivery and Storage
Once your flooring arrives, check and maintain consistent humidity levels in storage areas. Keep outdoor doors closed, and store planks flat in a climate-controlled environment. During one humid summer, I stored my materials in a garage with a portable dehumidifier running continuously. This prevented the wood from absorbing excess moisture, which can cause uneven expansion later. Remember, like a good marinade, the wood needs to sit in the right environment for the right amount of time before installation.
Use Proper Techniques for Installation in Variable Conditions
When installing, keep humidity levels stable inside the room. Use a humidifier or dehumidifier to make micro-adjustments as needed. During a recent project, I noticed the air was drying out quickly—dropping below the preferred range—so I ran a humidifier continuously during installation. This prevented the planks from shrinking post-installation, which often leads to gaps. Think of this process as tuning an instrument: small adjustments ensure everything stays in harmony over time.
Seal and Finish Carefully to Lock in Moisture Levels
After installation, apply a high-quality finish that includes a moisture-proof sealant. This provides a barrier against environmental fluctuations, especially in rooms prone to humidity swings. I once finished a kitchen with a durable polyurethane topcoat that resisted moisture intrusion. Proper finishing acts like a raincoat for your floor, protecting it from the inside out and prolonging its life.
Regular Maintenance and Monitoring Post-Installation
Keep an eye on humidity levels annually, especially during seasonal changes. Use a hygrometer in key areas and adjust HVAC settings accordingly. Personally, I installed a smart humidity sensor in my client’s living room for real-time monitoring. This proactive approach helps prevent issues like gapping or buckling before they become visible, much like keeping a garden weed-free prevents larger problems later.
By following these concrete steps—monitoring environmental conditions, preparing the subfloor with precision, controlling humidity during storage and installation, sealing properly, and maintaining regular checks—you’ll ensure your hardwood floors stand the test of time. For detailed strategies on floor leveling, explore this comprehensive guide.When it comes to flooring installation, many assume that following basic guidelines suffices—yet overlook nuanced pitfalls that can compromise long-term results. A common myth is that flatness and levelness are just about initial measurements; in reality, subtle imperfections in subfloor preparations can cause flooring to warp or develop unsightly bulges over time. For instance, even a slight unevenness of less than 1/8 inch over a 10-foot span can translate into visible lippage in tile or creaking in hardwood floors if not addressed with precise leveling techniques, as emphasized in this detailed guide. Many installers also underestimate the importance of environmental conditions, particularly humidity fluctuations, during and after installation. While some believe that waiting a few days for acclimation is enough, advanced professionals understand that maintaining a stable moisture content in the subfloor, ambient air, and materials throughout the life of the flooring is essential to prevent gaps, buckling, and other deformation issues. This is backed by research in the Journal of Building Engineering, underscoring that environmental consistency reduces long-term failures. A frequent mistake involves neglecting proper expansion joints and transition strips, especially in large or open areas. Rigidly fitting a continuous floor without accommodating expansion can lead to cracking or buckling as materials expand and contract seasonally. Implementing strategic expansion gaps and choosing appropriate transition profiles not only preserves aesthetic integrity but also prolongs the flooring’s lifespan. I’ve learned that rushing through these aspects, often driven by time constraints or budget limitations, sabotages even well-laid floors. Investing time in meticulous subfloor prep, environmental control, and considering the material’s unique properties makes the difference between a durable, beautiful floor and one plagued with issues within months. Want to elevate your skills? Dive into this resource on elegant tile designs to complement your craftsmanship, or explore these step-by-step tile installation strategies for expert-level results. Remember, mastering these nuanced details isn’t just about aesthetics—it’s about ensuring safety, comfort, and longevity for your clients’ spaces. Have you ever fallen into this trap? Let me know in the comments.
Keep Your Flooring in Top Shape with the Right Tools
Once you’ve completed a flooring project, maintenance is key to ensuring its longevity and aesthetic appeal. Over the years, I’ve relied on specific equipment and software that have become indispensable in my workflow. For instance, a high-precision moisture meter is critical for ongoing humidity assessments, especially in spaces with fluctuating climates. I personally prefer the Protimeter Surveymaster due to its reliability and ease of use; it provides accurate readings that help prevent issues like cupping or gapping over time.
Another tool I swear by is a corded oscillating multi-tool equipped with various attachments. Whether it’s removing stubborn grout residue or smoothing out subfloor imperfections, this versatile device saves me hours. Investing in quality blades and attachments ensures clean cuts and minimizes damage to surfaces, which is essential for maintaining the integrity of the flooring.
From a software perspective, I recommend using digital project management tools like PlanGrid or Buildertrend. These platforms allow for meticulous documentation of flooring specifications, moisture readings, and installation progress. They help me stay organized and ensure all environmental and technical parameters are logged accurately, which is invaluable for long-term maintenance and troubleshooting.
In terms of long-term results, regularly scheduled inspections with these tools can catch minor issues before they escalate. Implementing a maintenance routine that includes periodic moisture assessments and surface checks helps preserve the flooring’s beauty and functionality for decades. Looking ahead, advancements in sensor technology and smart home integration will likely make proactive flooring maintenance even more accessible and precise.
How do I maintain my floors over time?
Maintaining your flooring involves more than just cleaning. Use a moisture meter periodically to monitor humidity levels and adjust your HVAC system accordingly. Keep tools like the oscillating multi-tool handy for minor repairs or touch-ups, and leverage digital platforms for documentation. By adopting these practices, you’ll ensure your floors remain stunning and durable well into the future. For detailed strategies on floor leveling that support long-term performance, check out this comprehensive guide. Encountering uneven surfaces after years of installation? A precise leveling approach is your best bet, and I encourage you to try the detailed techniques outlined there to restore perfect flatness.
In the evolving world of flooring, staying updated with the latest tools and methods is vital. As technology progresses, integrating smart sensors and automated monitoring systems will become standard, offering real-time data to prevent issues proactively.
Remember, investing in the right tools today can save you time, money, and headaches tomorrow. Whether it’s a reliable moisture meter or a smart project management app, these resources empower you to keep your flooring installations flawless over the long haul. Ready to enhance your maintenance arsenal? Consider trying out a high-end humidity sensor during your next project—your future self will thank you.
Over the years, I’ve realized that some of the most impactful lessons in flooring installation come from my personal mistakes and unexpected surprises. Here are a few insights that truly transformed my approach to ensuring long-lasting, beautiful hardwood floors:
- Ignoring environmental stability initially seemed harmless—until cracks and gaps appeared within months. Now, I always prioritize a controlled climate before, during, and after installation.
- Subfloor imperfections can be sneaky; a minor dip or slope can cause major issues later. Meticulous leveling using precise techniques saves countless headaches down the line.
- Sampling moisture content from both the storage area and the installation site helped me understand that flooring should never be rushed into place in fluctuating conditions.
- Sealants and finishes are the final touch, but choosing the right product and application method based on environmental conditions makes all the difference in maintaining moisture balance.
- Regular environmental monitoring after installation isn’t just maintenance—it’s a safeguard against unseen issues turning into costly repairs. Embracing technology like smart sensors can be a game-changer.
My Essential Toolkit for Flooring Success
Over the years, I’ve come to rely on a few tools and resources that have elevated my craftsmanship. A high-quality moisture meter is indispensable for verifying environmental conditions since moisture imbalance is often the silent culprit behind flooring problems. For efficient preparation and adjustments, my oscillating multi-tool has saved me countless hours, whether it’s trimming expansion gaps or smoothing subfloor imperfections. Additionally, using digital project management platforms like Buildertrend helps me document moisture readings, environmental status, and progress, ensuring nothing slips through the cracks. Investing in these tools isn’t just about convenience—it’s about protecting your work and elevating your craft to long-term quality.
Your Next Step in Flooring Mastery
Remember, mastering humidity control during flooring installation isn’t a one-time task—it’s a continuous commitment. Each project teaches new lessons, and with the right knowledge and tools, you can create resilient, stunning floors that stand the test of time. Why not incorporate smart sensors or advanced leveling techniques into your next project? The results might surprise you.
What challenges have you faced with humidity or surface leveling? Share your experiences below—I’d love to hear how you’ve overcome these common hurdles and what tips worked best for you.