
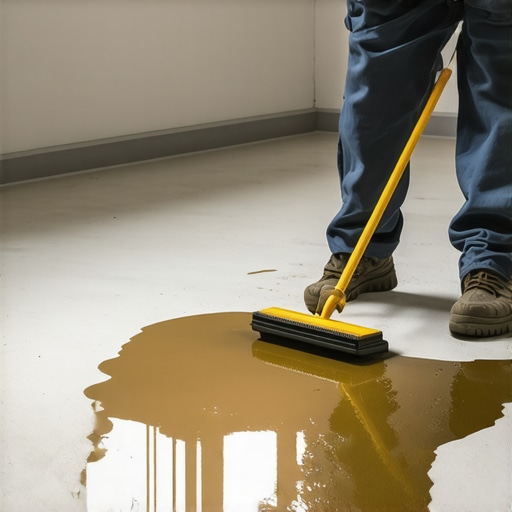
I remember the first time I poured self-leveling compound, expecting a perfectly smooth surface, only to watch it form a stubborn puddle that refused to level. It was frustrating—like trying to smooth out a puddle of honey with a spatula. That “lightbulb moment” hit me hard: I was doing something wrong, but why? Those uneven patches not only delayed my project but also risked ruining the entire floor installation. If you’ve ever faced this, you’re not alone. Many DIYers and even pros struggle with why their floor leveler puddles instead of spreading out evenly.
The Real Reason Behind the Puddling Issue
This common problem often boils down to simple mistakes—like using the wrong type of primer or applying a self-leveler onto an unprepared surface. One of the key issues I discovered early on was neglecting to properly prep the subfloor. If it’s too dry, too dusty, or already uneven, the leveling compound won’t bond correctly, leading to those dreaded puddles. Moreover, mixing the formula incorrectly or choosing the wrong self-leveling product for your flooring type can make all the difference. Remember, not all levelers are created equal, and selecting the right one is crucial. For comprehensive guidance on what to avoid, check out this detailed article.
But don’t worry. The good news is that with some adjustments, you can achieve a flawlessly level surface. Today, I’ll walk you through the most common causes of puddling and, more importantly, how to fix them. Whether you’re tackling a small patch or an entire floor, understanding these nuances will save you time and money, and give you that perfect finish you’re after.
Is It Really Worth the Extra Effort? My Early Mistake Reveals the Truth
Let me be honest: I once skipped the surface preparation step because I thought it was a waste of time. That mistake cost me hours of sanding and re-leveling later. Since then, I’ve learned that meticulous prep—like cleaning, sealing, and leveling—can make or break your project. For many, the fear of doing it right can feel overwhelming, but trust me, investing a little extra effort upfront pays off big in the end.
If you’ve faced similar issues or want to avoid common pitfalls, you’re in the right place. Stay tuned as I share practical tips that will help you understand why your floor leveler puddles and, more importantly, how to stop it from happening again. From surface prep to choosing the right products, these insights are your secret weapons for a seamless finish. And if you’re curious about specific installation techniques, I recommend exploring this comprehensive guide.
.
Prep Your Subfloor Like a Pro
Start by cleaning the entire surface thoroughly to remove dust, debris, and oils. Use a vacuum or broom followed by a damp cloth for best results. Address minor imperfections with a patching compound to create an even foundation. Think of it as sanding a rough piece of wood before staining—it’s all about surface quality before proceeding. I learned this when I skipped a deep clean once, leading to uneven spots in my leveler that took hours to fix. Proper preparation ensures the leveling compound adheres correctly and spreads smoothly, preventing puddling.
Mix and Pour with Precision
Follow the manufacturer’s instructions meticulously when mixing the self-leveling compound. Use a clean mixing bucket and a powered drill with a paddle attachment for a consistent blend. The goal is a pourable, pancake-like consistency—thin enough to flow but not so runny that it separates. Hands-on experience taught me to pour slowly and in a continuous motion, starting from the furthest corner and working my way towards the exit, avoiding sudden stops that can cause unevenness. Remember, a well-mixed compound will flow easily and settle evenly, much like pouring syrup over a pancake.
Spread with a Squeegee or Spatula
After pouring, use a long, flat trowel or a rubber squeegee to guide the compound into corners and edges. This helps eliminate air pockets and promotes uniform thickness. Think of it as smoothing butter on bread—gentle, continuous strokes do the trick. During my first attempt, I hurriedly spread the mixture with a fork, resulting in uneven patches. Taking my time and working systematically ensured a smooth, level surface. This step is crucial to prevent puddles or dips in your floor, giving you that flawless finish.
Use a Level and Trowel for Fine Tuning
Once the compound starts to settle, check the surface with a long spirit level. Mark high spots with a pencil and lightly feather them down using a trowel. If necessary, add small amounts of additional compound to low spots, then smooth them out. This is similar to tuning a guitar string—you fine-tune until perfectly even. I remember a time I missed a low corner, which caused a noticeable dip after it dried. Regular checks prevent such issues, ensuring the entire surface remains level across the room.
Allow Proper Curing Time and Final Checks
Patience is vital. Let the compound cure undisturbed for at least 24 hours, or as specified by the manufacturer. During this period, keep the area free of foot traffic and vibrations. After curing, re-examine the surface with your level—if any high or low spots remain, address them with light sanding or additional compound. Rushing this step led me to discover unevenness after tile installation, forcing extra work. Proper curing guarantees a stable, flat base for your flooring, be it tile, hardwood, or vinyl.
Quick Tips to Ensure Success
Always test a small mix before pouring a large area to confirm consistency. Use a laser level for precision over larger spaces—think of it as a giant ruler guiding your work. Avoid overworking the compound once poured, as it begins to set quickly. Instead, work in manageable sections, especially in larger rooms. Remember, a systematic approach—cleaning, mixing, pouring, smoothing, and curing—makes all the difference in achieving a perfectly level floor that lasts for years. For additional insights, explore this guide to flawless leveling techniques.
Most People Overlook These Critical Nuances in Floor Installation
While many believe that a perfectly leveled subfloor guarantees a flawless finish, the reality is that several hidden factors can undermine your efforts. One pervasive myth is that ensuring the subfloor is merely free of dust and debris is enough. In truth, moisture content, surface texture, and even the subfloor’s material type play vital roles in adhesion and longevity. For example, engineered wood and concrete slabs require different surface preparations, and neglecting these nuances often leads to issues like buckling or uneven tiles. To dive deeper into proper preparation, it’s worthwhile to review this guide on subfloor prep.
Another common misconception is that self-leveling compounds work miracles without proper application techniques. Many assume that pouring the compound and walking away will yield a perfectly flat surface, but in reality, the way you mix, pour, and spread it significantly impacts the end result. Overworking the compound can introduce air bubbles and inconsistencies, which may cause dips or puddles later. An often-overlooked detail is that the ambient temperature and humidity during curing can alter the compound’s behavior—something even experienced installers should monitor closely. Mastering these variables can be the difference between a perfect finish and an expensive redo. For refined techniques, consider advanced leveling methods here.
People also tend to assume that once the floor looks even after installation, no further adjustments are necessary. However, the real expert move involves meticulous testing with a long spirit level or laser. Small undetected high or low spots can develop into major problems over time, especially in large areas or spaces with heavy foot traffic. The trap many fall into is skipping the final inspection, which can lead to uneven wear patterns, cracked tiles, or gaps in hardwood floors. Remember, patience with fine-tuning during the curing phase saves significant trouble later. Want to optimize your inspection process? Here are essential tips.
How much does surface texture impact adhesion in challenging materials?
This question is crucial for advanced installers aiming for durable, long-lasting results. The surface’s micro-texture influences how well adhesives bond, especially with materials like vinyl or engineered wood. Roughening a slick surface with a light abrasive or applying a primer tailored for specific conditions can dramatically improve adhesion. Experts like those cited in the comprehensive leveler guide emphasize that surface preparation isn’t just about cleanliness but also about optimizing the micro-environment for bonding. Overlooking this can lead to premature failure, regardless of the quality of the flooring or leveling compound used. Therefore, investing time into surface texture assessment and modification can prevent costly replacements and repairs in your flooring projects.
Finally, understanding these nuanced factors demystifies why even experienced professionals sometimes face setbacks. It’s a reminder that excellent flooring results depend on more than just following the basic steps—attention to detail and advanced knowledge make all the difference. Have you ever fallen into this trap? Let me know in the comments!
Keep Your Floors Spotless and Functional with the Right Tools
Maintaining high-quality flooring, whether it’s hardwood or tile, requires more than just routine cleaning. Investing in specialized tools ensures longevity and a pristine appearance. For instance, I swear by a dedicated edge sander for hardwood refinishing; it allows me to reach those tricky corners without damaging the surface. Similarly, a moisture meter is indispensable when assessing subfloor conditions before installation, guiding me to prevent future issues like warping or buckling. These tools are not just conveniences but essentials rooted in professional standards, as detailed in this expert guide on subfloor prep.
Keeping your equipment in top shape is equally critical. Regularly calibrate your laser levels and clean your trowels after each use to avoid residual drywall or adhesive buildup, which can compromise precision over time. Using a high-quality vacuum designed for fine dust helps maintain a clean workspace, preventing debris from scratching delicate surfaces during maintenance or repairs. Remember, well-maintained tools are your best allies in achieving professional results without costly rework.
How do I maintain my flooring installations over time?
Consistent inspections and proper cleaning routines are fundamental. For hardwoods, applying a rejuvenating polish periodically can restore shine and seal out moisture, extending the life of your finish. Tile floors benefit from annual grout sealing to prevent staining and degradation, simplifying cleaning and preserving aesthetics. Additionally, addressing small issues promptly—like loose tiles or minor gaps—prevents them from developing into costly repairs. For comprehensive care strategies, explore this article on hardwood maintenance. In the future, I predict that integrating smart diagnostic tools—like IoT sensors monitoring humidity and temperature—will become standard, proactively alerting homeowners to potential flooring problems before they manifest visibly. Trying out a moisture meter regularly can be your first step toward smarter, long-term preservation.
Bridging to Advanced Flooring Techniques
If you’re aiming to elevate your skills further, mastering precise leveling techniques is crucial. The ultimate leveling guide offers in-depth strategies for flawless surfaces, reducing the need for repairs or reinstallation later. Remember, the initial quality of your tools and maintenance routines directly influences these advanced outcomes. Take the challenge and implement a weekly inspection of your tools—keeping blades sharp, calibrating lasers, and cleaning spatulas—so your work always meets the highest standards. For a practical tip, regularly test your leveling compounds with a laser level set to the highest precision available, ensuring consistent results across large areas. This tweak can drastically improve your installation quality and boost client satisfaction. Ready to see professional results? Incorporate systematic tool maintenance into your workflow today and notice the difference it makes on your projects.
What I Wish I’d Known When Starting Out
In my early days of floor leveling, I thought the key was just pouring the compound and letting it do its magic. I soon discovered that skipping detailed surface prep and rushing through mixing led to puddles instead of a smooth finish. The hard lesson: patience and precision are your best friends. This realization transformed my approach, teaching me that meticulous prep and proper technique prevent costly mistakes.
Another insight I gained was the importance of surface texture. A glossy or slick subfloor makes the leveling compound slip and puddle, no matter how carefully you pour. Roughening the surface slightly with a primer or light abrasive enhances adhesion, ensuring a level, durable surface. Small tweaks like these saved me hours of rework and frustration.
One of the biggest myths I encountered was that a quick initial pour guarantees a perfect leveler. Instead, I learned that working in manageable sections and using a laser level for fine-tuning ensures consistency. The effort invested in these details not only improves the finish but also long-term stability of your flooring.
Tools and Resources I Trust for Perfect Floors
My go-to resource for mastering floor leveling is this comprehensive leveling guide. It provides in-depth techniques that elevate your work beyond basic DIY. For measuring moisture levels and ensuring a dry subfloor, I highly recommend the moisture meter. It’s vital for preventing future problems like warping or cracking.
In terms of tools, I rely on a high-quality laser level for accuracy and a long, flat trowel for spreading. Regular calibration of your laser and cleaning your tools after each use keep results consistent. Nothing beats precision in this line of work, and these tools help ensure every project is a success.
The best advice I received was to never underestimate the tiny details—like cleaning dust from expansion gaps or checking the uniformity of each section before curing. These small actions guarantee your flooring looks professional and lasts for years.
Now It’s Your Turn to Elevate Your Flooring Game
Achieving a perfectly level floor isn’t just about following steps; it’s about honing your attention to detail and understanding the nuances that make the difference. With patience, practice, and the right resources, you can master the art of flawless flooring installation and avoid puddling or uneven spots. Remember, every project is an opportunity to improve your craft—and the satisfaction of a smooth, stable surface is well worth the effort.
What’s the biggest challenge you’ve faced with floor leveling, and how did you overcome it? Share your experiences below—I’d love to hear your story!
,