
It was a typical Saturday morning when I finally decided to tackle the stubborn grout stains in my freshly tiled bathroom. I grabbed my bucket, some harsh cleaners, and a scrubbing brush, eager to restore that pristine look. But minutes later, I noticed something alarming – the once-shiny grout lines looked dull, and a faint haze was spreading across my beautiful tiles. That’s when it hit me: I’d just stripped away the precious sealer I painstakingly applied months earlier.
If you’ve ever faced a similar frustration, you’re not alone. Many homeowners unknowingly damage their grout seals during routine cleaning, leading to costly repairs and a loss of that glossy finish we all desire. The good news? There’s a way to keep your grout clean without sacrificing your sealing efforts.
Why Proper Grout Care Matters for Your Home’s Beauty and Longevity
Grout lines act like the skin of your tile surface, protecting against moisture, mold, and dirt infiltration. When the sealer is compromised, tiles become vulnerable to staining and deterioration. Early in my DIY journey, I made the mistake of assuming that any strong cleaner would do the trick. I didn’t realize that many common cleaning products contain acids or abrasives that can strip away protective sealers. Trust me, I learned this lesson the hard way.
Research shows that proper grout sealing can extend the life of your tile installation and keep it looking vibrant for years. According to experts, maintaining the sealant and cleaning with suitable methods is essential, especially in high-traffic areas or moisture-prone spaces. To save yourself time, money, and frustration, understanding how to clean grout without stripping the sealer is a game-changer.
Are you struggling with grout that seems to attract dirt faster than you can clean it? Do you worry about damaging your tile’s protective coating every time you scrub? If so, don’t worry. Next, we’ll explore proven techniques and tips to keep your grout spotless while preserving that vital sealer, so your floors—and your wallet—stay happy and healthy.
Choose Gentle Cleaning Solutions
Start by selecting pH-neutral cleaners specifically formulated for tile and grout. Avoid harsh chemicals containing acids or abrasives that can dissolve or weaken the sealer. I once tried a strong bleach-based cleaner on my bathroom grout, resulting in dullness and increased staining. Instead, I used a mild, tile-safe cleaner, which maintained the sealant and kept my grout looking fresh for longer.
Use Proper Tools to Minimize Damage
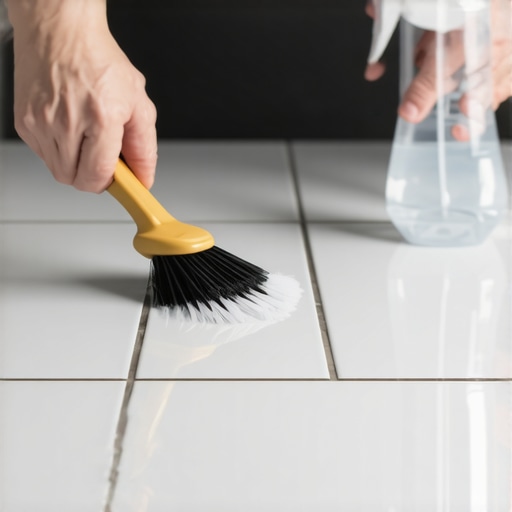
Opt for soft-bristled brushes or microfiber scrubbers rather than steel wool or abrasive pads. These gentler tools effectively lift dirt without scratching or removing the sealer. I remember tackling stubborn stains with a soft brush and a gentle cleaner; the process was slower but preserved the integrity of my sealant.
Employ Proper Cleaning Techniques
Apply your cleaner with a spray bottle or sponge, letting it sit for a few minutes to loosen grime. Then, scrub lightly in circular motions. Rinsing thoroughly with clean water ensures no residue remains, which can attract more dirt. During my last cleaning session, I misted the grout, waited, then gently scrubbed, achieving a spotless look without damage.
Limit Moisture and Frequency of Deep Cleanings
Overly wet sponges or excessive scrubbing can weaken the sealer over time. Schedule deep cleanings once a month and stick to regular mopping with damp cloths in between. Back when I ignored this, I noticed my grout’s appearance deteriorate faster—since then, I clean with a damp microfiber, which avoids over-saturating the grout.
Seal and Re-seal Carefully After Cleaning
If you notice the sealer wearing thin, reapplying a grout sealer helps protect against dirt and stains. Wait until the grout is completely dry after cleaning, then use a high-quality sealer, following the instructions carefully. I once applied a sealer after a thorough cleaning and saw immediate improvement in water resistance and appearance, extending the life of my grout.
Special Tips for Stubborn Stains
Mix a paste of baking soda and water, then apply to stubborn stains. Let it sit, then scrub gently with a soft brush. For persistent issues, a commercial grout stain remover designed for sealed surfaces can be used sparingly. Remember, always test in a small inconspicuous area first to avoid unforeseen damage.
Consistency Is Key to Long-Term Preservation
Regular maintenance preserves your grout’s sealant and keeps your tiles looking pristine. Establish a routine that combines these gentle cleaning methods, avoiding aggressive scrubbing or harsh chemicals. Over time, this disciplined approach prevents the need for costly re-sealing or repairs, as I learned from my own experience after neglecting routine care.
Many homeowners and even some professionals hold onto beliefs about flooring that can lead to costly mistakes. Let’s dig deeper into these misconceptions and uncover the nuances that can make or break your flooring project.
Is sealing your grout enough to prevent damage, or are there deeper truths?Maintaining your hardwood, tile, or leveled flooring system over the years demands more than just routine cleaning; it calls for specialized tools and methodical approaches that protect your investment. I’ve found that investing in the right equipment and understanding precise maintenance routines can extend your floors’ lifespan and keep them looking pristine well into the future.
A high-quality microfiber mop, such as the **Chamberlain Microfiber Mop**—which features extra-soft, electrostatically charged fibers—is perfect for daily damp cleaning. I personally prefer this because it traps dust and dirt effectively without scratching the surface or stripping sealants, unlike traditional cotton mops that can cause abrasive wear. Regular use of such a mop significantly reduces the accumulation of dirt particles that can lead to surface deterioration.
For more intensive cleaning or re-application of sealers, a **dual-action polisher** like the **Bona Stone, Tile & Laminate Floor Premium Spray Mop** provides dual benefits: easy application of cleaning solutions and gentle buffing, especially for glazed tiles or sealed hardwood floors. This tool minimizes the risk of uneven wear or damage that can occur when using abrasive pads or overly aggressive scrubbing.
Tools like a **digital moisture meter**, for example, the **General Tools MMD4E**, play an essential role in flooring maintenance, especially in areas prone to humidity fluctuations or potential water intrusion. Consistently monitoring moisture levels ensures your subfloor and flooring are protected from rot, mold, and warping, which are all long-term threats to your investment.
When it comes to re-sealing or touch-ups, I recommend a **precision-grade caulking gun** paired with high-quality sealers such as the **Black Diamond Stoneworks Ultimate Grout Sealer**. Carefully re-sealing grout lines after thorough cleaning helps prevent stains and damage, making the effort cost-effective over decades.
Predicting future trends, I believe smart cleaning devices equipped with IoT sensors will soon monitor floor conditions in real-time and alert homeowners to potential issues before they escalate, vastly improving preventative maintenance. A proactive approach with such tools can save you thousands in repairs and replacements.
How do I maintain hardwood and tile floors over time?
Regularly inspecting for wear, periodically reapplying sealers, and using the right tools are key. Establishing a maintenance schedule that incorporates these advanced techniques ensures your floors stay durable and beautiful.
For detailed strategies on flooring care, you may want to explore expert advice in [hardwood floor care secrets to longevity and shine](https://tiletrendshop.com/hardwood-floor-care-secrets-to-longevity-and-shine). Try incorporating a digital moisture meter into your routine—you’ll be surprised how much it can help prevent hidden damage before it becomes costly.
What No One Tells You About Protecting Your Floor’s Beauty
After years of trial and error, I realized that preserving my tile and grout isn’t just about quick fixes—it’s a nuanced process rooted in patience and knowledge. One of the hardest lessons I learned was how even a small oversight, like using an abrasive cleaner, can lead to early sealing failures. Now, I understand that every action, from choosing the right tools to scheduling routine maintenance, contributes to the longevity of my flooring.
Discover Tools and Resources That Keep My Floors Perfect
Over time, I’ve curated a set of tools that make maintenance both effective and gentle. For instance, a high-quality microfiber mop like the Chamberlain Microfiber Mop has become my daily companion, trapping dust without damaging the surface. Books such as Hardwood Floor Care Secrets have deepened my understanding of protective techniques, helping me avoid costly mistakes. Exploring online guides and tutorials continuously enhances my approach, ensuring my floors stay stunning for years.
Your Next Step Towards Flawless Floors
Remember, the key to flooring success isn’t a one-time effort; it’s an ongoing commitment. By applying these insights and leveraging trusted tools, you can dramatically extend the life and appearance of your tile and grout. Don’t wait until signs of wear appear—start implementing these practices today and transform your space into an enduring masterpiece. If you’ve faced specific challenges while maintaining your floors, I’d love to hear your story—share your experiences below and let’s learn together!