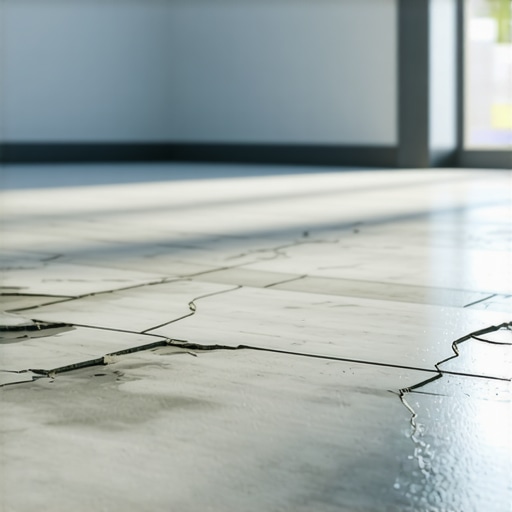
I’ll never forget the day I stepped into my living room and heard that unmistakable crack. Looking down, I saw a vinyl plank splintering apart like brittle glass. Frustration flashed through me—how could something so durable suddenly become so fragile? It was a lightbulb moment that revealed a common yet overlooked issue: the Cold Room Problem, where vinyl planks become brittle and snap under pressure in lower temperatures.
Decoding the Cold Room Dilemma
This problem isn’t just a fluke; it’s rooted in the very nature of vinyl flooring and how it reacts to temperature shifts. During colder months, vinyl contracts, becoming rigid and prone to cracking when stressed. I learned this the hard way, initially blaming poor quality or faulty installation, but the truth was that temperature fluctuations played a significant role. Recognizing this pattern was the first step toward preventing future damage and maintaining my floors’ beauty and integrity.
Is Vinyl’s Brittleness Actually Worth the Hype?
Many skeptics wonder if vinyl remains a viable flooring choice given its susceptibility to temperature-related issues. Honestly, I used to think vinyl was indestructible—until I saw how quickly it could deteriorate in a chilly environment. My mistake early on was ignoring the importance of proper acclimation and climate control before installation. According to industry experts, improper handling can lead to long-term problems like brittleness and snapping, especially in areas prone to temperature swings. For more tips on avoiding flooring pitfalls, check out flooring installation mistakes to avoid.
Now that I understand the root causes, I’m committed to helping you sidestep these issues. Next, I’ll guide you through practical strategies to keep your vinyl planks flexible and strong, no matter how cold it gets. Ready to learn how to shield your floors from the chill? Let’s dive in and ensure that your flooring stays flawless for years to come.
,
Optimize Your Indoor Climate Before Installing Vinyl Planks
Start by ensuring your room temperature is stable and within the recommended range of 65°F to 75°F (18°C to 24°C). Use a quality thermostat to monitor and maintain this climate for at least 48 hours prior to installation. I recall a time I delayed my project because I noticed the room dipped below 60°F during winter; installing in that cold led to immediate issues with brittleness. By pre-heating the space, I prevented my newly laid planks from contracting and cracking.
Allow Proper Acclimation of Vinyl Flooring
Spread Out Your Vinyl Before Installation
Take your vinyl planks out of their boxes and lay them flat in the room where they’ll be installed for at least 48 hours. This process, known as acclimation, helps the material adjust to ambient temperature and humidity. In my own project, I once hurried installation without acclimation, and several planks cracked during the first cold snap. Letting the planks breathe reduced this risk significantly.
Handle the Material Carefully During Transit and Storage
Keep the vinyl in a climate-controlled environment and avoid storing it in unheated garages or sheds. Exposure to low temperatures or direct sunlight can cause the material to contract or expand unevenly, leading to brittleness. Once I stored planks overnight in a chilly garage and brought them directly into the warm house, I noticed warping and increased fragility—avoid this mistake by maintaining consistent storage conditions.
Control Temperature and Humidity During Installation
Use portable heaters or humidifiers to stabilize the environment as you work. Avoid working in rooms with drafty windows or doors where cold air can cause rapid temperature drops. I learned this firsthand when a breeze from a nearby open window chilled my work area, prompting the vinyl to stiffen and crack during installation. Sealing drafts and maintaining a consistent environment helps keep your flooring supple and less prone to damage.
Implement Protective Measures Post-Installation
Once installed, keep the door closed during cold weather and consider using space heaters at a safe distance. Avoid turning off the heat abruptly or lowering the thermostat, which can cause the vinyl to contract and develop stress cracks over time. I once neglected this after installation, and a sudden cold snap resulted in visible cracks along my flooring. Consistent heating preserves the flexibility and appearance of your vinyl planks.
Regular Maintenance to Sustain Flexibility
Use recommended vinyl floor cleaners and avoid excessive moisture. Schedule periodic humidity checks using a hygrometer, maintaining humidity levels between 40-60%. Dry winter months with low humidity make vinyl more brittle, so employing a humidifier can keep the environment stable. I installed a humidifier in my living area and noticed my flooring remained resilient through cold spells, avoiding the brittleness I previously experienced. Proper climate management prolongs your floor’s lifespan and keeps it looking new.
By incorporating these practical measures, you directly influence the elasticity and durability of your vinyl flooring, even in the coldest months. For detailed techniques on flooring installation and maintenance, visit this comprehensive guide.
 When it comes to flooring, many homeowners rely on well-intentioned but often inaccurate beliefs that can lead to costly mistakes. One widespread misconception is that perfect floor leveling is always achievable with minimal effort, but the truth is that subtle imperfections in subfloor preparation can cause uneven surfaces and cracked tiles or warped hardwood planks. Failing to address these nuances can compromise your entire flooring project, as detailed in expert-level leveling techniques. Another common myth is that hardwood floors can be sanded multiple times without affecting durability. In reality, over-sanding thinens the wood, diminishing its lifespan and aesthetic appeal, especially in high-traffic areas. For advanced insights on refinishing, visit hardwood refinishing strategies. Many assume that tile installation is a straightforward process, but improper substrate preparation or incorrect adhesive application can lead to lippage, cracking, or grout failure. Learning professional tile installation tips can help you avoid these pitfalls. An advanced question many DIY enthusiasts overlook is how the thermal expansion of flooring materials affects long-term stability. For instance, vinyl planks can warp or gap if not installed with adequate expansion joints, as discussed in comprehensive leveler guidance. Stay vigilant for these hidden nuances—acknowledging them can elevate your project from amateur to pro-level craftsmanship. Have you ever fallen into this trap? Let me know in the comments.
Keeping It Working: Essential Tools and Techniques for Long-Term Flooring Care
Maintaining your floors’ integrity and appearance over time requires the right tools and a consistent approach. From tile to hardwood and vinyl, each flooring type benefits from specific equipment that ensures a professional finish and lasting durability. In my experience, investing in quality tools has paid off by reducing repair costs and extending the lifespan of my floors. Today, I want to share the tools I rely on regularly and how they help me keep my floors in tip-top shape.
Power Sanders for Refinishing Hardwood Floors
When it comes to refinishing hardwood, a high-quality orbital sander is indispensable. I personally use a random orbital sander from Makita because of its smooth operation and variable speed control. It allows me to remove old finish evenly without gouging the wood, especially in tight corners and edges. For detailed corner work, a detail sander with triangular sanding pads is perfect, helping me reach those tricky spots efficiently. Proper sanding not only restores shine but also prepares the surface for recoating, making it a vital step in ongoing maintenance.
Laser Levels for Precise Flooring Alignment
Ensuring your flooring is perfectly aligned prevents lippage in tiles and uneven hardwood planks. I swear by a laser level with a rotating beam; it provides a continuous, calibrated line across large areas. This tool is especially useful during installation, but also for checking existing floors over time. Inaccurate leveling can cause uneven wear and noticeable gaps, so investing in a reliable laser level streamlines the process and saves headaches later. Advanced options, like multiple plane adjustments, help in multi-room projects or when correcting existing unevenness.
Moisture Meters for Material Compatibility
Moisture levels in subfloors and flooring materials directly influence their durability. I use a digital pinless moisture meter—such as a Protimeter—because it provides quick, non-invasive readings that help me avoid issues like warping or buckling. Regular checks before installation or when noticing changes in humidity ensure I catch potential problems early. It’s especially crucial when dealing with hardwood, where excess moisture can cause swelling, or with concrete subfloors, which require proper drying before laying down tile or vinyl.
Advanced Floor Levelers for Perfect Flatness
Achieving a flat surface is foundational for successful flooring installation. I recommend using a professional-grade self-leveling compound, like Ardex or Mapei, applied with a smooth metal trowel or a specialized pourer for large areas. These products, when used correctly, create a seamless base that prevents cracks, lippage, and uneven wear. An important tip is to use a fresh batch and to mix according to the manufacturer’s instructions precisely—this avoids lumps and ensures even flow. For detailed techniques, reviewing expert-level leveling techniques can make a significant difference.
Future Trends in Flooring Maintenance
Looking ahead, I predict that automation and smart technology tools will become integral to flooring care. From robotic vacuum cleaners equipped with sensors to moisture sensors connected to IoT systems, staying ahead of minor issues before they escalate will save money and time. Integrating these advancements into your routine ensures your floors stay pristine with minimal manual effort.
How do I keep my floors performing over time?
Consistent cleaning using gentle, manufacturer-recommended products combined with these specialized tools forms the backbone of long-term flooring health. Additionally, scheduling regular inspections with moisture meters and leveling assessments can prevent small problems from becoming costly repairs. For expert guidance tailored to your specific flooring material, feel free to reach out to me.
To make sure your flooring remains stunning and functional, I urge you to try one of these advanced tips today—such as using a laser level to check your floors’ alignment. It’s a game-changer for DIYers and pros alike, helping you achieve flawless results every time.