
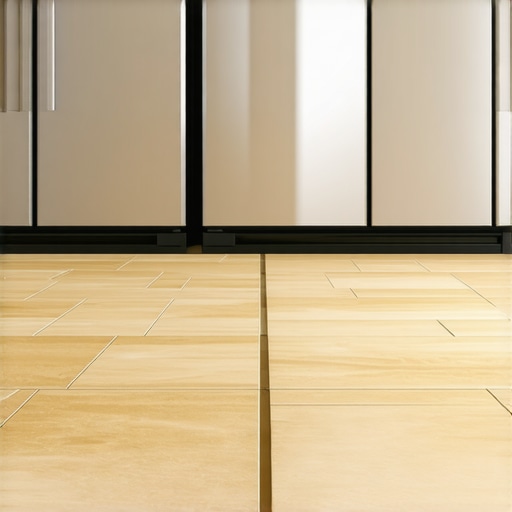
I remember the moment clearly: I was standing in my kitchen, staring at the floor near the fridge, and suddenly, I felt that unmistakable gap widening beneath my feet. That sinking feeling—the kind that makes you question whether your new flooring was a good idea—hit hard. It wasn’t just a cosmetic issue; it was a sign that something wasn’t right underneath, and that gap wasn’t going away on its own.
If you’ve noticed similar separation in your click-lock flooring around your appliances, especially near the fridge, you’re not alone. This is a common frustration among homeowners who invest in seemingly foolproof floating floors. The good news? It’s often fixable, and understanding why it happens is the first step toward a lasting solution.
What’s Really Causing That Separation?
Many people assume that a slight gap near the fridge is just a cosmetic annoyance, but it usually points to underlying issues like improper floor leveling or expansion space mismanagement. Over time, floors can shift due to humidity fluctuations, subfloor imperfections, or installation mistakes. For example, if the subfloor isn’t perfectly flat, the click-lock planks may slowly drift apart, especially in high-traffic areas or near appliances that generate movement and vibration.
One common mistake I made early on was neglecting to leave adequate expansion gaps around fixed objects like cabinets and appliances. This oversight can cause the flooring to buckle or separate over time. I learned the hard way that these tiny details matter more than I thought, and according to experts, neglecting proper expansion can lead to ultimately costly repairs or complete replacement if ignored.
To get a comprehensive understanding of how to prepare your subfloor and ensure a flawless installation, I recommend checking out [this detailed guide on floor leveling](https://tiletrendshop.com/the-ultimate-guide-to-floor-leveling-for-a-perfect-finish). It covers everything from assessing subfloor flatness to choosing the right leveling compound, helping you avoid these frustrations before they start.
But before diving into the fixes, let’s explore what makes this issue so persistent and whether your specific situation is worth tackling right now.
Assess the Subfloor Before Repair
Start by walking the entire floor with a level or straightedge to identify uneven spots or high and low points. Use a long straightedge—at least four feet—to check the entire area near your fridge, paying special attention to the gap. If you notice significant dips or bumps, addressing these irregularities is crucial before proceeding. I once skipped this step and only focused on the visible gap, which led to a temporary fix that soon failed. Proper assessment ensures you target the root cause, preventing recurring problems.
Remove Baseboards and Moldings Carefully
Detach baseboards and any transition strips surrounding the space near your fridge. Use a pry bar wrapped in painter’s tape to avoid damaging the wall or the trim. Keep clips or nails in a safe place for reinstallation. This step provides access to the expansion gaps and allows you to inspect for debris or obstructions that might inhibit the floor from expanding or contracting correctly. I once neglected this and found debris in the gap later, which complicated the repair process.
Clean and Prepare the Area
Vacuum and sweep out all dust, dirt, and debris from the gap and surrounding area. Use a damp cloth to wipe the floor surface, ensuring it’s dry before proceeding. Clearing out obstructions gives your repair a clean surface, allowing for better adhesion of leveling compounds or shims. I learned this the hard way when leftover dust caused leveling compound to peel off prematurely.
Identify and Address Subfloor Irregularities
Check for Levelness
Place your level across the area with a spirit level or laser level to detect dips or humps. In my experience, even small deviations of a quarter-inch can cause noticeable gaps over time. For uneven spots, apply a suitable floor leveling compound, following the manufacturer’s instructions carefully. For large irregularities, consider reinforcing the subfloor with additional plywood or consult a professional.
Apply Floor Leveling Compound
Mix the compound to the consistency specified—usually like pancake batter—and pour it into the low spots, spreading it evenly with a trowel. Use a gauge rake or a straightedge to ensure the surface is smooth and flush with surrounding areas. Allow sufficient drying time, typically 24 hours, before walking on it. I once hurried this step, and the uneven surface caused recurrent gaps, emphasizing the importance of patience here.
Expand the Floor Space Correctly
Leave appropriate expansion gaps, typically 1/4 to 1/2 inch, around fixed objects and along the perimeter, including near appliances like the fridge. Use spacers to maintain consistent gaps. Reinforce these gaps with foam or caulk if necessary, to prevent debris from filling the space later. Remember, neglecting this can lead to the floor buckling or shifting over time. I corrected my mistake by adding foam backer rods along the edges, which provided flexibility and allowed natural movement.
Reinstall Baseboards and Finish
Once leveling and expansion gaps are addressed, reattach baseboards and trim. Use finishing nails and finish to your wall’s surface with caulk or paint as needed. Ensure the new trim covers the expansion gap neatly but allows room for floor movement. Proper finishing not only improves appearance but also maintains floor stability, preventing future gaps. After this, I kept an eye on humidity levels, which also influence expansion and contraction, to maintain the fix long-term.
Keep Humidity and Temperature Stable
Maintain consistent indoor conditions to minimize future expansion issues. Use a dehumidifier or humidifier as needed, especially during seasonal changes. I found monitoring conditions with a hygrometer helped me preemptively address fluctuations, avoiding recurring gaps or buckling. Proper climate control is essential for the longevity of your repair.
Many homeowners believe that installing hardwood or tile is just a matter of following the basic steps, but in reality, there are subtle nuances that can make or break the longevity and aesthetic of your floors. One common myth is that more adhesive or thicker mortar guarantees better results; however, experts emphasize that proper thinset application, such as achieving the right consistency, is crucial for durable bonding. An overly dry or excessively wet thinset can cause adhesion failures or even cracks over time. To master this, understanding the precise mix ratios and how they relate to your specific tile types is essential, and resources like [this guide on thinset consistency](https://tiletrendshop.com/the-thinset-consistency-secret-for-heavy-porcelain-tiles) provide invaluable insights.
Another often overlooked detail is the importance of subfloor preparation. Many assume that a subfloor only needs to be flat enough to support the tile or hardwood, but even minor irregularities can lead to lippage, cracks, or gaps later. While a laser level can reveal obvious dips or humps, the real challenge lies in recognizing subtle deviations that might be less apparent but equally damaging. For example, research indicates that subfloor irregularities as small as 1/8 inch per 10 feet can cause noticeable problems in tile installation. Proper leveling using advanced techniques, such as self-leveling compounds, can mitigate this risk. For comprehensive strategies, check [this advanced floor leveling resource](https://tiletrendshop.com/precise-floor-leveling-techniques-to-achieve-flawless-surfaces).
A common trap homeowners fall into is neglecting expansion gaps, especially around fixed objects or near walls without accounting for seasonal movement. While the standard is often 1/4 inch, I’ve found that in regions with high humidity fluctuations, closer to 1/2 inch provides extra room for expansion. Failing to leave sufficient gap can result in buckling or cracking. When installing around appliances like refrigerators or heaters, sealing these gaps improperly or filling them with rigid materials can impede natural movement, leading to structural stress. Using flexible sealants or specialized backer rods can prevent these issues and prolong your floor’s lifespan.
For those venturing into tile work, the precision of cuts and layout plays a pivotal role in achieving a professional finish. Many underestimate the importance of proper measurement techniques and often rely on shortcuts. The practice of dry-laying tiles before actual adhesive application can reveal unexpected layout issues and prevent costly corrections. Additionally, employing the correct tools — like diamond blades for porcelain — minimizes chipping and ensures cleaner cuts. For a step-by-step walkthrough, reviewing [this detailed tile installation guide](https://tiletrendshop.com/installing-tiles-like-a-pro-step-by-step-strategies-for-2025) can elevate your craftsmanship.
Making mistakes in these nuanced areas can significantly impact your results, but understanding the underlying principles empowers you to avoid costly errors. Remember, simple details like consistent mixing, meticulous subfloor prep, and mindful expansion considerations often determine whether your floors stand the test of time. Have you ever fallen into this trap? Let me know in the comments.Maintaining your flooring investment requires more than just initial installation; it involves regular upkeep with the right tools and techniques. Personally, I rely on a combination of specialized equipment and expert-approved methods to ensure long-term durability and beauty of hardwood floors and tiles. Investing in the correct tools not only saves you money in repairs but also enhances the overall appearance of your home every day.
One of my go-to items is a high-quality vibration-free orbital sander. This tool is indispensable for refinishing hardwoods, especially during deep cleaning or when applying a new finish. The orbital sander’s smooth operation prevents swirl marks, ensuring an even, professional look. For precision work around edges and tight corners, I use detail sanding attachments, which allow me to target difficult areas without damaging the surrounding finish.
For tile maintenance, a wet-dry vacuum with a HEPA filter is crucial. It helps me efficiently remove debris from grout lines and surfaces, preventing accumulation that can lead to staining or mold. When cleaning, I prefer using microfiber mops paired with pH-neutral cleaners. These prevent dulling the surface and preserve the sealant or finish applied during installation.
Another tool I highly recommend is a digital moisture meter, especially for hardwood floors. This device measures moisture levels in the subfloor and the planks themselves, helping you avoid installation or refinishing at the wrong times, which can cause gaps or warping. Proper moisture management is vital for flooring longevity, and I often refer to detailed guides like [the ultimate floor leveling guide](https://tiletrendshop.com/the-ultimate-guide-to-floor-leveling-for-a-perfect-finish) to optimize my approach.
On the software side, I utilize flooring layout apps that help plan tile patterns or hardwood plank arrangements before starting. These digital tools enable me to visualize the final look, identify potential issues early, and minimize waste. Planning with precise measurements and clear visualization cuts down on installation errors and makes maintenance easier later.
Looking ahead, I believe automation will play an increasing role in floor care, with smart sensors alerting homeowners to humidity spikes, structural shifts, or the need for cleaning. These innovations will make long-term flooring upkeep more manageable and less labor-intensive.
**How do I maintain hardwood floors over time?** Regular sweeping and vacuuming prevent debris accumulation that can scratch surfaces. Applying a fresh coat of finish or sealant periodically, guided by the manufacturer’s instructions, keeps the wood resilient and shines bright. Using a microfiber mop with appropriate cleaning solutions ensures that the surface stays dust-free without risking damage.
To further boost your maintenance routine, consider trying the [specialized grinding technique](https://tiletrendshop.com/why-your-hardwood-finish-is-peeling-after-only-one-year) I adopted recently. This method involves strategically sanding high-traffic areas to remove wear and tear without full refinishing, saving time and preserving the integrity of your flooring.
Maintaining your floors is an ongoing process, but with the right tools and practices, you can significantly extend their lifespan and aesthetic appeal. Remember, planning ahead with layout and moisture management tools paves the way for easier future repairs and touch-ups. Ready to elevate your flooring game? Try investing in a quality orbital sander or moisture meter today and see the difference it makes in your next project!
The Hardest Lesson I Learned About Floor Gaps and Installation
One of the most unexpected insights I gained was realizing how tiny details during installation could lead to major issues years later. Neglecting to leave proper expansion gaps near appliances like the fridge didn’t just cause a cosmetic gap but led to substantial buckling over seasons. It taught me to prioritize precise measurements and thoughtful planning over rushing through the process—something I wish I had understood sooner.
What Others Don’t Tell You About Long-Term Floor Care
While many focus on the initial installation, the truth is, ongoing maintenance—using specific tools like the right microfiber mop or moisture meter—significantly impacts your floors’ lifespan. I found that monitoring humidity levels diligently and investing in quality maintenance tools prevents small problems from turning into costly repairs. Trusting professional guides has been invaluable to me in making efficient, informed decisions that keep floors looking stunning for years.
If You’re Ready to Elevate Your Flooring Game
Actively applying these insider tips and focusing on the details can transform your space and save you money and stress long term. Whether it’s perfecting your subfloor leveling or maintaining humidity levels, the effort pays off in beautiful, durable floors. Take charge now—your future self will thank you for the proactive approach and commitment to excellence in flooring maintenance.