
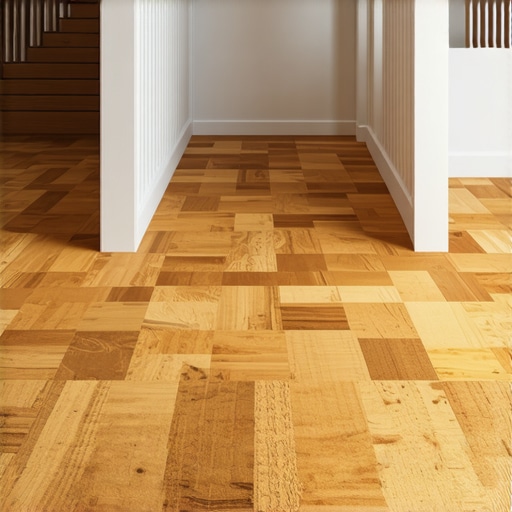
I remember the moment vividly—walking up the stairs, only to be greeted by the relentless creaking and the muffled voices from my upstairs neighbors. It was like trying to listen to a whisper through a thick wall. That lightbulb moment made me realize how crucial soundproofing truly is, especially in multi-story living spaces. If you’re tired of hearing every step, giggle, or argument from above, then you’ve probably asked yourself whether there’s a simple, effective solution.
In my quest for peace, I discovered something that transformed my upstairs comfort—cork flooring. Not just because it looks great or feels warm underfoot, but because of its incredible soundproofing qualities. Unlike traditional hardwood or laminate, cork naturally absorbs impact sounds, turning noisy footsteps into a distant hum. This revelation changed my approach to home improvement, and I promise—it might just do the same for you.
### Is Cork Flooring Actually Worth the Hype?
Early on, I made a crucial mistake: I underestimated how much soundproofing depends on the material beneath your feet. I assumed that installing a thick layer of soundproofing underlayment alone would suffice—only to find out it sometimes did more harm than good. Some inexpensive underlays can compress over time, reducing their soundproofing ability and creating uneven floors. It was a lesson in the importance of choosing the right foundational materials, which you can explore in detail through [precise floor leveling techniques](https://tiletrendshop.com/precise-floor-leveling-techniques-to-achieve-flawless-surfaces). If you’re serious about eliminating upstairs noise, understanding these subtleties is vital.
Now, I want to help you sidestep these common pitfalls. We’ll look at why cork flooring stands out as a top-tier sound barrier and how it integrates seamlessly into a typical home renovation. Before we dive into the installation tips, consider: Have you faced persistent noise issues that no amount of rugs or padding seemed to fix? If so, you’re not alone—and the solution might be simpler than you think. Up next, we’ll explore exactly why cork is such an effective ally against sound transmission.
Begin with a Level Surface
In my first attempt at installing cork flooring, I overlooked the subfloor’s unevenness, resulting in an uneven, squeaky finish. To avoid this, I used a long level and a flashlight to identify high and low spots, then skimmed these with a self-leveling compound. For best results, follow this comprehensive guide on floor leveling. Proper leveling creates a flat base, crucial for effective soundproofing and longevity.
Prepare the Subfloor Carefully
Before laying down cork, ensure your subfloor is dry, clean, and free of debris. I used a vacuum and a damp cloth to remove dust, which can prevent the adhesive from bonding properly. If your subfloor has imperfections, fill them with a suitable patching compound and sand smooth. This step is vital because any hollows or bumps can transmit noise more readily and compromise the floor’s stability.
Install an Effective Underlayment
Despite cork’s natural sound-absorbing qualities, adding a quality underlayment amplifies its performance. I chose a premium cork underlayment, which I laid out tightly with no gaps or overlaps, taping the seams with a moisture-resistant tape. This layer acts as a buffer—reducing impact noise and preventing sound vibrations from traveling upward. For more details, consult this article on precise subfloor preparation.
Measure and Acclimate Your Cork
During my project, I measured the room dimensions to determine the exact amount of cork flooring needed. I also acclimated the cork planks in a climate-controlled environment for at least 48 hours before installation, preventing expansion or contraction after installation. This minimizes gaps and reduces noise transmission caused by material movement. Always check manufacturer instructions for your specific cork product.
Lay the Cork Flooring Correctly
When installing, I started perpendicular to the main light source, ensuring consistent pattern alignment. I applied adhesive as recommended—using a notched trowel to ensure even coverage—and pressed each plank firmly into place, avoiding overlaps or gaps. I used a rubber mallet and tapping block to snug seams together, which I found helped maintain tight joints crucial for soundproofing. Be wary of applying too much adhesive, as excess can seep out and cause uneven surfaces, undermining the floor’s sound-absorbing qualities.
Finish with Proper Sealing
After laying the cork, I sealed the surface with a maintenance-friendly, breathable finish to protect it from moisture and wear. Additionally, sealing the edges where the cork meets walls and moldings minimizes sound leaks. Regular maintenance, including gentle cleaning and periodic resealing, will preserve soundproofing effectiveness over time.
When it comes to flooring, many homeowners focus on choosing the right material or color, but often overlook the intricacies that make or break a lasting, flawless finish. A common misconception is that leveling and installation are straightforward tasks, but in reality, even seasoned DIYers can falter by neglecting subtle nuances that impact durability and aesthetics. Let’s unravel some advanced pitfalls that trip up even experienced installers and explore how to avoid them.
Are You Compromising Long-Term Quality for Short-Term Ease?
One widespread myth is that a simple underlayment suffices for perfect leveling. However, over-relying on cheap underlayment or ignoring the importance of a meticulously prepared subfloor can lead to uneven floors, creaks, or cracking over time. As I’ve observed firsthand, the key lies in precise floor leveling techniques, ensuring that your surface is truly flat before laying any material. Skipping this step or using subpar materials not only reduces soundproofing effectiveness but also accelerates wear and tear. You need to examine every inch for low spots or humps, often missed during quick inspections. This is particularly critical when installing hardwood or tile, where even minor imperfections distort the whole aesthetic and functionality. Don’t fall into the trap of assuming it’s all about the top layer; the foundation truly determines the longevity of your flooring.
Common Pitfall: Misapplied Adhesives and Sealants
Many installers underestimate the importance of proper adhesive application. Excessive glue can seep into joints, causing uneven surfaces and gaps that compromise both appearance and soundproofing. Conversely, insufficient adhesive leads to hollow spots and squeaking issues. During my projects, I discovered that following proper adhesive techniques is critical, especially with large-format tiles where precision matters more than ever. An advanced mistake is not considering the moisture levels in subflooring, which can affect adhesive performance and cause future warping—especially in basements or areas with high humidity. A simple step like testing moisture content with a meter can save expensive repairs later. Remember, the materials and environment are just as vital as the installation process itself.
Looking Beyond Basics: Leveling Challenges with Engineered Hardwood
Engineered hardwood is famous for its stability, but many overlook its sensitivity to subfloor imperfections. Even slight slopes or dips can cause visible gaps or uneven planks after acclimation. To prevent this, I recommend consulting expert techniques like those outlined here. Additionally, acclimatizing your wood in the room for at least 48 hours is crucial, preventing expansion or contraction post-installation that can lead to gaps or buckling. Another nuanced aspect is the choice of fasteners; improper nailing can create weak spots, especially over uneven surfaces. For the advanced installer, aligning nail patterns and using shims appropriately makes a noticeable difference. Elevating your expertise involves attention to these subtle details, which often determine whether your floor stands the test of time or succumbs to common faults.
Have You Fallen for These Installation Traps?
Many homeowners assume that installing floor tiles or hardwoods is simply a matter of following basic instructions. But neglecting these advanced nuances—like thorough subfloor preparation, precise adhesive application, and accounting for material sensitivities—can result in costly mistakes. Remember, a well-installed floor is not just about looks but about functional longevity. For more insights on avoiding typical errors, visit installation mistakes to avoid and elevate your project to the next level. Have you ever fallen into this trap? Let me know in the comments and share your experiences!”,Maintaining your flooring system over time is crucial to ensure longevity and optimal performance. One of the most effective ways to do this is by investing in high-quality tools designed specifically for flooring care and installation. For example, a good digital moisture meter is indispensable for monitoring subfloor and ambient humidity levels, especially before installing hardwood floors. My personal favorite is the Protimeter Surveymaster, which provides quick, accurate readings, helping to prevent future issues like warping or gaps. Regularly checking moisture levels aligns with expert advice and can save extensive repairs down the line, as detailed in this comprehensive guide to floor leveling. Additionally, I recommend using a sanitized, microfiber mop paired with a pH-neutral cleaner for routine maintenance; this avoids damaging sealants or finishes on your floors. For sealing edges and small cracks, a high-quality, flexible caulk gun and sealant are essential—I’ve found that a semi-automatic gun provides better control and coverage. When it comes to floor leveling, a professional-grade self-leveling compound combined with a suitable trowel has become my go-to method for creating a perfectly flat surface before laying new material. Predicting where flooring trends are heading, I see an increased emphasis on smart, sensor-equipped maintenance tools that alert homeowners of issues before they escalate, making preventative care even more effective.
How do I maintain my flooring tools to keep them working like new?
To keep your tools in top condition, always clean them thoroughly after each use—especially when working with adhesives or sealants— and store them in a dry, organized space. Periodic calibration of digital moisture meters ensures ongoing accuracy, vital for long-term results. For those eager to put these ideas into action, try calibrating your moisture meter using a salt-saturated solution, as recommended by industry professionals, to guarantee precise readings. This small step can make a significant difference in your floor’s durability. Remember, investing in the right tools and maintaining them properly isn’t just about ease—it’s about ensuring your flooring project stands the test of time and continues to look spectacular for years to come. If you’re interested in deepening your understanding of proper floor preparation or avoiding common pitfalls, explore these floor leveling techniques or mistakes to avoid during installation. Taking these steps now will pay off in long-term beauty and performance—don’t wait until small issues become costly repairs. Start by selecting a reliable moisture meter and schedule regular checks; it’s the best investment for keeping your flooring looking pristine and functioning perfectly over the years.
Lessons That Changed My Approach to Flooring
One of the most eye-opening experiences I had was realizing that even the best materials can fall short if the foundational work isn’t meticulous. I once rushed through subfloor preparation, thinking that the installation phase would cover any imperfections. The result? An uneven, squeaky floor that negated all my efforts. That lesson taught me to prioritize precise floor leveling and thorough subfloor checks, which became the backbone of my projects. Mastering floor leveling techniques is essential for anyone aiming for durability and silence.
My Go-To Tools That Make All the Difference
After years of trial and error, I’ve zeroed in on a handful of tools that genuinely elevate flooring projects. For moisture measurement, I swear by the Protimeter Surveymaster, which ensures my subfloor is dry enough to prevent future warping. Precision tools like high-quality notched trowels and flexible sealants help achieve seamless cuts and tight joints. These selections are based on my experience—they save time, reduce errors, and extend the lifespan of your flooring set-up.
Embracing the DIY Spirit Without Second Guessing
One of the biggest barriers to starting a flooring project is fear—fear of making mistakes, wasting money, or the project turning out less than perfect. But I found that incremental learning, coupled with attention to details like acclimating materials and sealing edges, dramatically boosts confidence. Remember, every professional started as a beginner. The key is to focus on the joint between preparation and patience—skipping either can cost you dearly later. If you’re looking for inspiration, resources like common installation mistakes provide a valuable safety net.