
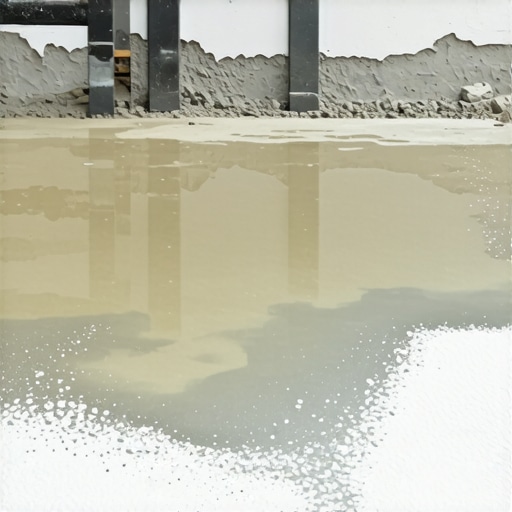
I remember the first time I tried to level a floor with self-leveling concrete. I was eager, full of confidence, and ready to see my project transform. But within hours, instead of a smooth, flawless surface, I was staring at a lumpy, powdery mess. The culprit? A tiny but devastating mistake with the primer that made the entire mix turn into powder. That moment taught me a hard lesson about the importance of proper surface preparation, and I want to share that insight with you.
The Secret Culprit Behind Powdery Self-Leveling Mixes
Have you ever poured self-leveler only to discover it’s not leveling at all, but instead just sitting in lumps or flaking away? That frustrating scenario often traces back to an overlooked prep step—the primer application. If the primer isn’t applied correctly or if the wrong type is used, it can cause the self-leveling compound to fail to adhere properly, and in many cases, it turns into a useless powder instead of a smooth surface.
Understanding this mistake early on can save you countless hours and money. Trust me, I’ve been there. Knowing the right primer and how to apply it isn’t just a detail; it’s the foundation of a successful flooring job. I’ll walk you through the specifics so you can avoid my misstep and get your project back on track.
Is Skimping on Primer Actually Worth the Risk?
Many DIYers and even some pros underestimate the importance of primer, thinking it’s an optional step. But according to industry experts, skipping or improperly applying primer is one of the top mistakes that lead to uneven, problematic surfaces—sometimes requiring complete demolition and rebuilds. Early in my career, I thought I could skip this step, only to be confronting a powdery disaster.
If you’re wondering whether primer is really necessary, consider this: proper primer application ensures better adhesion and reduces the risk of future cracks, bubbles, and failure of the self-leveling compound. For a thorough guide on the best practices, check out [our comprehensive floor leveling tutorial](https://tiletrendshop.com/the-ultimate-guide-to-floor-leveling-for-a-perfect-finish). It has helped me refine my process and can help you too.
So, do you recognize this problem in your own projects? Have you faced the frustration of a failed self-leveler because of a skipped or mishandled primer? If so, keep reading. The next steps will give you a clear, step-by-step plan to prevent this mistake and achieve that seamless, professional finish you’re aiming for.
Prepare Your Surface Like a Pro
Start by thoroughly cleaning the entire subfloor to remove dust, grease, and debris. Use a vacuum or sweeping brush, and wipe down with a damp cloth if necessary. This step is crucial because trapped particles can create air pockets, weakening primer adhesion. I once skipped this step and applied primer over a dusty surface, which led to bubbling and uneven leveling—an avoidable mistake that cost me hours. Be meticulous; a clean surface is the foundation of successful self-leveling.
Choose the Correct Primer for Your Project
Select a primer designed specifically for self-leveling compounds and your subfloor material, whether concrete or wood. For concrete slabs, an acrylic or epoxy primer works best. For wooden substrates, look for products that ensure optimal adherence. Using the wrong primer is like trying to paint over oil with water—failure is guaranteed. I learned this firsthand when I used a general-purpose primer, resulting in poor bonding and an uneven finish. Always check the manufacturer’s recommendations or consult a professional if unsure.
Apply the Primer Evenly and Consistently
Use a roller or brush to apply the primer in thin, uniform coats. Avoid puddles or thick layers that can take longer to dry and may peel off. For larger areas, a paint roller with a medium nap is ideal. Apply the primer in sections, working from the far end of the room toward the exit to avoid stepping over wet areas. During my last project, I rushed and applied a thick layer in one spot; it delayed drying and caused adhesion issues. Consistency here pays off.
Allow Sufficient Drying Time
Follow the manufacturer’s drying instructions precisely. Usually, this ranges from 30 minutes to a few hours, depending on conditions. Ensure proper ventilation to facilitate drying. I once impatiently walked on a freshly primed surface after only 15 minutes, which disturbed the coating and created weak spots. Waiting the recommended time ensures the primer bonds effectively, creating a solid base for the self-leveling compound.
Test the Surface Before Pouring
After drying, perform the ‘damp paper towel test’—gently press a damp towel on the surface. It should resist sticking and not lift away dust or powder. If dust transfers onto the towel, it’s a sign the primer didn’t adhere properly, and you should reapply. I’ve encountered this test revealing inadequacies, prompting me to re-clean and re-prime, ultimately saving me from future failures.
Learn from Experience and Fine-Tune Technique
Applying primer correctly requires attention to detail and patience. Over time, you’ll develop a feel for the right amount of product and application speed. Every project adds to your skill set. Remember, the foundation of a smooth, durable, self-leveling surface lies in this seemingly small step. For an in-depth look at leveling techniques, check out this comprehensive guide. Mastering primer application ensures your project turns out just as you envision—flawless and professional-looking.
When it comes to flooring, many experts warn against oversimplifying the process, but even seasoned pros can fall prey to misconceptions. One widespread myth is that choosing high-end materials alone guarantees a flawless finish, but in reality, proper preparation and technique are often more critical. For instance, many underestimate the importance of subfloor stability; overlooking this step can lead to cracks, buckling, or uneven surfaces, regardless of material quality. This nuance is often missed because the focus tends to be on the visible surface rather than foundational factors.
A frequent trap is believing that all adhesives or leveling compounds are interchangeable. However, using the wrong type can result in poor adhesion, shrinkage, or even failure of the installation. For example, self-leveling underlayment needs specific preparation and application conditions to perform correctly, which is rarely obvious to DIYers. Incorrect use here can cause uneven surfaces that are only discovered after the flooring has been laid, leading to costly repairs.
For advanced installers, understanding the soil’s moisture content plays a pivotal role, especially with engineered hardwood or ceramic tiles. Excess moisture can compromise adhesion and cause warping over time. Experts recommend using moisture meters to assess subfloor conditions accurately, a step that many overlook. This oversight often results in subtle, long-term issues like cupping or delamination, which might only surface months or years later.
Moreover, the common belief that floor leveling is always necessary is not entirely accurate. In some cases, minor imperfections can be managed with flexible grout or resilient flooring options, avoiding unnecessary work. Recognizing when to level and when to adapt your design is an advanced skill that can save time and money. For more detailed strategies on this nuance, check out this comprehensive guide.
Another hidden aspect is temperature and humidity control during installation. Many underestimate how crucial these factors are, especially for wood and tile. Fluctuations can cause materials to expand or contract post-installation, creating cracks or gaps. Installing flooring in controlled environments or during optimal weather conditions reduces these risks significantly.
Have you ever fallen into this trap? Let me know in the comments. Understanding these nuanced details is what separates an average flooring job from a professional masterpiece, so investing time in learning them pays off in the long run.Maintaining your flooring investments requires more than just initial installation precision. Investing in the right tools streamlines ongoing maintenance and ensures long-term durability. For example, I swear by a high-quality moisture meter when caring for hardwood floors—it’s vital for detecting moisture fluctuations that can cause cupping or gaps over time. Regularly checking subfloor moisture with a reliable device helps me catch potential issues early, preventing costly repairs. Using a microfiber mop combined with gentle, pH-balanced cleaning solutions preserves the finish without scratching, as recommended by industry experts in hardwood floor care secrets.
How do I maintain hardwood floors over time?
One of my best practices involves frequently inspecting for scratches or wear spots. Small touch-ups with floor repair kits or re-coating high-traffic areas extend the floor’s lifespan significantly. Additionally, sealers and protective coatings should be reapplied periodically to uphold shine and resistance, following the guidance found in our article on hardwood floor care secrets to longevity and shine.
For tile surfaces, I rely on precision grout-cleaning tools—such as grout haze removers and rubber scrapers—paired with annual sealing, which prevents staining and eroding. Interestingly, maintaining the correct ambient humidity levels with a dehumidifier or humidifier as inappropriate moisture levels can cause tiles to loosen or crack—something I learned the hard way. This is particularly important in climates with significant seasonal changes.
Looking ahead, technological advancements like smart moisture sensors integrated into flooring could revolutionize maintenance, providing real-time alerts and predictive diagnostics. Embracing these innovations ensures your floors remain impeccable for years. So why not start by testing your existing hardwood with a moisture meter and scheduling routine cleanings with gentle products? Small steps now can make a big difference later. For comprehensive guidance on upkeep, explore our hardwood floor care secrets to longevity and shine.
Discover Hidden Truths That Changed My Approach to Flooring
One of the biggest revelations I had was how crucial surface cleanliness is before applying primer. Skipping this step seemed minor at first, but it led to bubbling and uneven self-leveling, costing me time and money. Now, I always dedicate extra effort to thoroughly cleaning the subfloor—it’s a small investment for flawless results.
Another lightbulb moment was realizing that not all primers are created equal. Using a generic primer on a concrete slab, instead of a specialized acrylic or epoxy primer, compromised adhesion. This taught me to carefully select products tailored to the subfloor material, which has made a significant difference in my projects.
Lastly, patience truly pays off. Waiting the recommended drying time after primer application is vital. Rushing this step led to weak spots and future cracks. Practice patience, and see how it elevates your flooring finish from average to professional.
My Go-To Tools and Resources for Flooring Success
- Moisture meters: As I learned, testing subfloor moisture helps prevent future warping or delamination. I trust the [industry-standard moisture meters](https://tiletrendshop.com/hardwood-floor-care-secrets-to-longevity-and-shine) for reliable readings.
- Betting on quality primers: Choosing primers recommended by manufacturers ensures adhesion and durability. For detailed product info, I recommend checking out [this guide on floor leveling primers](https://tiletrendshop.com/the-ultimate-guide-to-floor-leveling-for-a-perfect-finish).
- Specialized cleaning tools: A microfiber mop and gentle cleaning solutions help maintain and prepare surfaces without damage. These small, affordable tools are game-changers in preserving your flooring.
- Educational content: Books and tutorials, like this inspiring resource, keep me updated on best practices and the latest trends.
I Believe in Your Ability to Transform Your Space
Every project is an opportunity to learn and improve, transforming your home into a showcase of your effort and skill. Remember, mastering the basics like surface prep and primer application is your best investment towards flawless flooring. Dive into these resources, stay patient, and enjoy the process of creating beautiful, durable floors you can be proud of. Your future self will thank you for the dedication and care you put in today.
What challenging step in flooring installation have you conquered recently? Share your story below—I’d love to hear how you’re making progress!