
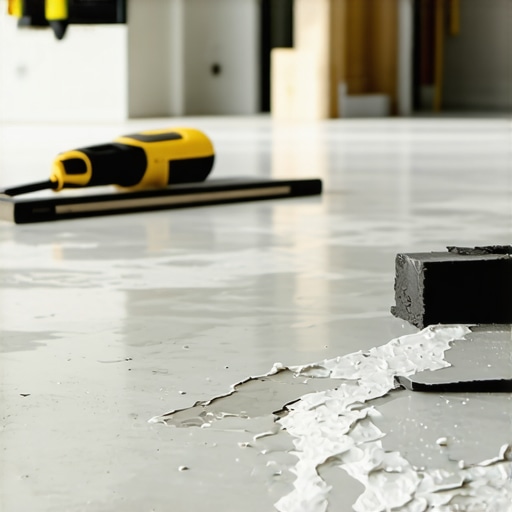
It happened to me on a project I thought I’d have all wrapped up in a weekend. I poured the self-leveling compound, stepped back, and watched the entire thin layer peel away in ragged strips—like used paper. My stomach sank. That moment of frustration is all too familiar for anyone tackling flooring installations. I learned the hard way that even small mistakes can turn a promising project into a mess, costing both time and money.
Understanding Why Self-Leveler Peels Off Like Paper
If you’re reading this, chances are you’ve experienced or feared that frustrating scenario. Self-leveling compounds are designed to create perfectly flat surfaces, but when they peel or lift, it can feel like you’ve wasted your effort. The root of this problem often lies in prep work or improper application. From not cleaning the substrate thoroughly to applying it over damp or contaminated surfaces, these missteps undermine the bonding process.
Early in my career, I made the mistake of assuming that the surface was clean simply because it looked dust-free. I didn’t realize that residual moisture or oil can significantly weaken adhesion, leading to lifting and peeling. According to industry experts, surface preparation is 80% of a successful application. Skipping this step or rushing it nearly always results in failure. Want to dive deeper into prepping your surfaces for success? Check out hardwood floor care secrets.
Is Self-Leveler Peeling Off Actually Worth the Hype?
Honestly, my early assumption was that the product alone could fix any unevenness. I underestimated the importance of proper substrate preparation and the right mixing techniques. A common mistake novices make is mixing the compound with incorrect ratios or applying it too thick, which isn’t suited for quick curing and bonding.
By understanding the core causes—like moisture intrusion, contamination, or improper mixing—we can significantly reduce the risk of peeling. Getting these details right isn’t just about preventing a patchwork mess; it’s about ensuring your entire flooring system remains solid and durable. For more tips on professional-flooring techniques, I recommend visiting the ultimate guide to floor leveling.
Let’s move past this barrier and explore the practical steps you need to take to ensure your self-leveler stays put, providing a smooth foundation for your beautiful new floors. Ready to get your hands dirty with proven tips that work? I’ve got you covered.
Prepare Your Surface Like a Pro
Start by thoroughly cleaning the subfloor—vacuum and damp mop to remove dust, grease, and debris. Use a moisture meter to ensure the surface moisture is below 3%, especially important over concrete slabs to prevent peel-off caused by excess humidity. I once rushed this step on a basement project, skipping the moisture check; the next day, the self-leveler started lifting in patches—lesson learned the hard way. Proper prep is your first defense against peeling.
Select the Right Self-Leveling Compound
Choose a product compatible with your subfloor—whether concrete, plywood, or existing flooring. Read the manufacturer’s instructions carefully, particularly the recommended pour thickness and mixing ratios. I recall mixing a batch too thick because I thought it would save time; instead, it cured unevenly, causing dips and cracks. Always measure and mix precisely, following guidelines to ensure proper bonding and a smooth surface.
Master the Mixing Technique
Use a heavy-duty paddle mixer attached to a drill to achieve a lump-free, uniform mixture. Mix for at least 3-5 minutes, ensuring the compound is fully blended. When I first started, I underestimated the importance of mixing time and speed; clumps remained, which led to weak spots on the finish. Proper mixing prevents air pockets that can cause cracking or peeling later.
Control the Pour and Spread
Pour the self-leveler in small sections, starting from one corner and working outward. Use a gauge rake or there’s a risk of uneven thickness—thick edges peel faster. During a recent install, I poured too much at once, causing the product to misbehave and creep over the edges. Work swiftly but carefully, letting the compound flow naturally to fill dips, and don’t overwork it, as that can introduce air bubbles or thin spots.
Ensure Proper Curing Conditions
Maintain consistent temperature (above 55°F) and humidity levels. Avoid drafts, direct sunlight, or sudden temperature swings. I once neglected to cover a freshly poured self-leveler in winter, which caused it to cure unevenly and peel in patches. Use plastic sheeting to cover the area if needed, and keep foot traffic to a minimum during curing, typically 24-48 hours. This patience pays off in a perfectly bonded, smooth surface.
Test the Surface Before Installing Flooring
Once cured, perform a light tap test—listen for hollow sounds. Use a straightedge to spot any high spots or dips. For extra assurance, walk over the surface with clean shoes, checking for any bounce or soft spots. My failure to test thoroughly led to issues with tile lippage later on. Taking these simple steps saves headaches down the line.
Address Issues Immediately
If you notice signs of peeling or lifting during curing, address them promptly. Lightly sand and clean the affected areas, then reapply a thin layer of self-leveler to seal the base. Remember, timely intervention can salvage what seems lost and prevent extensive rework—saving both time and money. I once patched a minor lift, and it held perfectly, avoiding a complete redo.
Many DIY enthusiasts and even seasoned pros often overlook the subtle nuances that can make or break a flooring project. A common misconception is that choosing the right product is all that matters; in reality, mastering the installation process involves understanding advanced factors such as substrate compatibility and environmental conditions. For instance, many people assume that once the surface appears dry, moisture isn’t a concern, but studies show that residual moisture can cause self-leveling compounds to peel or crack over time, leading to costly repairs. To avoid this trap, always use a high-quality moisture meter, especially over concrete slabs, and follow recommended curing times.
Can Your Flooring Handle the Stress of High Traffic? The Hidden Factors Behind Durability
It’s tempting to select flooring based solely on aesthetic appeal or initial cost, but neglecting the floor’s load-bearing capacity and wear resistance can result in premature failure. For example, engineered hardwoods are often marketed as durable, yet without proper acclimation and subfloor preparation, they can warp or buckle under heavy furniture or foot traffic. Experts suggest that understanding the specific environmental conditions and usage patterns can significantly extend the lifespan of your floors. Dive into the details at this resource on hardwood refinishing. Structural stability also depends on meticulous subfloor preparation—skipping this step invites issues like squeaking and uneven surfaces.
Why Does Leveling Really Matter, and Are You Doing It Wrong?
Many installers underestimate the importance of precise leveling, leading to lippage, tile cracking, and uneven flooring. A surprisingly overlooked aspect is that substrate preparation extends beyond simply cleaning; it involves assessing and correcting slope and variations. For example, applying a thin layer of proper self-leveling compound can save hours of troubleshooting later. Remember, even small imperfections—like a single high point—can cause uneven grout lines and tripping hazards. For more on this crucial step, check the ultimate guide to floor leveling. One common mistake is rushing to apply after superficial cleaning, which causes bonding issues; instead, always verify flatness with a straightedge and perform multiple passes as needed. Use a good quality primer before pouring flooring compounds and don’t forget to cure properly. This minor investment of time pays dividends in the long-term performance of your installation. Have you ever fallen into this trap? Let me know in the comments.
Keeping It Working: Essential Tools and Maintenance Tips
Achieving flawless flooring isn’t just about proper installation; maintaining that perfection over time requires the right tools and proactive care. I personally rely on a few select items that have proven indispensable in my projects, ensuring longevity and ease of maintenance. One such tool is a high-quality moisture meter, which I use regularly to monitor substrate moisture levels—especially over concrete slabs—before applying any flooring material. This step, highlighted in hardwood floor care secrets, can prevent future issues like warping or peeling.
Beyond initial installation, a good soft-bristled broom and microfiber mop are vital for routine cleaning. I avoid harsh chemicals that can degrade finishes and opt for pH-neutral cleaners. For hardwood floors, I recommend using a specialized buffer with gentle abrasive pads to remove scratches without stripping the finish—this is crucial for maintaining their appearance. For tiles, a grout rengage and sealant are worth investing in; they protect against staining and moisture infiltration, significantly extending the life of your flooring.
Looking ahead, I believe that smart, connected sensors capable of monitoring environmental conditions like humidity and temperature will become standard, enabling homeowners to receive alerts before issues develop. This trend integrates well with the growing emphasis on preventative maintenance, rather than reactive repairs.
How do I maintain hardwood floors to keep them looking pristine?
To keep your hardwood floors revitalized, regular refinishing is key. I recommend deep cleaning and buffing every couple of years. Applying a fresh coat of polyurethane sealant renews their luster and offers an additional layer of protection against wear. Moreover, implementing area rugs in high-traffic zones reduces surface impact, preserving the finish longer. For comprehensive guidance, explore luxury vinyl flooring maintenance tips.
Don’t forget to stay vigilant about environmental factors—excess moisture or direct sunlight can cause expansion, contraction, or fading. Installing moisture barriers or UV protective films can mitigate these risks effectively. Whenever possible, schedule professional inspections to identify subtle issues before they escalate. For more advanced maintenance techniques, I encourage you to try systematic cleaning routines combined with periodic refinishing, which preserves the appearance and structural integrity of your floors for decades.
By using these precise tools and adopting consistent maintenance habits, you’ll not only extend the life of your flooring but also keep it looking brand new year after year. For detailed insights into professional practices, visit expert flooring tips. Ready to elevate your maintenance game? Start with a moisture check today—it’s a small step that makes a huge difference.
Throughout my journey in flooring installation, I’ve uncovered lessons that aren’t found in manuals or standard tutorials. These insider insights have transformed my approach, saving me time, money, and frustration—all while delivering impeccable results. If you’re serious about getting your floors right the first time, pay close attention to these lessons learned the hard way.
Breaking the Myth of Quick Fixes and Perfect Surfaces
I used to believe that choosing the right products meant I could skip meticulous preparation. Turns out, even the best self-leveling compound won’t bond properly if the substrate isn’t perfectly prepped. I learned to always verify moisture levels with a high-quality moisture meter, especially over concrete slabs, because residual moisture is a silent killer of adhesion. Overlooking this step nearly cost me a complete redo. Remember, quality preparation beats rushing any day.
Trust the Process, Not Just the Tools
Innovative tools like laser levels or specialized primers are valuable, but I discovered that their true power lies in consistent application. For example, applying primer evenly across the surface prevents adhesion issues, and using the right trowel size ensures proper thinset coverage. Investing in these small details has made a huge difference in the longevity and appearance of my floors. Want to see what tools genuinely make a difference? Check out this expert guide for more insights.
Embrace Patience over Perfection
Rushing to finish often leads to mistakes like uneven grout lines or tiles that crack soon after installation. I’ve learned to trust the curing process, maintaining optimal temperature and humidity to prevent issues like peeling or warping. Covering freshly poured self-levelers with plastic sheeting and waiting at least 24 hours before walking on them can save you from future headaches. Patience truly is a virtue in flooring work.
Learn to Read Your Floors—They Talk Back
There’s a language your floors speak—whether it’s hollow sounds, soft spots, or uneven surfaces. Listening carefully during testing can reveal underlying problems like a wet subfloor or insufficient leveling. Performing simple tests such as tapping or walking across the surface helps catch potential issues early. The benefit? Addressing these before they manifest into costly repairs. Want more tips on early detection? Visit this resource.
Curated Arsenal for Flawless Floors
Over the years, I’ve relied on a handful of trusted tools and resources that consistently deliver great results. A high-quality moisture meter keeps my substrates in check; professional hardwood care guides teach me how to restore and maintain finishes; and comprehensive installation guides from industry experts keep me sharp on best practices. These resources and tools have become my secret weapons for consistent success.
Your Floor, Your Legacy—Make It Count
Flooring is more than just installing tiles or wood; it’s about creating a durable, beautiful foundation for your space. Every step, from precise leveling to thoughtful maintenance, contributes to longevity. I encourage you to approach your project with both patience and curiosity. Don’t let fear hold you back—every mistake is a lesson and every challenge an opportunity. Ready to transform your space with confidence? Dive deeper into professional tips at this inspiring collection. What’s the next step you’re excited to take on your flooring journey? Share below and let’s elevate your space together.