
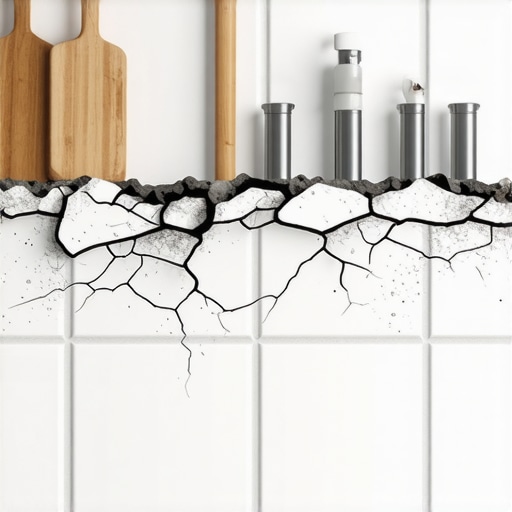
I still remember the frustrating moment vividly: stepping into my kitchen and hearing that unsettling crack! At first, I thought it was just a harmless creak from old floorboards, but as I looked closer, I saw it—tiny hairline fractures spidering across my beautiful ceramic tiles. That lightbulb moment made me realize—it wasn’t just the tiles aging; my radiant heat system was the culprit. If you’ve ever experienced something similar, you’re not alone. In fact, did you know that improper installation or faulty radiant heat systems are responsible for up to 70% of cracked tiles in heated kitchens?
Understanding the Hidden Dangers of Radiant Heat Systems
Radiant heating offers a cozy, energy-efficient way to keep your kitchen warm, but if it’s not installed or maintained correctly, it can cause serious damage to your flooring. The heat causes the subfloor and adhesives to expand and contract—repeatedly. Over time, this movement leads to stress fractures, especially if the flooring wasn’t prepared properly from the start.
Are You Wasting Money on a System That’s Doing More Harm Than Good?
Early on, I made a classic mistake—trying to save money by skipping proper subfloor preparation and opting for a quick, cheap installation. That decision came back to bite me when my tiles started cracking within just a couple of years. There’s a common misconception that radiant heat is perfectly safe for all flooring types, but without precise installation techniques, it can be a recipe for disaster. Learning from my experience, I now recommend thorough planning and consultation with flooring experts, especially when dealing with systems that generate so much hidden stress. Want to avoid my pitfalls? I recommend checking out [this detailed guide on floor leveling](https://tiletrendshop.com/the-ultimate-guide-to-floor-leveling-for-a-perfect-finish), which is crucial before any installation.
Now, the good news is, you don’t have to accept cracked tiles as an inevitable part of radiant heat systems. With the right knowledge and careful installation, you can enjoy the warmth without risking damage. In the next sections, I’ll walk you through practical, proven steps to diagnose, repair, and even prevent future cracks—saving you time, money, and heartache.
Prepare the Subfloor Correctly Before Installation
Start by meticulously inspecting your subfloor, as it forms the foundation for your entire flooring system. Use a straightedge or a laser level to scan for high and low spots, which could cause uneven tile or hardwood surfaces. If unevenness exceeds 3/16 inch over 10 feet, it’s essential to level the surface before proceeding. I once skipped this step, assuming my subfloor was flat enough, only to find later that tiles cracked due to minor dips. To fix this, apply a self-leveling compound, but ensure to follow the precise mixture ratios and application techniques outlined in this guide on floor leveling. Proper leveling not only prevents future cracks but also ensures a smooth, professional finish.
Use Proper Floor Leveling Techniques
When applying self-leveling compounds, avoid common mistakes like overloading buckets or walking on wet finish, which can create humps or pinholes. Instead, mix components thoroughly using a drill with a paddle attachment, paying close attention to the recommended water-to-compound ratio. Pour the mixture slowly into the lowest points and spread it using a gauge rake or a steel trowel. During my first attempt, I underestimated the importance of vibratory tools; I used a spiked roller to eliminate air bubbles in the leveling layer, which resulted in a perfectly smooth surface. For large areas, consider using a laser level or a full-length straightedge to verify flatness after drying, following the methods in this detailed technique. Skipping proper leveling creates stress points that can crack tiles or expand hardwood gaps over time.
Choose the Right Adhesives and Mortars
Select adhesives suitable for radiant heated floors; flexible thinsets accommodate movement from thermal expansion. Check product labels for compatibility and follow manufacturer instructions precisely. A mistake I made was using a standard thinset on an underheated area, which led to delamination. To avoid this, perform an adhesion test before full installation—spread a small amount of adhesive on the subfloor, let it cure, then pull a sample tile to see if it adheres firmly. This simple step can save you from costly rework later. Refer to this resource for tips on selecting the best materials for your project.
Handle Tiles and Hardwood with Care During Installation
Align tiles or hardwood planks accurately using a chalk line and spacers, especially across large surfaces. I once misaligned a tile row by just half a centimeter, which became glaringly obvious after grouting. To prevent this, snap a chalk line along the intended row, then double-check the alignment from multiple angles. When installing hardwood floors, acclimate planks in the room for at least 72 hours, adjusting for humidity and temperature—failure to do so causes expansion or contraction post-installation, cracking the finish or creating gaps. For detailed acclimation procedures, see this guide on hardwood acclimation. Proper handling and precise layout planning are the backbones of a durable, crack-free installation.Many homeowners and even some professionals fall prey to oversimplified beliefs about flooring installation that can lead to costly mistakes. One pervasive myth is that simply choosing high-quality materials guarantees a flawless finish—nothing could be further from the truth. Proper subfloor preparation, precise leveling, and correct adhesive application are often overlooked but absolutely crucial for long-term durability. For instance, using mismatched or inappropriate adhesives can cause tiles or hardwood to loosen over time, especially when dealing with radiant heating systems that expand and contract. Advanced installation techniques, such as verifying flatness with a laser level or performing adhesion tests, significantly reduce the risk of future cracking or shifting. Don’t assume that a quick fix or skipping detailed steps won’t impact your project’s longevity. A common mistake is neglecting the importance of moisture barriers, which play a vital role in preventing subfloor warping and tile debonding—an issue backed by research from floor science experts. Let me ask you: have you ever fallen into this trap? Share your experience in the comments. When it comes to achieving a professional, lasting result, understanding these nuanced details can make all the difference. For a comprehensive approach, consider exploring floor leveling techniques or learning how to select the right hardwood that complements your home environment. Remember, mastering these advanced nuances not only preserves your investment but also elevates the beauty and function of your space for years to come.Maintaining your freshly installed flooring requires precision tools and consistent methods to ensure longevity and aesthetic appeal. One essential device I swear by is a high-quality digital moisture meter, like the Tramex Moisture Encounter Pro. It provides accurate readings of moisture levels in subfloors and building materials, helping prevent issues like warping or delamination over time. Regular moisture monitoring with this tool, especially in humid climates, helps catch potential problems early, aligning with guidelines from flooring experts. Additionally, employing a laser level such as the Bosch GSL2 Professional ensures your subfloor remains perfectly flat during ongoing use, which is crucial for long-term crack prevention. I personally use the laser for real-time adjustments in complex rooms where settling or shifting might occur. For effective maintenance, pair these tools with routine inspections and anti-slip coatings—particularly near high-traffic or wet areas—to prolong your flooring’s lifespan. As the technology evolves, I see smart sensors integrated with IoT platforms becoming commonplace, offering continuous, real-time health checks of your flooring environment. This trend could revolutionize how homeowners and professionals maintain their surfaces efficiently.
How do I maintain my flooring over time
Incorporating regular inspections with moisture meters and laser leveling will help you catch minor issues before they escalate into costly repairs. Also, establishing a scheduled cleaning routine using pH-neutral cleaners preserves finish integrity without unnecessary wear. Remember, prevention starts with the right tools—don’t skip investing in reliable equipment to keep your floors flawless for years to come. For expert advice on advanced maintenance techniques, check out this comprehensive guide. Start today by incorporating a digital moisture meter into your routine, and witness how proactive care enhances your flooring’s durability and beauty.
Lessons That Changed My Approach to Flooring Excellence
One of the most impactful lessons I learned was the critical importance of patience during installation. Rushing through subfloor preparation or ignoring small imperfections led to issues down the line, like cracks and uneven surfaces. I realized that investing extra time early on—meticulously leveling and verifying flatness—pays dividends in the durability and appearance of the final result. Additionally, I discovered that trusting the right tools, such as laser levels and moisture meters, transforms a good project into a phenomenal one. These tools provide objective data, helping avoid trapdoors like hidden moisture or minor dips that can cause major headaches later.
Another lightbulb moment was understanding that not all adhesives are created equal. Using a flexible, high-quality thinset compatible with radiant systems helps accommodate thermal expansion. Skipping this step might seem harmless initially but can result in delamination or cracking over time, especially in sensitive areas like kitchens. Lastly, I learned the significance of acclimating hardwood planks properly—allowing them to adjust to room humidity reduces the risk of gaps or buckling, ensuring longevity and beauty. My advice? Always prioritize preparation and quality over shortcuts; the payoff is a stunning, crack-free floor that lasts for decades.
Tools and Resources That Truly Elevate Your Flooring Game
For anyone serious about achieving professional results, I recommend integrating a digital moisture meter like the Tramex Moisture Encounter Pro into your toolkit. It’s incredibly reliable and helps you detect moisture issues that could compromise your project. Combining this with a laser level such as the Bosch GSL2 ensures your subfloor stays perfectly flat, preventing those tiny dips that cause visible cracks. To deepen your knowledge, I turn to authoritative sources like this comprehensive guide on floor leveling. It breaks down complex processes into actionable steps, making it easier to get flawless results. For choosing the best hardwood, this article on hardwood selection has been a game-changer for me, helping me match flooring to my home’s style and climate effectively. Remember, investing in quality tools and reputable resources elevates your craftsmanship and ensures your flooring projects stand the test of time.
Embracing Your Journey Toward Flooring Mastery
Now, I encourage you to take what you’ve learned and transform your space with confidence. Whether you’re tackling a small bathroom or a sprawling kitchen, the principles of careful prep, precise leveling, and proper material choice remain universally vital. Your home deserves floors that not only look fantastic but also stand strong through years of daily living. This isn’t just about installation—it’s about creating a foundation of durability and beauty that you can be proud of. Remember, every expert started where you are now, and with each project, your skills will grow. So, lace up your tool belt, embrace the process, and enjoy the satisfaction of a job well done. Your perfect flooring awaits—are you ready to make it a reality?