
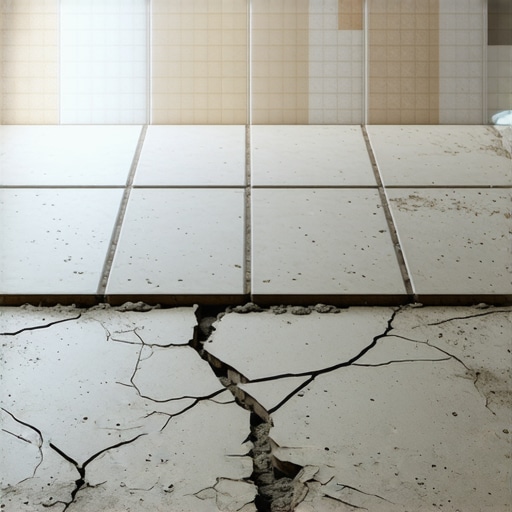
I remember the exact moment I stepped into my living room and saw that large porcelain tile crack right in the center. It was like a scene from an adult cartoon—my jaw dropped, and frustration kicked in. I had followed all the instructions, or so I thought. But there it was—an ugly crack slicing through my newly laid floor, making me question everything I knew about proper installation. That lightbulb moment made me realize just how tricky large tiles can be, especially when it comes to their tendency to snap in the middle of the room.
The Hidden Challenge of Large Tile Installations
If you’ve ever experienced a large tile cracking unexpectedly, you’re not alone. Many homeowners and even pros face this issue, often thinking it’s just bad luck or inferior materials. But the real culprit is often a subtle, overlooked factor—uneven subfloors and improper leveling. When large tiles are laid over an unprepared surface, they have nowhere to flex or move without cracking. This is why ensuring a perfectly flat subfloor isn’t just a recommendation; it’s an essential safeguard against future problems.
Question: Have You Faced Cracked Tiles After Installation?
Understanding why your new floor cracked can save you time, money, and frustration down the line. Early mistakes, like neglecting to check for subfloor flatness or using the wrong adhesive, can set the stage for failure. I learned this the hard way, when I skipped the crucial step of verifying the subfloor’s levelness and paid the price with a sprawling crack running through my tile. Trust me—these early missteps are common, but they are also entirely preventable.
So, how do you ensure your large tiles stay intact and look flawless for years to come? The answer lies in proper preparation, precise leveling, and understanding the nuances of the installation process. Keep reading, and I’ll guide you through the key steps that will help you avoid these pitfalls and achieve a professional-looking finish. Plus, I’ll share insights from experts, including detailed tips on floor leveling techniques that can make all the difference.
Prepare Your Subfloor Like a Pro
Begin by thoroughly inspecting your subfloor for any bumps, dips, or irregularities. Use a long straightedge or a laser level to identify high and low spots. If you discover any unevenness exceeding 1/8 inch over 10 feet, you’ll need to address these issues before proceeding. I once ignored this step and proceeded with a slightly uneven subfloor; my tiles developed cracks within weeks. Correcting these imperfections early on prevents future headaches and ensures a smooth surface. For more detailed techniques, visit hardwood floor smoothing tips.
Use Precise Leveling Methods
Test and Mark Low Points
Identify low spots by placing a straightedge across the surface. Mark these areas with chalk or a pencil. This visual guide helps you plan where to apply leveling compounds. I remember marking a large low patch in my living room and filling it with self-leveling underlayment—soon after, the entire floor was noticeably flatter, creating a perfect base for tile or hardwood.
Apply Self-Leveling Compound Effectively
Mix your leveling compound according to the manufacturer’s instructions. Pour it starting from the lowest point, allowing gravity to spread it evenly. Use a trowel or a straightedge to help spread and smooth the surface. To avoid bubbles and ensure a uniform layer, I used a spike roller to vent out trapped air, which improved adhesion. For expert advice, see floor leveling techniques.
Achieve a Smooth, Blemish-Free Surface
After pouring, check for any remaining dips or high points with a straightedge. Sand down high spots gently once dry, and fill in low areas with additional compound if needed. Remember, patience here makes the difference; rushing can lead to lippage or cracks later. I once hurried through the sanding process and ended up with uneven tile lines, which required redoing sections. Proper surface readiness is vital for longevity and appearance. For more tips, review preventing hardwood buckling.
Test for Flatness Before Installing Flooring
Conduct the flashlight and straightedge test across your prepared surface. Any high or low areas will cast shadows or show gaps. Use a leveling app or a long spirit level if available. This step caught my attention to a 1/16-inch hump in a kitchen corner, which, once corrected, prevented cracked tiles down the line. Investing time here ensures your tile or hardwood will sit perfectly without uneven gaps or cracks. Learn how to identify subfloor issues at flatness tests for flooring.
Final Checks and Preparation
Before setting your tiles or laying hardwood planks, double-check that the entire surface passes the straightedge test. Use a 3-foot level to detect subtle dips. If any imperfection remains, address it immediately. A correctly prepared subfloor not only enhances appearance but also extends your flooring’s lifespan. Remember, thorough prep now saves costly repairs later, making your investment worthwhile.
Many DIY enthusiasts and even seasoned professionals often get the basics right but overlook subtle yet critical nuances that can make or break a flooring project. One common misconception is the idea that leveling the subfloor is a simple matter of pouring some self-leveling compound and calling it a day. In reality, the surface must be meticulously prepared, tested, and sometimes even prepped multiple times to ensure no high or low spots remain, as underscored by experts in the field. Overlooking these details can lead to cracked tiles or buckling hardwood floors months after installation. For advanced techniques on perfecting your subfloor, check floor leveling methods. Another pitfall is underestimating the importance of environmental conditions, such as humidity and temperature, which significantly influence the adhesive’s bonding ability and the material’s expansion or contraction. Contrary to popular belief, waiting for the right season or ensuring stable indoor climate control can drastically extend the lifespan of your flooring. Many mistakenly think that ambient conditions only matter during installation, but they are equally crucial during curing and drying phases. Do not forget that using the correct adhesive or grout is just as vital; choosing a generic product without considering the substrate material or environmental factors often results in failures. While some assume all thinsets are interchangeable, expert advice recommends selecting specific formulas designed for large format tiles or engineered hardwoods to minimize lippage and cracking. Make sure to investigate correct adhesive selection. What about subfloor flatness tests? Many skip the flashlight and straightedge assessments, which are essential for detecting hidden imperfections. Even a slight hump or dip, unnoticed, can translate into visible tile lippage or uneven hardwood planks later. Investing time in these checks, as demonstrated in flatness testing techniques, can save you from costly rework. Advanced installers also emphasize the importance of understanding the subtle differences between engineered and solid hardwood, especially how each reacts to moisture and floor heating systems. Misjudging this can lead to unpredictable gaps or buckling, particularly in climates with high humidity swings. Relying solely on general rules can be misleading; instead, consult manufacturer guidelines and expert sources. Finally, avoid the trap of rushing through surface testing and preparation phases. Even experienced workers can fall into the trap of believing the surface is ‘good enough’ after a quick visual inspection. Remember, a flawless finish depends on meticulous prep, environmental awareness, and selecting the right materials and tools. These nuanced steps aren’t just pedantry—they’re the difference between a beautiful, long-lasting floor and one riddled with issues. Have you ever fallen into this trap? Let me know in the comments. For more in-depth insights, explore common installation mistakes and how to avoid them.
Maintaining perfect flooring installations over time requires more than just initial effort; it demands the right tools and a commitment to ongoing maintenance. One of my most valuable investments has been a high-quality laser level, like the Bosch GLL 3-80. I personally use it because of its accuracy over long distances, which helps me detect subtle dips or humps that can compromise tile or hardwood integrity. Regularly checking the flatness of a subfloor with a laser level prevents issues before they become costly repairs. For those who prefer a more manual approach, a prefabricated straightedge and a reliable spirit level are indispensable for quick checks during routine maintenance.
Additionally, I recommend investing in a spike roller for use immediately after pouring self-leveling compounds. This tool helps vent trapped air bubbles, ensuring a flawless and durable surface that resists cracking over time. Personally, I’ve found that a 4-inch spike roller offers the perfect balance—small enough for precision but effective in removing bubbles. Regular maintenance also means keeping your tools clean and stored properly to prolong their lifespan and accuracy.
Software tools have become increasingly useful for planning and documentation. I rely on flooring layout software like Easy2Design to visualize patterns and ensure precise tile or hardwood placement, especially in complex layouts. Using digital measurements and planning reduces waste and speeds up installation, which I believe is crucial for achieving professional results on a consistent basis.
Looking ahead, I predict that automation and smart measurement devices will continue to enhance flooring projects. Innovations like laser-guided tools integrated with smartphone apps are making it easier than ever to achieve perfect flatness and alignment, even for DIY enthusiasts.
Question: How do I maintain my flooring tools to ensure long-term performance?
Proper maintenance involves cleaning tools after each use to prevent dirt and adhesive residue build-up, which can affect accuracy. For laser levels, storing batteries correctly and calibrating periodically ensures continued precision. Also, inspecting your spike roller for any damage or wear prevents imperfections in future pours. Diligent upkeep of your equipment pays off by providing reliable results, reducing errors, and saving money over the long term.
To elevate your flooring maintenance routine, consider trying a fast-drying leveling compound combined with precise application techniques. This approach minimizes downtime and guarantees a smooth, long-lasting surface that resists cracking and shifting. Remember, investing in the right tools and their proper upkeep isn’t just about initial success; it’s about ensuring your floors look great and perform well for decades. Explore how advanced floor leveling techniques can make your projects more durable and easier to maintain over time.
What I Wish I Knew Before Poring That First Self-Leveler
One of my biggest realizations was that even a tiny miscalculation in substrate tests can snowball into major cracks or dips. I once skipped the flashlight and straightedge checks because I was eager to get started, only to pay later with uneven tiles that took hours to fix. Trust me, taking the extra minutes for thorough testing upfront saves you from costly redo work down the road.
Secrets the Pros Might Not Share About Floor Preparation
Professionals often keep quiet about how crucial environmental conditions are once the project is underway. Temperature and humidity levels can alter adhesive performance and material behavior. Waiting for the right season or setting up climate controls isn’t just about comfort—it’s about longevity and durability of your flooring. Embracing these details can turn a good installation into a great one.
Lessons Learned from Unexpected Cracks and How to Avoid Them
The most striking lightbulb moment came when I realized that the true enemy isn’t just the materials but the surface beneath them. Small humps or dips, invisible to the naked eye initially, can cause uneven wear or cracking months later. Regularly verifying flatness with a laser level and continuous surface checks became my armor against future failures. This proactive approach is a game-changer for peace of mind and quality assurance.
Tools and Resources That Changed My Floor Game
Investing in precision tools like a high-quality laser level, spike roller, and digital planning software made a significant difference. I personally rely on the precise floor leveling techniques guide to refine my methods, ensuring every project hits the mark. Combining the right tools with expert insights elevates your craftsmanship and reduces errors.
Encouragement for Your Flooring Journey
Remember, every great floor starts with diligent prep and a willingness to learn from missteps. The landscape of flooring installation might seem daunting at first, but with attention to detail and patience, you can achieve results that last for decades. Keep pushing your skills forward, and don’t hesitate to seek out the best resources to guide your progress.
What’s been your biggest challenge when preparing or leveling your floors? Share your experience below—I’m here to learn and help!